Showing posts with label colour spray. Show all posts

Saturday, 27 January 2018

{Colour Blast} Magic & Brains ~ A Scrapbook Layout

Hello my scrappy friends and welcome to my blog today! I'm here sharing my last post for Colour Blast for January. I hope you enjoy my process!


Funny how I came to this design though because I started with a patterned paper background and decided I just didn't love it, heck I didn't even like it really so I thought I would use what I had done to create something I at least liked!!

First up - patterned paper and White Heavy Gesso. A thick-ish/random, smeary coat in the area where I was going to put my photo's. I left that over night to dry.


When I came back the next day I turned my camera on and you can see my process from here on out below and keep scrolling for my step by steps....


I decided I wanted a dark contrast so grabbed my Dusty Charcoal Colour Paste and a stencil and after I marked where my photos were going I added some paste in 2 different areas. And smeared it on the top left so added a 3rd place with the paste.


Before this dried I knew I wanted an orange/black/gold colour scheme so I grabbed my Bling Colour Embossing Powder and sprinkled a little here and there over my Colour Paste and heat set the lot! Not only does heat setting it set the embossing powder but it also makes the Paste all bubbly and gives more awesome texture!


At this point I was thinking "Hrm, I'll add a bit more colour and maybe I'll start to love it more" so I grabbed my Sunset and Saffron Colour Sprays and some packaging and got to work using the smooshing (yep, that's the techy word ;) ) technique, working a small-ish section at a time and drying in between.


While I was working on that it occurred to me that the reason the 3rd spot of paste wasn't gelling was because I hadn't added gesso first, so I told myself "I'll add some smooshing here too and that will work better". TBH with you, NOPE, just nope! Ok, time to re-think my idea!


I grabbed some circle punches and dies and got to chopping up the paper - I did feel some satisfaction here - and immediately I was liking it better!! White cardstock and clear gesso for the background and I was ready to go again!


I added some ink to both my circles and the thin mat I had applied to my photos using Archival Black ink and placed the circles and photos in a configuration, first horizontally, that I thought would work. Meh, so I tried vertically and was like "Yay!! THIS is it!!"


Remove everything from the page again, grab my black archival ink and a couple of texture stamps and stamp, stamp, stamp!!


Next, I used both my Bling Colour Shimmer Spray and Colour Shimmer Pot to apply lots of pretty gold to the background. I sprayed the mist first, I wanted a fine, light coverage then I used the Bling Colour Shimmer Cube with both the packaging technique and also a paint brush and added colour to my hearts content.


Oh, and of course splatters! I used my paint brush and Colour Shimmer Pot. And Colour Spray in Roadbase also using a brush!

I added some gold stitching with my sewing machine through some of the circles and then it was time to stick, stick, stick!


I did add some more Bling splatters after all the circles were stuck down but before the photo was stuck down.


And lots of close ups! Enjoy!


So, just because you are not loving what you started does not mean that either a) you need to ditch the whole lot or b) you have to "put up with" and keep what you don't love!! Play! I'm sure, like me you have a good stash of awesome product that can sometimes be neglected, pull it out and PLAY!!!


That's it for me for this post and January so see you again next month, I cannot wait to play along with the next challenge, it's a fun one ;)


Melinda
xx


Saturday, 7 October 2017

{Colour Blast} Yr One 2016 ~ A Scrapbook Page

Hello Colour Blasters!! Melinda here with you today sharing my latest DT make.


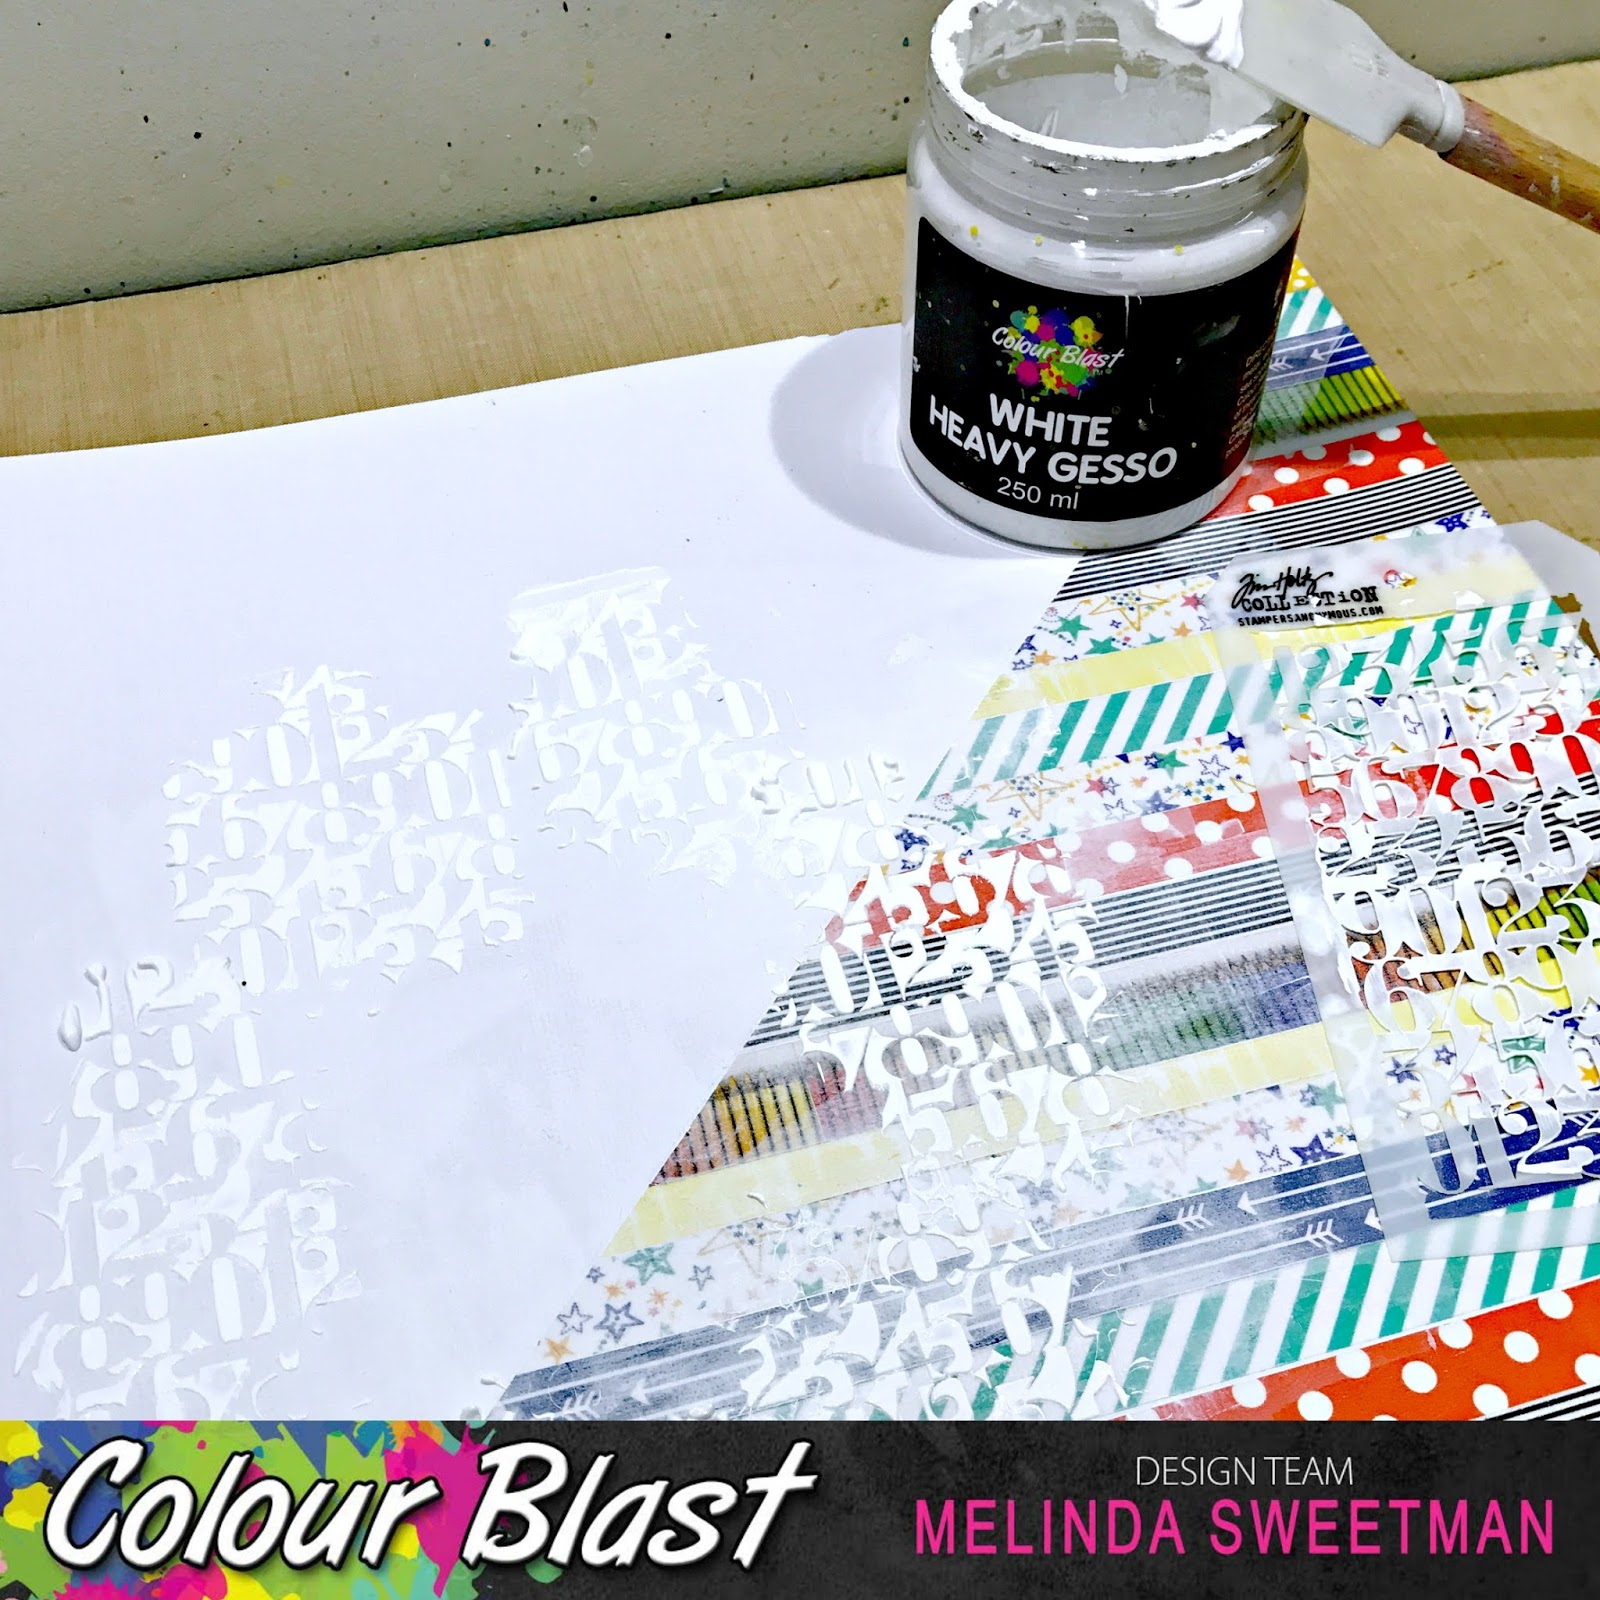
For this page I had been inspired by lots of different people using lots of washi tape and so thought now is as good a time as any to pull out some of my own and create a background. I pulled colours from the star washi in the background and randomly applied strips across the page to make a triangle. I knew I wanted some mixed media in the background so added a quick, messy coat of Heavy White Gesso where I knew the photo was going and over the top of some of the washi.


When that was dry I added some texture, again with my gesso and a number stencil.


I left this to dry naturally as I didn't want the gesso to bubble.

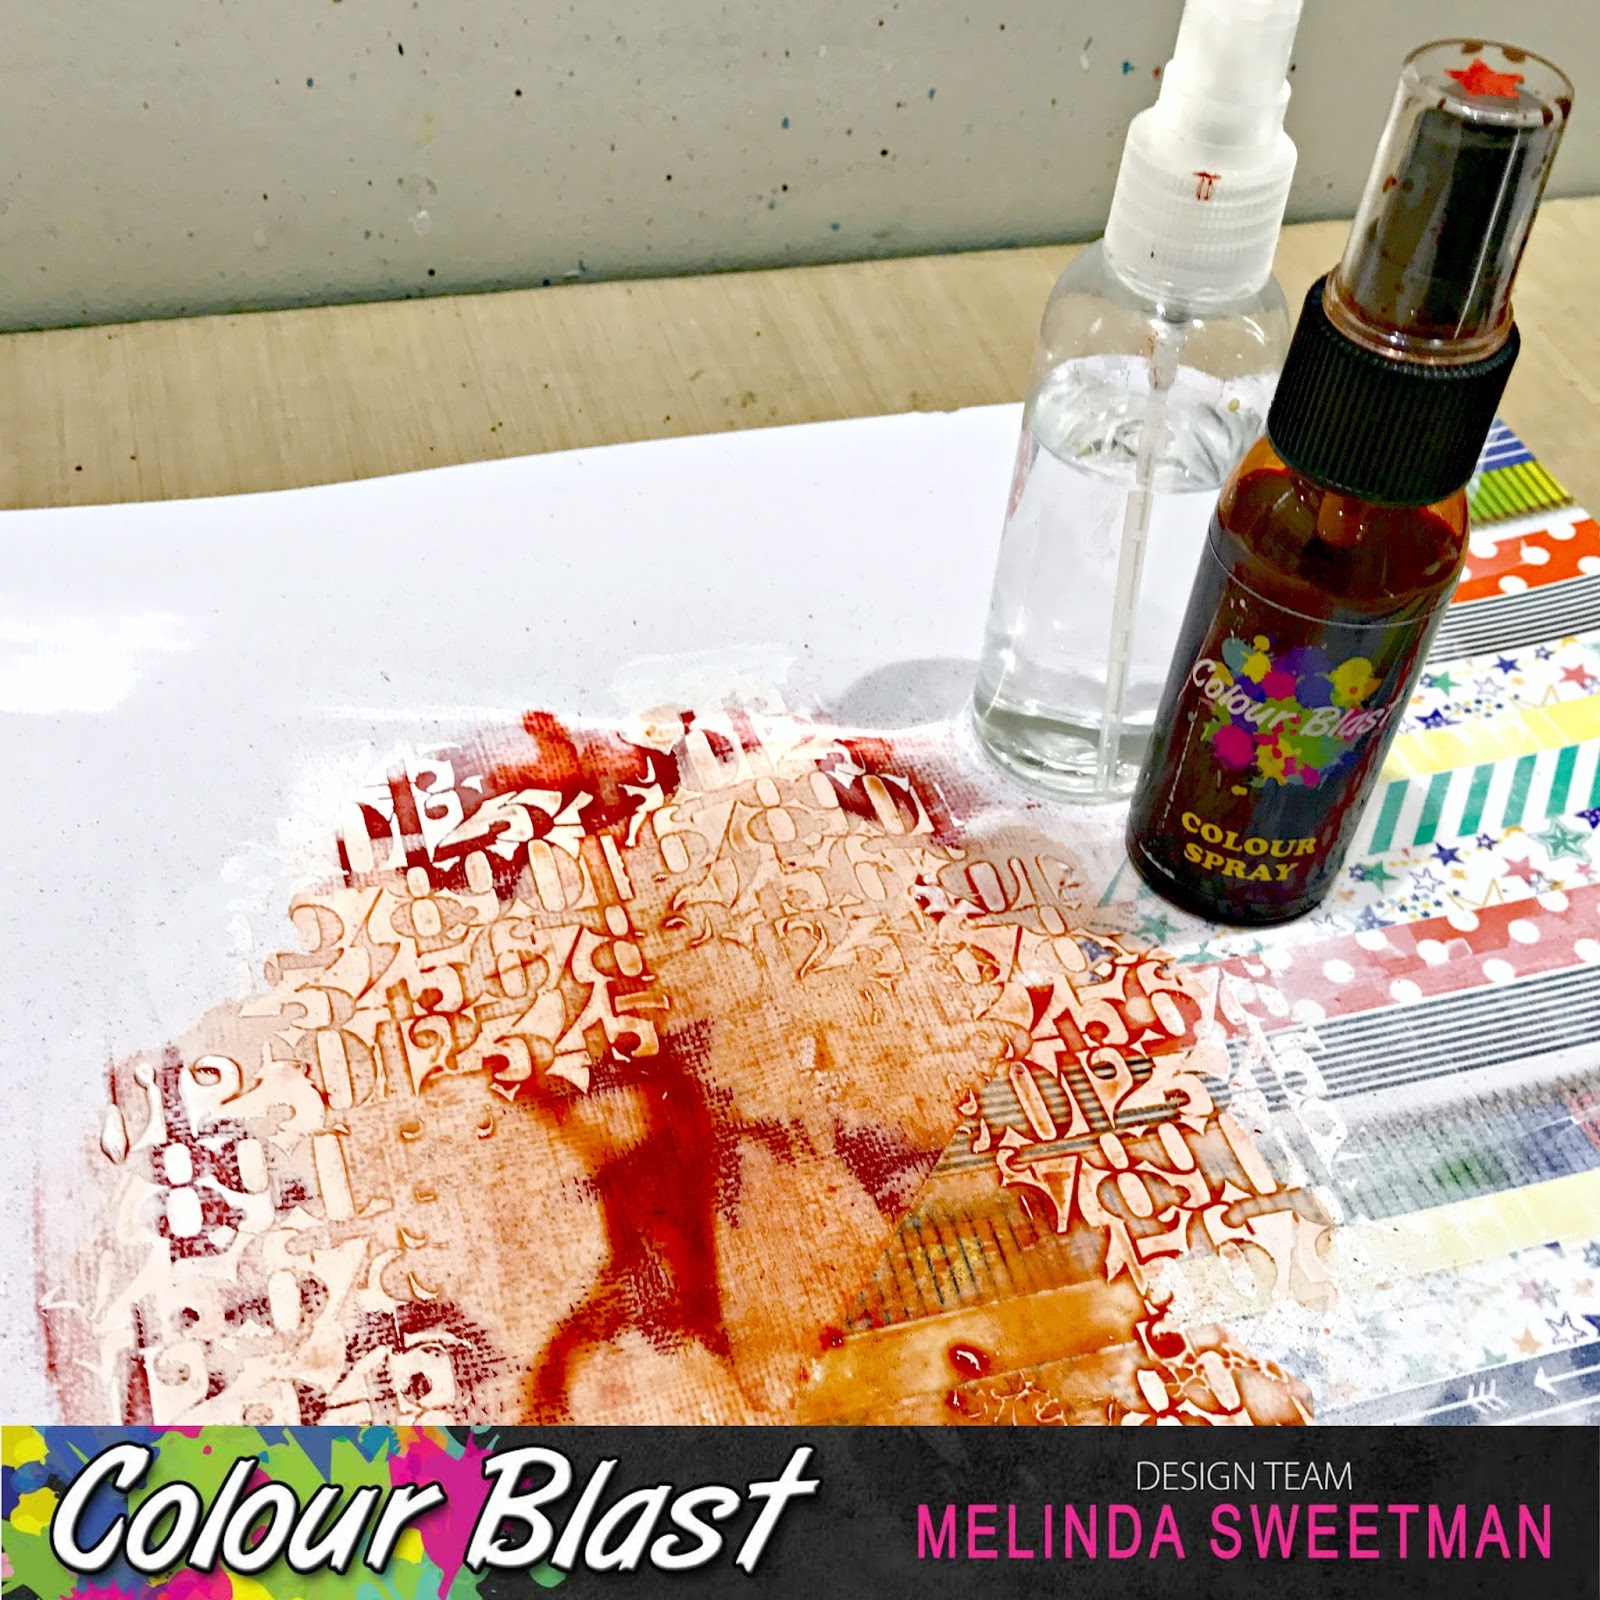
Next up, COLOUR! I have grabbed my Sunset Colour Spray and a water spritzer. Also, a paper towel. I did a test sample right behind where I knew the photo was going to make sure that I was happy with the colour. I spritzed a little colour, added some water and just tipped and tilted the page until I had the coverage I was after.


I did soak up a lot of the extra water to a) help drying time but also to b) lighten the colour a little.

After that was dry thoroughly I added some splatters using both the Sunset and the Roadbase Colour Sprays.


That got popped to the side to dry and I worked on my next bits. I grabbed a couple of resist tags by Heidi Swapp and 2 more Colour Sprays - Saffron and Rainforest - and used a paint brush to apply the 2 colours to 2 different tags.


My very last step before putting all the page together was to spray some ribbon to colour it. Again I have used the Roadbase Colour Spray, spritzed the colour straight onto the ribbon and dried with my heat tool - super quick and I love the texture it gets when you wrinkle it up as it's drying.


So, that's all my messy steps, time to assemble all the bits together to finish this page off!

If you'd like to see my whole process just click play below and enjoy!!


Here are a few close ups and I hope I have inspired you to mix and match some products with some of your stash!!


Thanks so much for stopping by and happy scrapping!!


Melinda

Friday, 29 September 2017

Just Adorable ~ A Travellers Notebook Insert

Hey, hey, hey!! I am right on time this month with my K+ share, haha! The end of the month is here already and I managed to sneak in at the last minute as usual!!

Here is the challenge for this month and I struggled for most of the month coming up with an idea but then suddenly, boom it hit me today!!


Here is my take on the September challenge


I decided when I purchased (another!!) a pocket page notebook from The Stamp Spot that I would dedicate it to our Snapchat photos! So many silly, fun photo's and honestly, how many 12x12 pages can one make with them?!? This is my very first layout in the PPN and I am super happy with it!

Here are a couple of close ups!


I kept it pretty simple; kraft background, gold (in the form of Bling Colour Paste and Colour Shimmer Spray by Colour Blast), black and a little wood veneer and really love how it came out in the end!

There is a process video for this little page as well, just click play in the box below and voila!!


Thanks so much for stopping by and happy scrapping!

Melinda

Saturday, 23 September 2017

{Colour Blast} Breathe - An Art Journal Page

Hello fellow Colour Blast lovers!! I'm here with you today and I am sharing my latest DT project which is another art journal page! 

Here is a bit of a sneaky peek


And I am playing along with the September challenge which is


So, remember, you have until the end of the month to load your project into this album on Facebook using the prompts provided!

And here are my step-by-steps (I did MEAN to have a process video, phone was loaded and ready to go but I forgot to press record!!)


First up I picked a page in my art journal that I had applied some left over products from another project onto some time ago! My White Heavy Gesso and a paint brush and applied a very random (I did not cover the whole page) layer of gesso.


Next up, I of course heat set that first, some stamping for texture. I grabbed my archival black ink and a couple of stamps I wanted to use and again, randomly applied those across my page.


Again with the heat gun! And next was some actual texture! Here I grabbed my Colour Mica Powders in Espresso and Polar. First I mixed the Espresso with some White Heavy Gesso (I accidently discovered you get this beautiful grey colour when you mix these products together!) and then applied randomly through a stencil. 


I cleaned up that mixture and again with the gesso but this time Polar Mica Powder. I had left the stencil in place so again applied this colour randomly over the stencil, both over lapping the other colour and some by itself.


I love how this stencilling came out!! Remember, the more colour you add the bolder the colour you will get mixing it with white gesso!

I left that to dry naturally and started work on my chipboard. I picked a single word for my title and decided to emboss it using the gorgeous Just Blue Colour Embossing Powder. First up however, I wanted a "cleaner" colour so I applied a quick coat of gesso and let that dry.


Next up, I grabbed my embossing ink dabber, applied liberally, added embossing powder in Just Blue, shook off excess and heat set. So pretty!


While embossing I decided that the background needed some more colour so I activated my Just Blue Colour Shimmer Cube by adding a little water. When that was ready to go I applied the watercolour to the page, spritzed with more water and turned and titled the page until I got the colour where I wanted it. 


Time to put the finishing touches on! Before I stuck anything down however I decided that I had this new stamp that I HAD to use so I stamped that 3 times onto some tissue paper, heat set and tore around.


Using some different fibres, my title and 2 of my butterflies I came up with placing that I was happy with and stuck everything down. Wet glue for the fibres and title and matt medium for the butterflies.


Oops, I nearly forgot my last 2 finishing touches!! I grabbed some tiny blue beads and matt medium and stuck some of those down around my title - I feel like I now need some shells!  


And then I grabbed my fan brush and my Roadbase Colour Spray for some black splatters!


I love, love, love how this came out! I challenged myself when I started this page to keep LOTS of white space - which is VERY unusual for me in my art journal. I was lucky enough to have Fiona Paltridge create a page in my journal and one of the things I really loved about it was that not every single inch of the paper was covered so I though I'd give it a go myself!! Here are a couple more close ups!


Swoon, I so LOVE all that texture!

That's it for me for today so have fun playing with your fun Colour Blast goodies and make sure you pop into the FB group to share your creations, we love to see what is being made!!

Happy scrapping!
Melinda
xx

Saturday, 26 August 2017

{Colour Blast} Flying Baby ~ A Scrapbook Page

Hey my scrappy friends, today I am here sharing my latest DT make for Colour Blast Australia.

I decided to play along with the August challenge this month and instead of using just one product I have used 2 but in a RAINBOW of colours!!

Here again is the August challenge for you


I have used the Colour Spray and a Colour Paste.

Here is the line up of my sprays


Like I said, a RAINBOW! In it's true ROYGBIV form! Yep, I'm using Indigo and Violet but from left to right the colours are:
Love, Sunset, Saffron, Rainforest, Lagoon, Indigo and Violet. 

And just a refresher if you are  not sure, the Colour Sprays are beautifully pigmented flat colour with no shimmer but gorgeous none the less!!

Here is what I did with my Colour Sprays


This is a technique I have been meaning to use for ages but just kept forgetting! I have simply sprayed each colour 2 or 3 times straight onto the bubble wrap - which I cut to roughly 12x12 size - and then put my textured card stock on top and did some reverse stamping! No gesso needed as there was  not a lot of water being added to the page.


This is what my stamping looked like!! I just love it! And so too does my 7 year old who chose the photo's I am scrapping today ;) Needless to say, they HAD to be of him!!

I left that to dry naturally and added a couple of layers of white tissue paper behind my photo. By the time I got that stuck my background was dry and ready for me to do my next layer, which was some stamping in both a light and dark grey ink.


I did a real quick dry off with my heat tool and added another layer. This time I wanted sparkle and not much colour so I grabbed the beautiful Snow White Colour Paste and this fun 7 Dots stencil.


As you can see in the photo the paste goes on white with some shimmer but as it dries it goes clear with SO MUCH shimmer. It is beautiful and I love that you can still see the stamping and the rainbow through the paste.

Time for some coordinating embellishments. 


I chose wood veneer from Cocoa Vanilla Studios and 3 of the Colour Sprays - Love, Lagoon and Indigo and just painted the colour straight onto the veneer. I hurried along the drying process with my heat tool and then my next step was, of course, more shimmery goodness!!


I used my embossing ink dabber and of course the Snow White Colour Embossing Powder. 2 coats just to make sure they were super shimmery ;)

With all of my bits coloured and dried it was time to assemble my page and here is the final design


I felt that the white edge left a little something to be desired so I found this fun rainbow patterned paper in my stash, gutted it, cut down my white and attached my page. I think it really makes the whole page come together - especially with that rainbow stitched border!

Here are a few more close ups! Well, quiet a few close ups actually! Enjoy!


Here you can see all that beautiful shimmer from the Colour Paste!


I tried to keep the embellishments within the background colours and love how the veneer came out!


So, that is my challenge for August done and I love the end result using a technique I have wanted to try for AGES!

There is a process video available, just click the play button below!


You can load up your take on the challenge here in the FB group and I hope I have inspired you to play along for the chance of a Colour Blast voucher!

Until next time, happy scrapping!


Melinda