Showing posts with label shimmer spray. Show all posts

Friday, 23 September 2016

{ScrappingClearly DT} Spring CC Colour Challenge

Hi there!! Thanks so much for stopping by! I am here with you today with a quick share of my page and process for my colour challenge over at ScrappingClearly for our Spring Cyber Crop!! You can see most of my process in a video I have uploaded here. 

I hope you are enjoying all the fun we are having over on the FB group (if you have no idea what I'm talking about head over here and join in the fun!) and manage to get in some scrappy time over the course of the next week to play along!

As I mentioned above my challenge is a colour challenge and here is the page I came up with


My colours are teal, silver/grey, black and white :) 

I was in Target a couple of weeks ago and found these paper straws and I just LOVED the colours in them so picked them up knowing (or hoping!!!) I would/could use them on a page!

Here is a closer look at them since they were the inspiration for this whole page!


When I picked them up my mind went straight to the Colour Blast products I have used - Deep Water and Steel - in both the Colour Pastes and the Shimmer sprays. 

I spread both Deep Water and Steel through a stencil from my stash onto the background and also lots of sprinkles of both colours with the nozzle from the bottle. I actually managed to leave it to dry overnight - my impatience was occupied with other projects as I started this page while I was away on a recent retreat!


I have also used the Shimmer Sprays (in both Deep Water and Steel) to paint that fun banner from the Banner Delights pack by Heidi Swapp. I just used a paint brush and a little water :)

I stitched the banners down below the photo and straws and left the threads long as I wanted this page to be a bit fun and almost party like as this is a photo of myself and my littlest guy on his recent birthday.


That gorgeous fun white veneer word from the "Today" Heidi Swapp veneer pack fit in nicely between the layers and gave a bit more fun texture to the page.

Alphas from my stash for my title - again, something relaxed and fun!

I stuck the photo down with some fun foam to match the dimension the straws brought to the page, added some of the really cool WRMK Clearly Posh enamel shapes, some star and circle enamel shapes from my stash, my journalling, a little stamping in 3 places and finally a few little lines of stitching.

I'll leave you with a couple more close ups and hopefully lots of inspiration to play along! Make sure you head over to the FB group to see all the fun challenges and play along with all of the games happening over this weekend!


Happy scrapping and thanks so much for stopping by!!


Mel
xx


Thursday, 8 September 2016

An idea inspired by Missy Whidden

Hi there friends!!

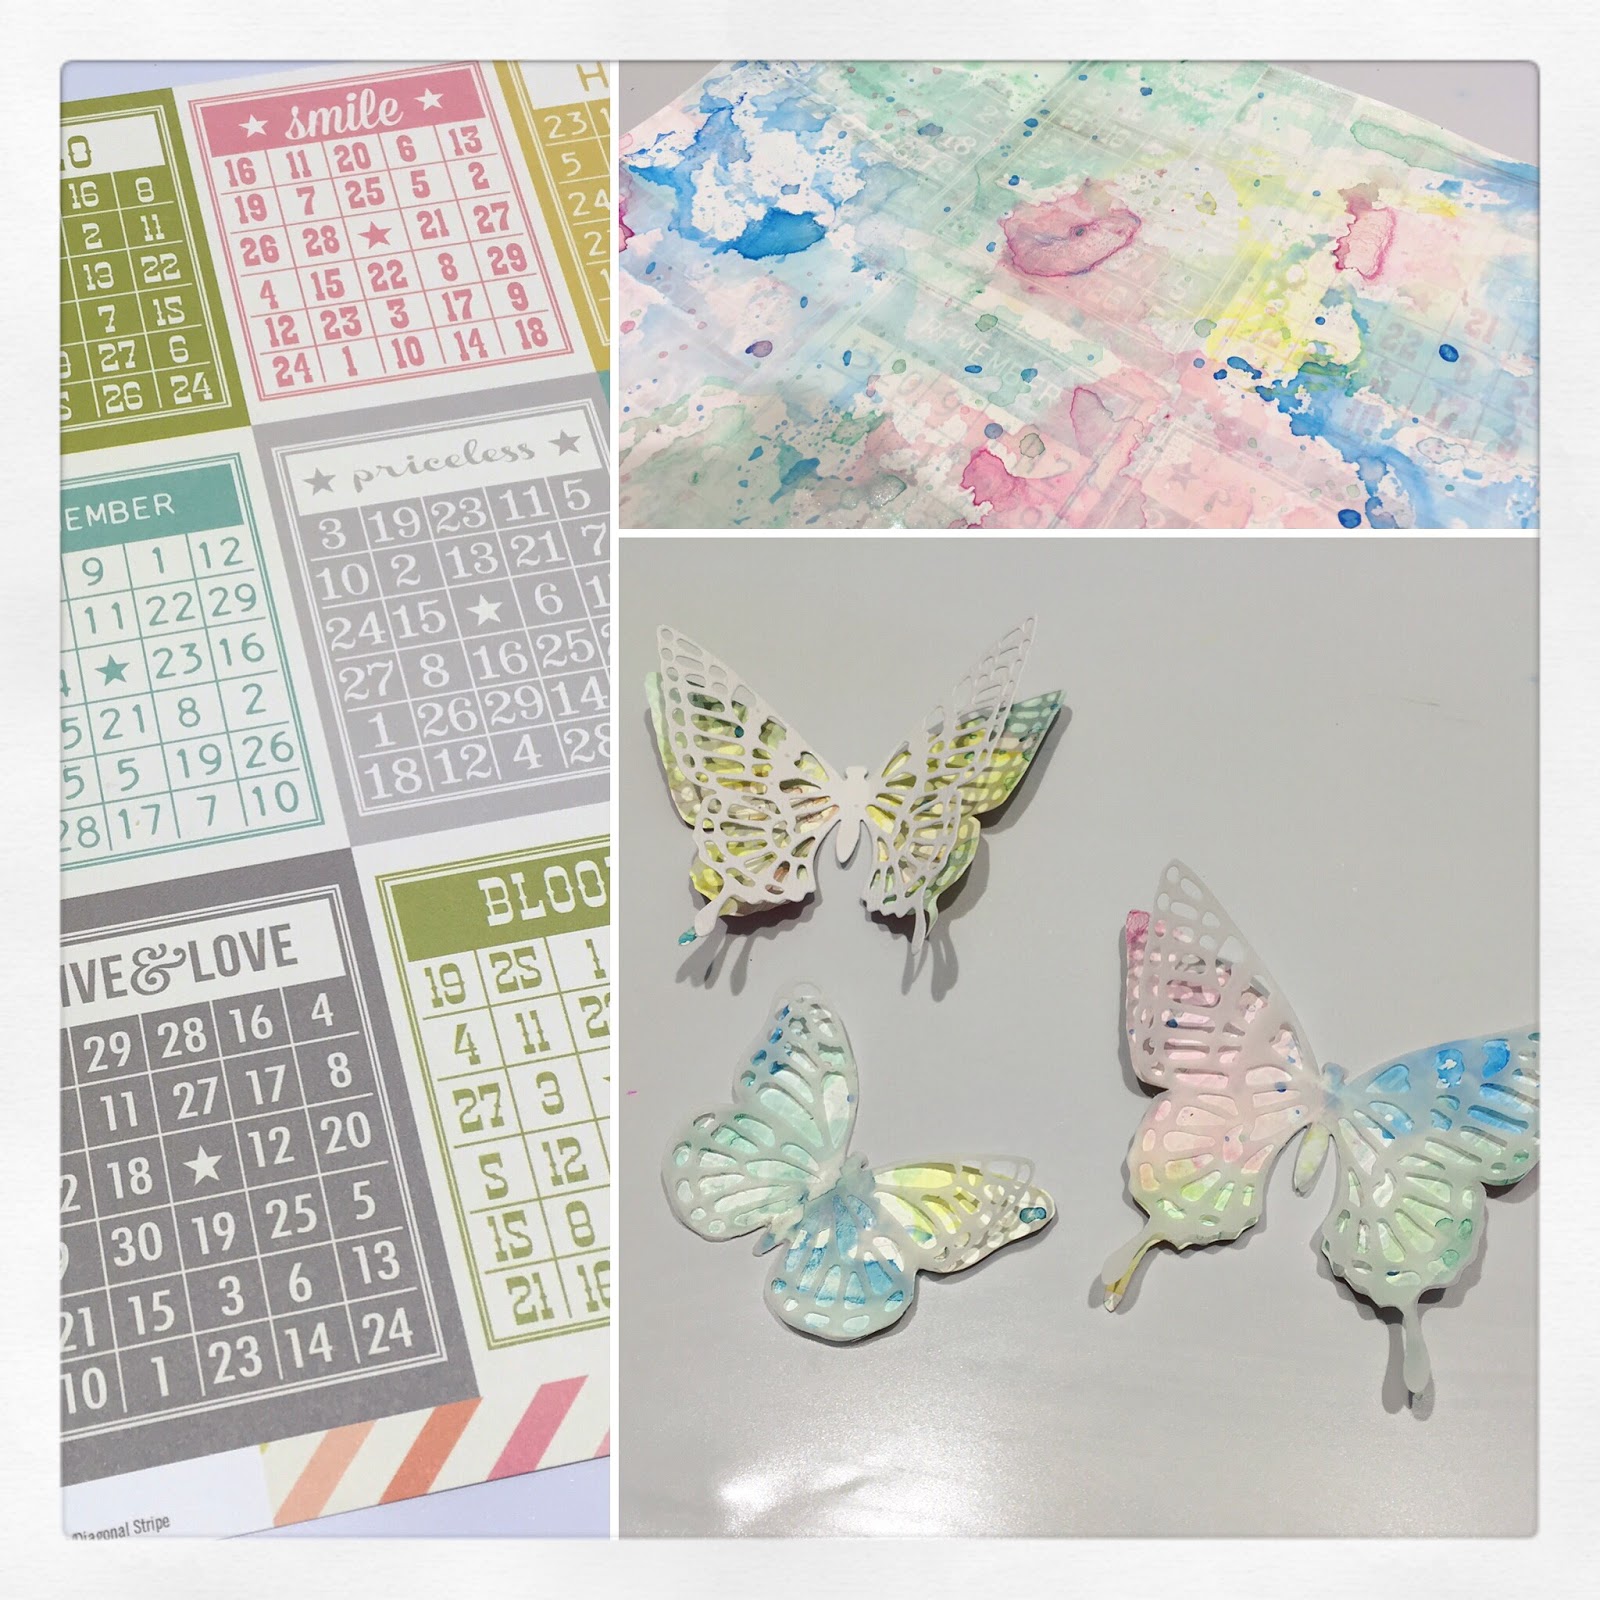
As the title suggests I am here today sharing a layout I was inspired to create after watching this Missy Whidden video! I love, love, love how that paper turned out with the white paint and all the fun colour added so I took inspiration from that and pulled out a paper I had 2 of that I was happy to sacrifice (in case it didnt turn out!!), some white acrylic paint and some gelatos! 

Here is the paper, bare, in progess and as butterflies!


And I decided to use 3 of them on another wedding layout! Another has made it's way onto an art journal page and I think that leaves me 1 or 2 to find homes for!


And a couple of close ups


I used the beautiful Snow White Colour Paste by Colour Blast in the background and the bling shimmer spray and snow white for splatters :)

The title is from Dusty Attic and I just heat embossed that with the gorgeous bling embossing powder from Colour Blast as well.

The papers are all from my stash - I have a box of supplies put aside for wedding layouts and when I feel inspired I'll pull out product and photos from there and create yet another page for our album.

Just a super quick share for today, my life is currently going a million miles an hour, which is apparently what adulthood/parenthood is all about!!

I hope you get some scrappy time in this weekend and I hope that between myself and the very talented Missy I hope you are tempted to just have a play with what you have in your stash!!

Mel
xx

Sunday, 14 August 2016

{Colour Blast DT} Hello Darling

Hi there! I am SO, SO, SO excited to be here sharing my very first Colour Blast layout!! A massive thank you to Tenisha for asking me to join this incredibly talented bunch of ladies doing something we all love!!

So, enough of my gushing (I sometimes still pinch myself, I'm  honestly so excited to be here!!) and onto what you came here for, the crafty fun!

Here is the page I made!


In all honesty I just started this page playing! I wanted to use the awesome Colour Mica Powders as I had never used anything like them before (and the shimmer is just gorgeous!!) so I grabbed a couple of colours I loved (cool mint and polar - so, so, so pretty!!), some modelling paste, some white cardstock and a stencil. I totally didn't think to gesso my page I was so eager to play but am super impressed with how the cardstock held up! I sprinkled a little of the colour mica powder onto the stencil and then applied some white modelling paste through the stencil.


I wasn't sure what would happen or how far the colour would go but I decided that I was after something a bit more saturated in colour so I sprinkled some of the same colour powders (this time one at a time) straight over the stencilled areas and spritzed with water. LOTS of water. After I spritzed the mica powders I just tipped the page to get the colour to run and move around the page. I also added some of the powders to a few drops of water and used a dropper for big splatters (I forgot to take photos but you can see it all in the video linked at the bottom of the post!) in both colours. I dried in between colours and LOVE how the background came out!


As I said, I had NO idea what I was going to do with this background, heck IF I was even going to use it for anything so the background sat on my desk for a few days and then I was hit with inspiration and chose a photo of my youngest boy and a few pieces from the Crate Paper Little You collection, some veneer pieces and some chipboard pieces from Dusty Attic.

I worked out placement of all my bits and then decided I wanted to emboss the chipboard and the veneer. I love the pops of yellow in the Crate Paper collection so decided to emboss my stars (chippy) with the gorgeous, bright Sunshine Colour Embossing Powder. Two coats!!


And wanted to bring in a little silver (I had a flair badge in my stash I wanted to use) so used the Steel Colour Embossing Powder on the veneer words for my title. Again, 2 coats and it turned out ever so pretty!


Before I put everything together I wanted to bring a little yellow into the background so grabbed out my Sunshine Colour Shimmer Spray and sprinkled that across my page.


I used my tiny attacher, foam adhesive and wet adhesive to stick it all down and LOVE how this page turned out! 

And here are some close ups of my completed page!

The title area

Isn't that embossed veneer beautiful?!


The top cluster


An even closer close up of the top cluster!


And finally the area under my photo/next to my journalling

It's really hard to photograph the sparkly sheen where I have used the Mica powders but you can sort of see it here!


I also recorded my whole process of making this page and I would love it if you stopped by to take a peek. The video can be found here.

That is it for me and my first post with Colour Blast. If you haven't yet tried out those awesome Colour Mica Powders I seriously cannot recommend them enough! They are so pretty and so FUN to use! The Colour Embossing Powders and Colour Shimmer Sprays have so much sparkle to them, like nothing else I have worked with!

Thanks so much for stopping by and see you soon!