Showing posts with label silhouette. Show all posts

Tuesday, 28 May 2019

CUT to YOU | Let's Get Crafty

Hello my scrappy friends and welcome to my blog today! I'm sharing my latest DT project with you for CUT to YOU! Yep, I said project and not page again!
I actually created this a little while ago as a gift but couldn't share it until this month as the cut file was one of the fantastic freebies Gwen offered for iNSD! Did you manage to snag yourself this cut file for free? If not head over here to the Etsy store and you buy it now!
This is the project I created and it is actually in a frame by Ikea called "Ribba". The inside dimension of the frame is about 9" square and I thought the perfect size for an OTP project that wasn't ginormous or too heavy!
I started by cutting the title and the scissors on some smooth white cardstock keeping in mind the limitations of the inside of the frame.
I decided to back the whole title with some vellum, except for the heart in the middle of the 'A' as I had come up with an idea for the background that did not involve any mixed media lol The person this was gifted to is a (very talented!!) quilter so I used her craft to inspire my background for this!
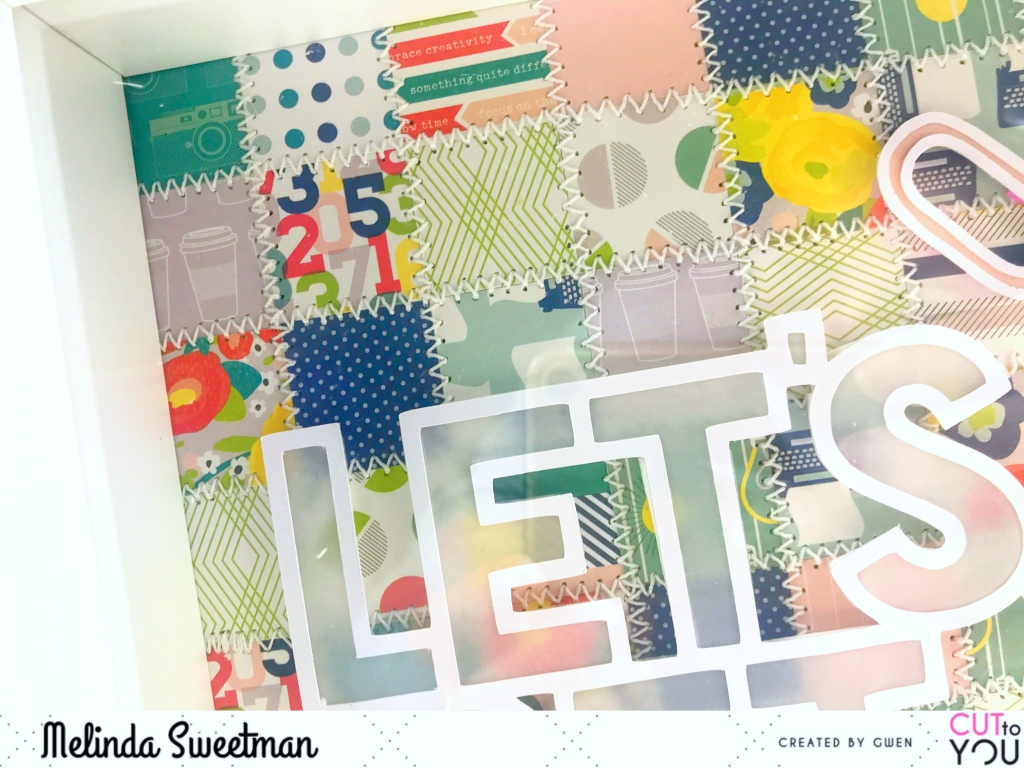
I have pulled out an older 6x6 paper pad by Shimelle and cut a heap of 1" squares to create my background. Without much rhyme or reason, other than not having 2 of the same pattern next to each other, I randomly stuck down the squares to form a kind of quilt like pattern onto some cardstock. To really go with that idea of quilting I also used my sewing machine and did a zig zag stitch on every line, both horizontally and vertically.
With the main part of my design good to go I got to work on my scissors! I've used the same pink from the heart in the 'A' to back the handles. (cause who wouldn't love a pair of pink handled scissors?!)
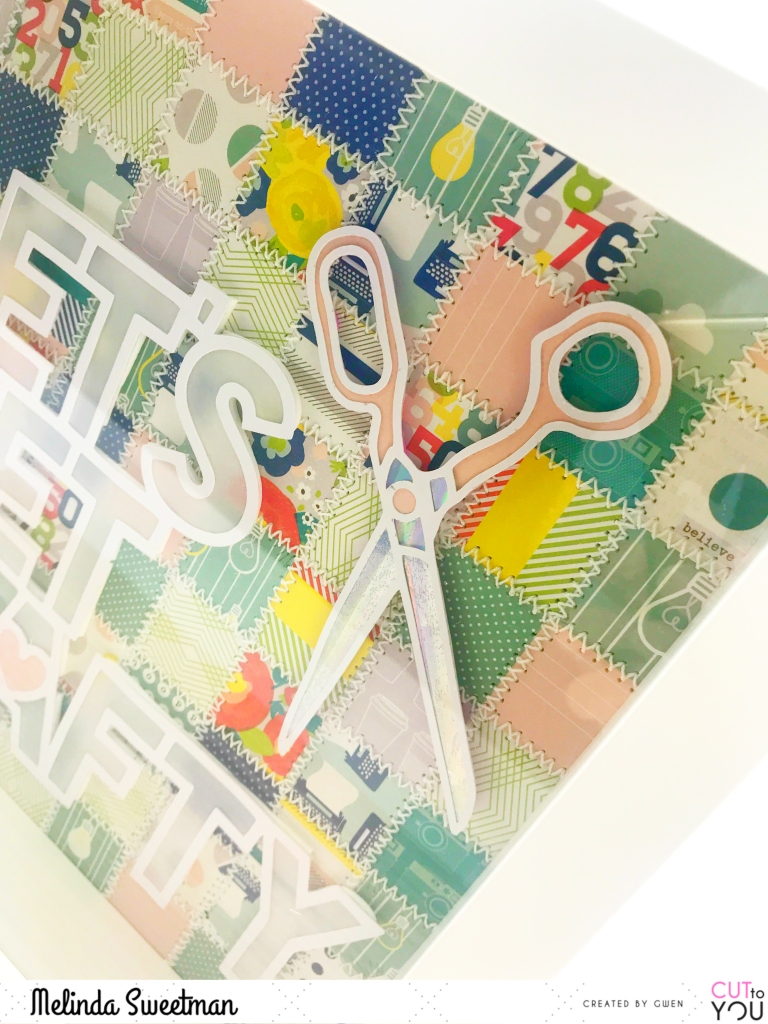
Next I have created my own holographic paper for the blades. This was really easy to do with my Minc machine and the Minc mist! I simply painted some of the mist onto some scrap paper, let that dry thoroughly and then ran my scraps through my Minc with the holographic foil and voila!! I love how these scissors came out!
Time to put it all together! I used foam adhesive around the whole title and also behind the scissors and then used my wet adhesive to stick it all to my "quilted" back ground.
I have recorded my process for this as well so I do hope you enjoy!


This was a super fun project to create and it would be so easy to replicate! And using different papers you would get a completely different look so next time you have a gift to give, maybe you could think a little outside the norm!


I hope you have enjoyed and I shall see you next month my next share!
Happy scrapping!
Melinda
x

Tuesday, 14 May 2019

CUT to YOU | Together

Hello fellow creatives I'm so happy you have visited me here today! I'm sharing another 12x12 layout for CUT to YOU and playing along with the Scrap The Girls May challenge as CTY is this months sponsor.


We had this sketch to play along with and as soon as I saw I thought one of the brand new cut files would be perfect so I cut the Frames Background cut file on white card stock.


And here is my page! I've gotta be honest and say that this is nothing like what I had "planned" out in my head but I do really love it! I kinda got a bit carried away painting lol


I wanted to crack into my Cocoa Vanilla Studio Happiness collection so pulled out the pattern paper with ALL the colours and matched those as best I could with some Distress Ink Pads. I've used Faded Jeans, Worn Lipstick, Cracked Pistachio and Peacock Feathers.


I had intended on colouring just the full blooms in this cut and backing the open ones but, like I said, I got carried away with my painting! The technique I have used to colour is super easy. All I did was smoosh my ink pad onto my craft mat and then used a water colour brush to pick up the colour and paint it onto my cut file. Easy!


I made sure I had different shades of the colours happening which just mean applying a second or third coat and then blending the edges and I really love how this turned out!


I have backed the main frame with the photo of my Mum, my sister (little sister that is lol), myself and my Aunty from my Mum's birthday lunch earlier this year and then backed all of the other frames with pattern papers from the Happiness collection. I ended up backing the open flowers with some plain vellum and love the softness it adds.


I also had other plans for the background paper! I was going to use the beautiful wood grain that is in this collection but when I happened to move my cut file to find something it ended up on this gorgeous pattern and I just LOVED the way it looked! So I shifted gears again!
I popped the cut file up on some old cardboard for dimension adding layers to the pieces that were the furthest away from the centre and then leaving the open leaves and flowers without any adhesive.
Before I stuck that down however I decided I wanted to mute out some of that pattern a little bit so I used some white gesso and my finger to spread some behind where all of my page elements were going and then stuck down the cut file.


Finally, some embellishing. With all the pattern on the background paper I didn't want to add too much so I simply used my Pixscan mat in my Cameo software to fussy cut some butterflies from on of the other pattern papers and added of those (in pink) to the centre of the big open flowers.
I added tassles from the ephemera pack (OMG aren't they gorgeous!), a title piece from the Midnight collection as well as a sticker that says Wonderful. I pulled in a couple of wood grain labels from my stash to add my journalling, added in some white ink splatters and my page was done! I also have a process video for you linked below so I do hope you will pop over and that you enjoy!


That is it for me for today. This page turned out completely different to what I had envisioned but I really do love the end result and love that I got this photo scrapped! Thanks for stopping by and see you next time!


Melinda
x

Tuesday, 16 April 2019

CUT to YOU | Live For Today

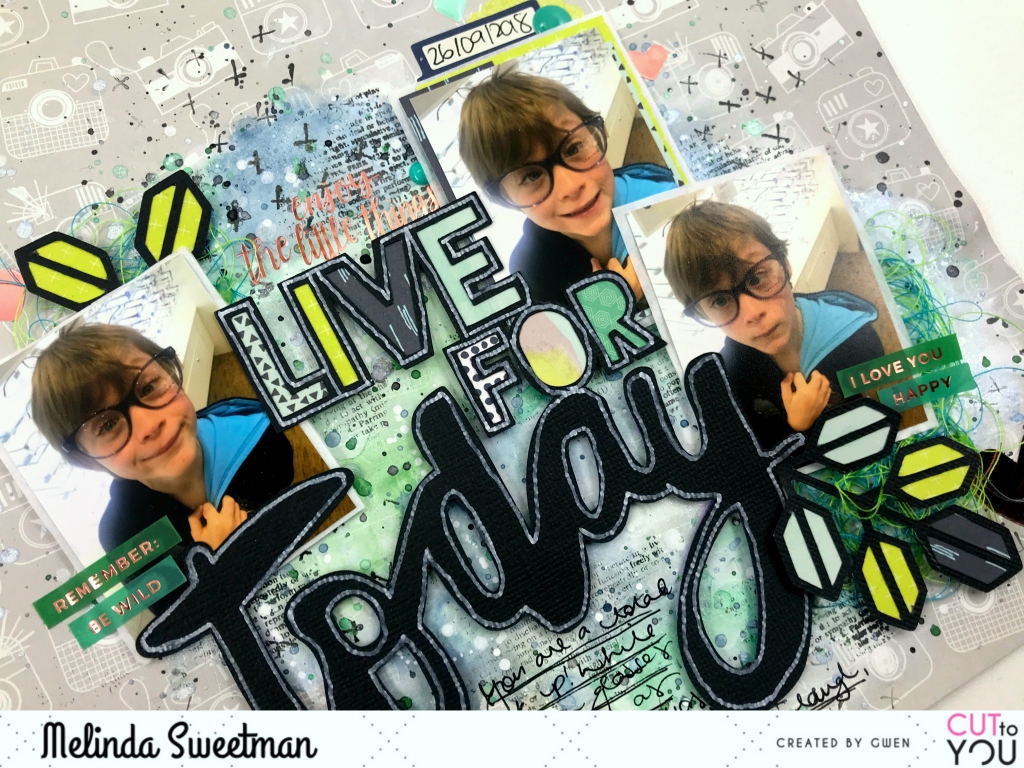
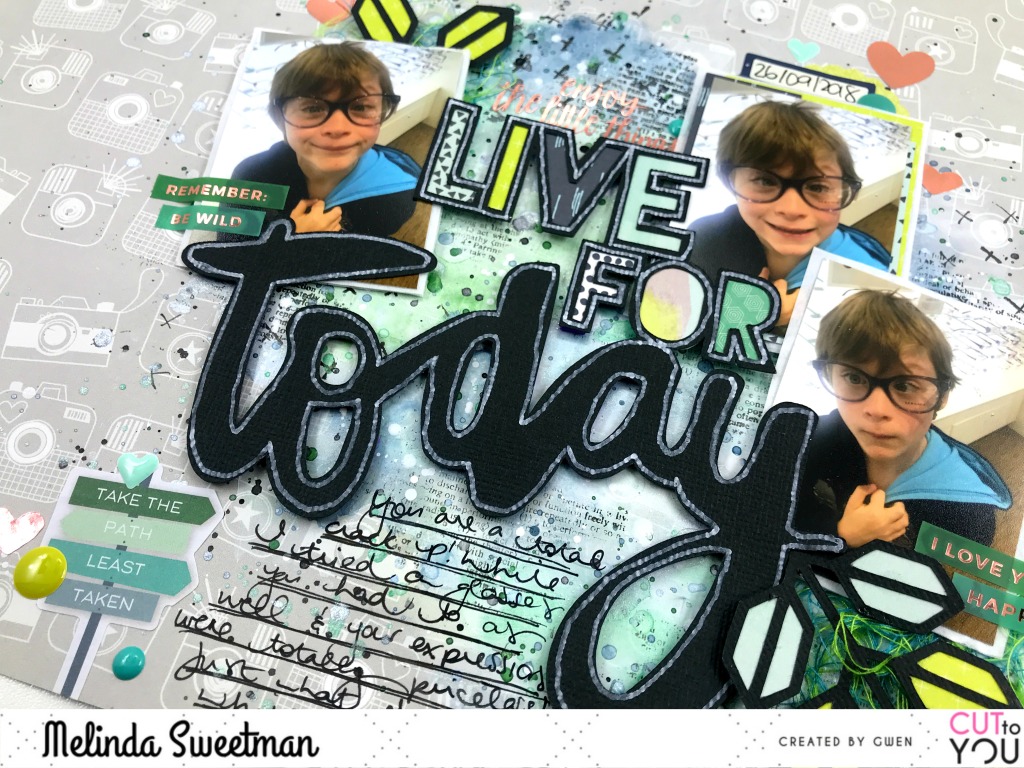
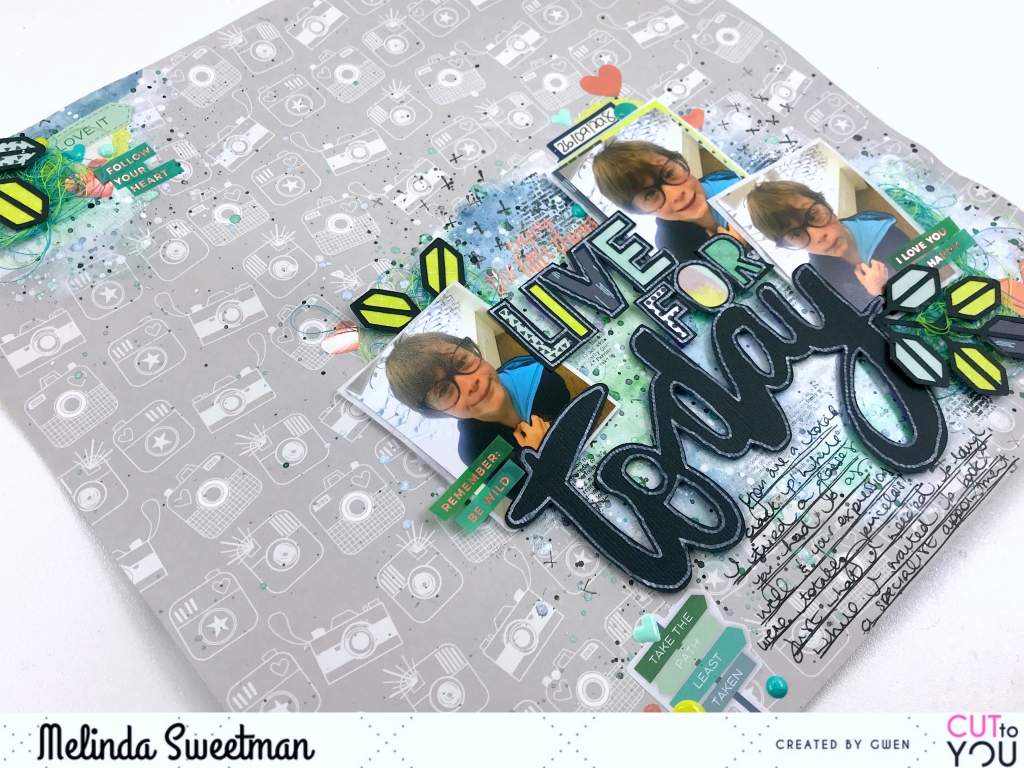
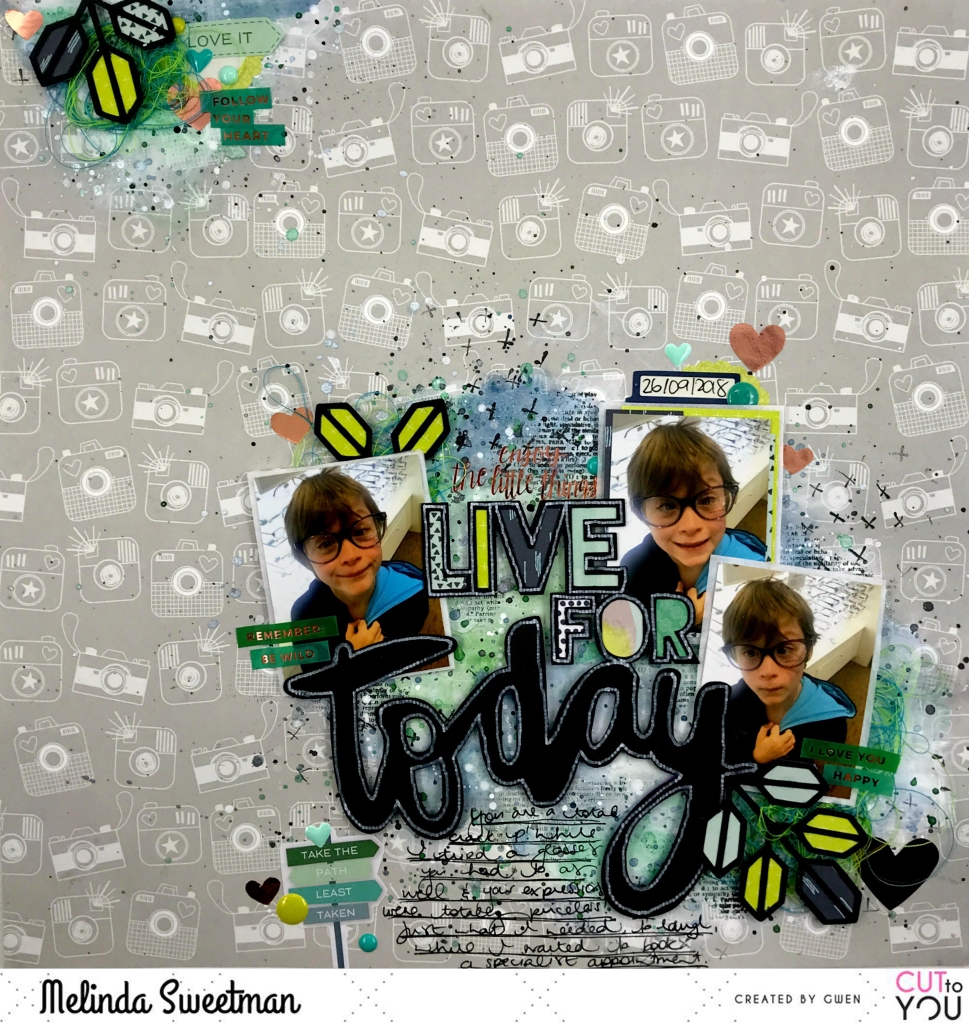
Hello my scrappy friends and welcome to my blog today! Today I have another share for CUT to YOU and for this page I have used an older cut file called Live For Today.
I cut this in black card a while ago and thought it was perfect for these photo's of my biggest child. First up I backed the open letters of my title using some patterned paper I had picked out to work with the colours in my photos.
I worked out where the photos and title were going to be placed and added some white gesso to my back ground paper, smudging the edges with my finger for a softer finish. I also added a small amount to the top left of the page. I've used the packaging technique and a paint brush to add colour onto the gesso'ed back ground paper with some mists and paints from my stash. You can see how that all came together in my process video, linked below!

After adding my mixed media I added a couple of paper layers and some tissue paper behind the small photos. I stuck all the photos and title together to make it easier to maneuver around my page.
I added some more messy fun to the back ground after it was dry with some stamping in black and splatters in matching colours.
With the title and photos being one big cluster that made it easy to work out exact placement and next it was time to embellish. I grabbed a couple of spools of thread (green and blue to match my back ground) and added 3 messy clusters of tangled thread and then hunted for the longest time for something else to add.
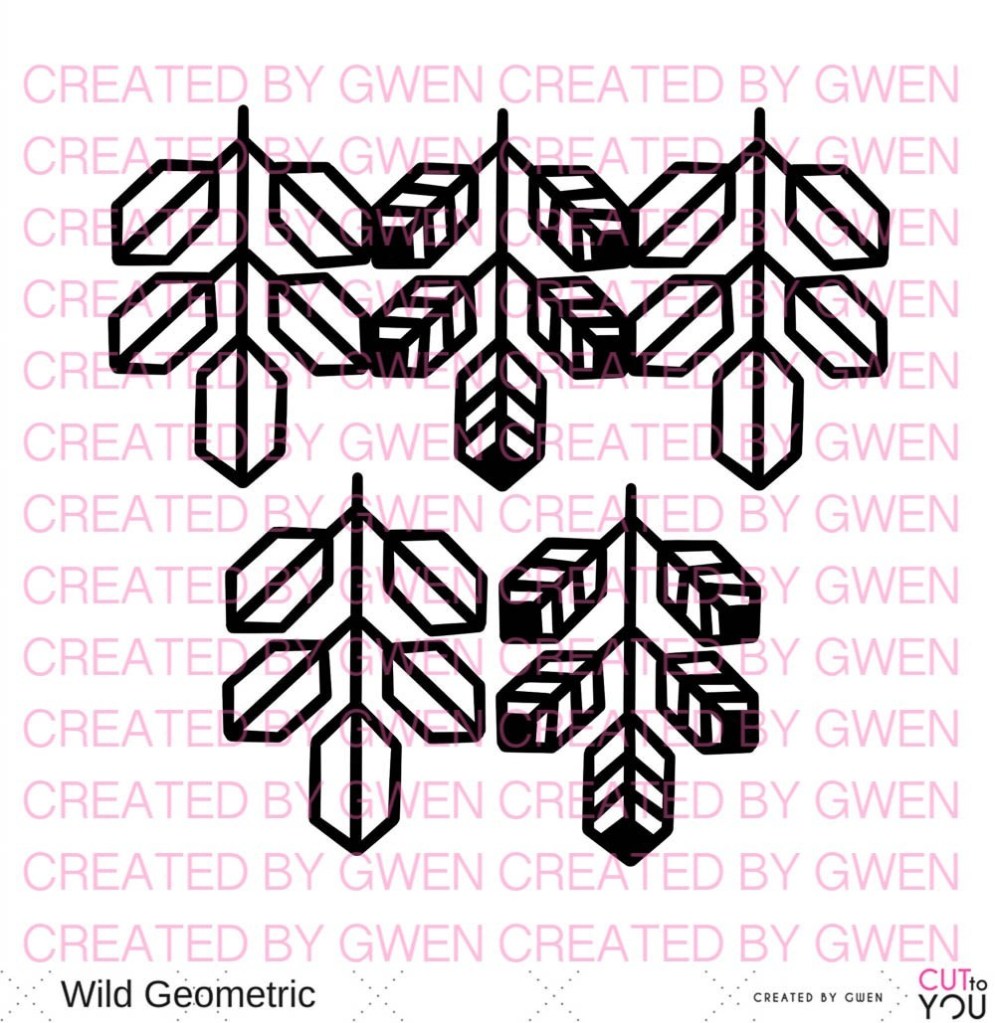
In my bag of already cut CTY cuts I found these great little geo leaves from the Wild Geometric cut file and decided they would be perfect! I backed the leaves in matching papers and then added those in my 3 main clusters over the top of my thread. Then using some wet glue I stuck the thread, title and photos and geo leaves.
I felt like my title wasn't popping enough so I grabbed a white paint pen and outlined the whole file and love the extra attention it brings to the title! Oh, and white splatters in the background ;)
A few sprinkles of stickers, word strips, enamel shapes and my journalling and my page is done!
I hope you have enjoyed my share today, I love these photo's of my little goof ball and I love the finished page!

Until next time, happy scrapping!
Melinda
x
Wednesday, 13 March 2019

CUT to YOU | Family Christmas Selfie 2018

Hey everyone and welcome to the CUT to YOU blog today! I am so excited to be here sharing on the blog for the first time with my latest creation for CUT to YOU!

Hello my scrappy friends, it's so lovely to have you here on my blog today!! Today's share is for CUT to YOU and I love the simplicity of my page that really lets my cut file of choice shine!


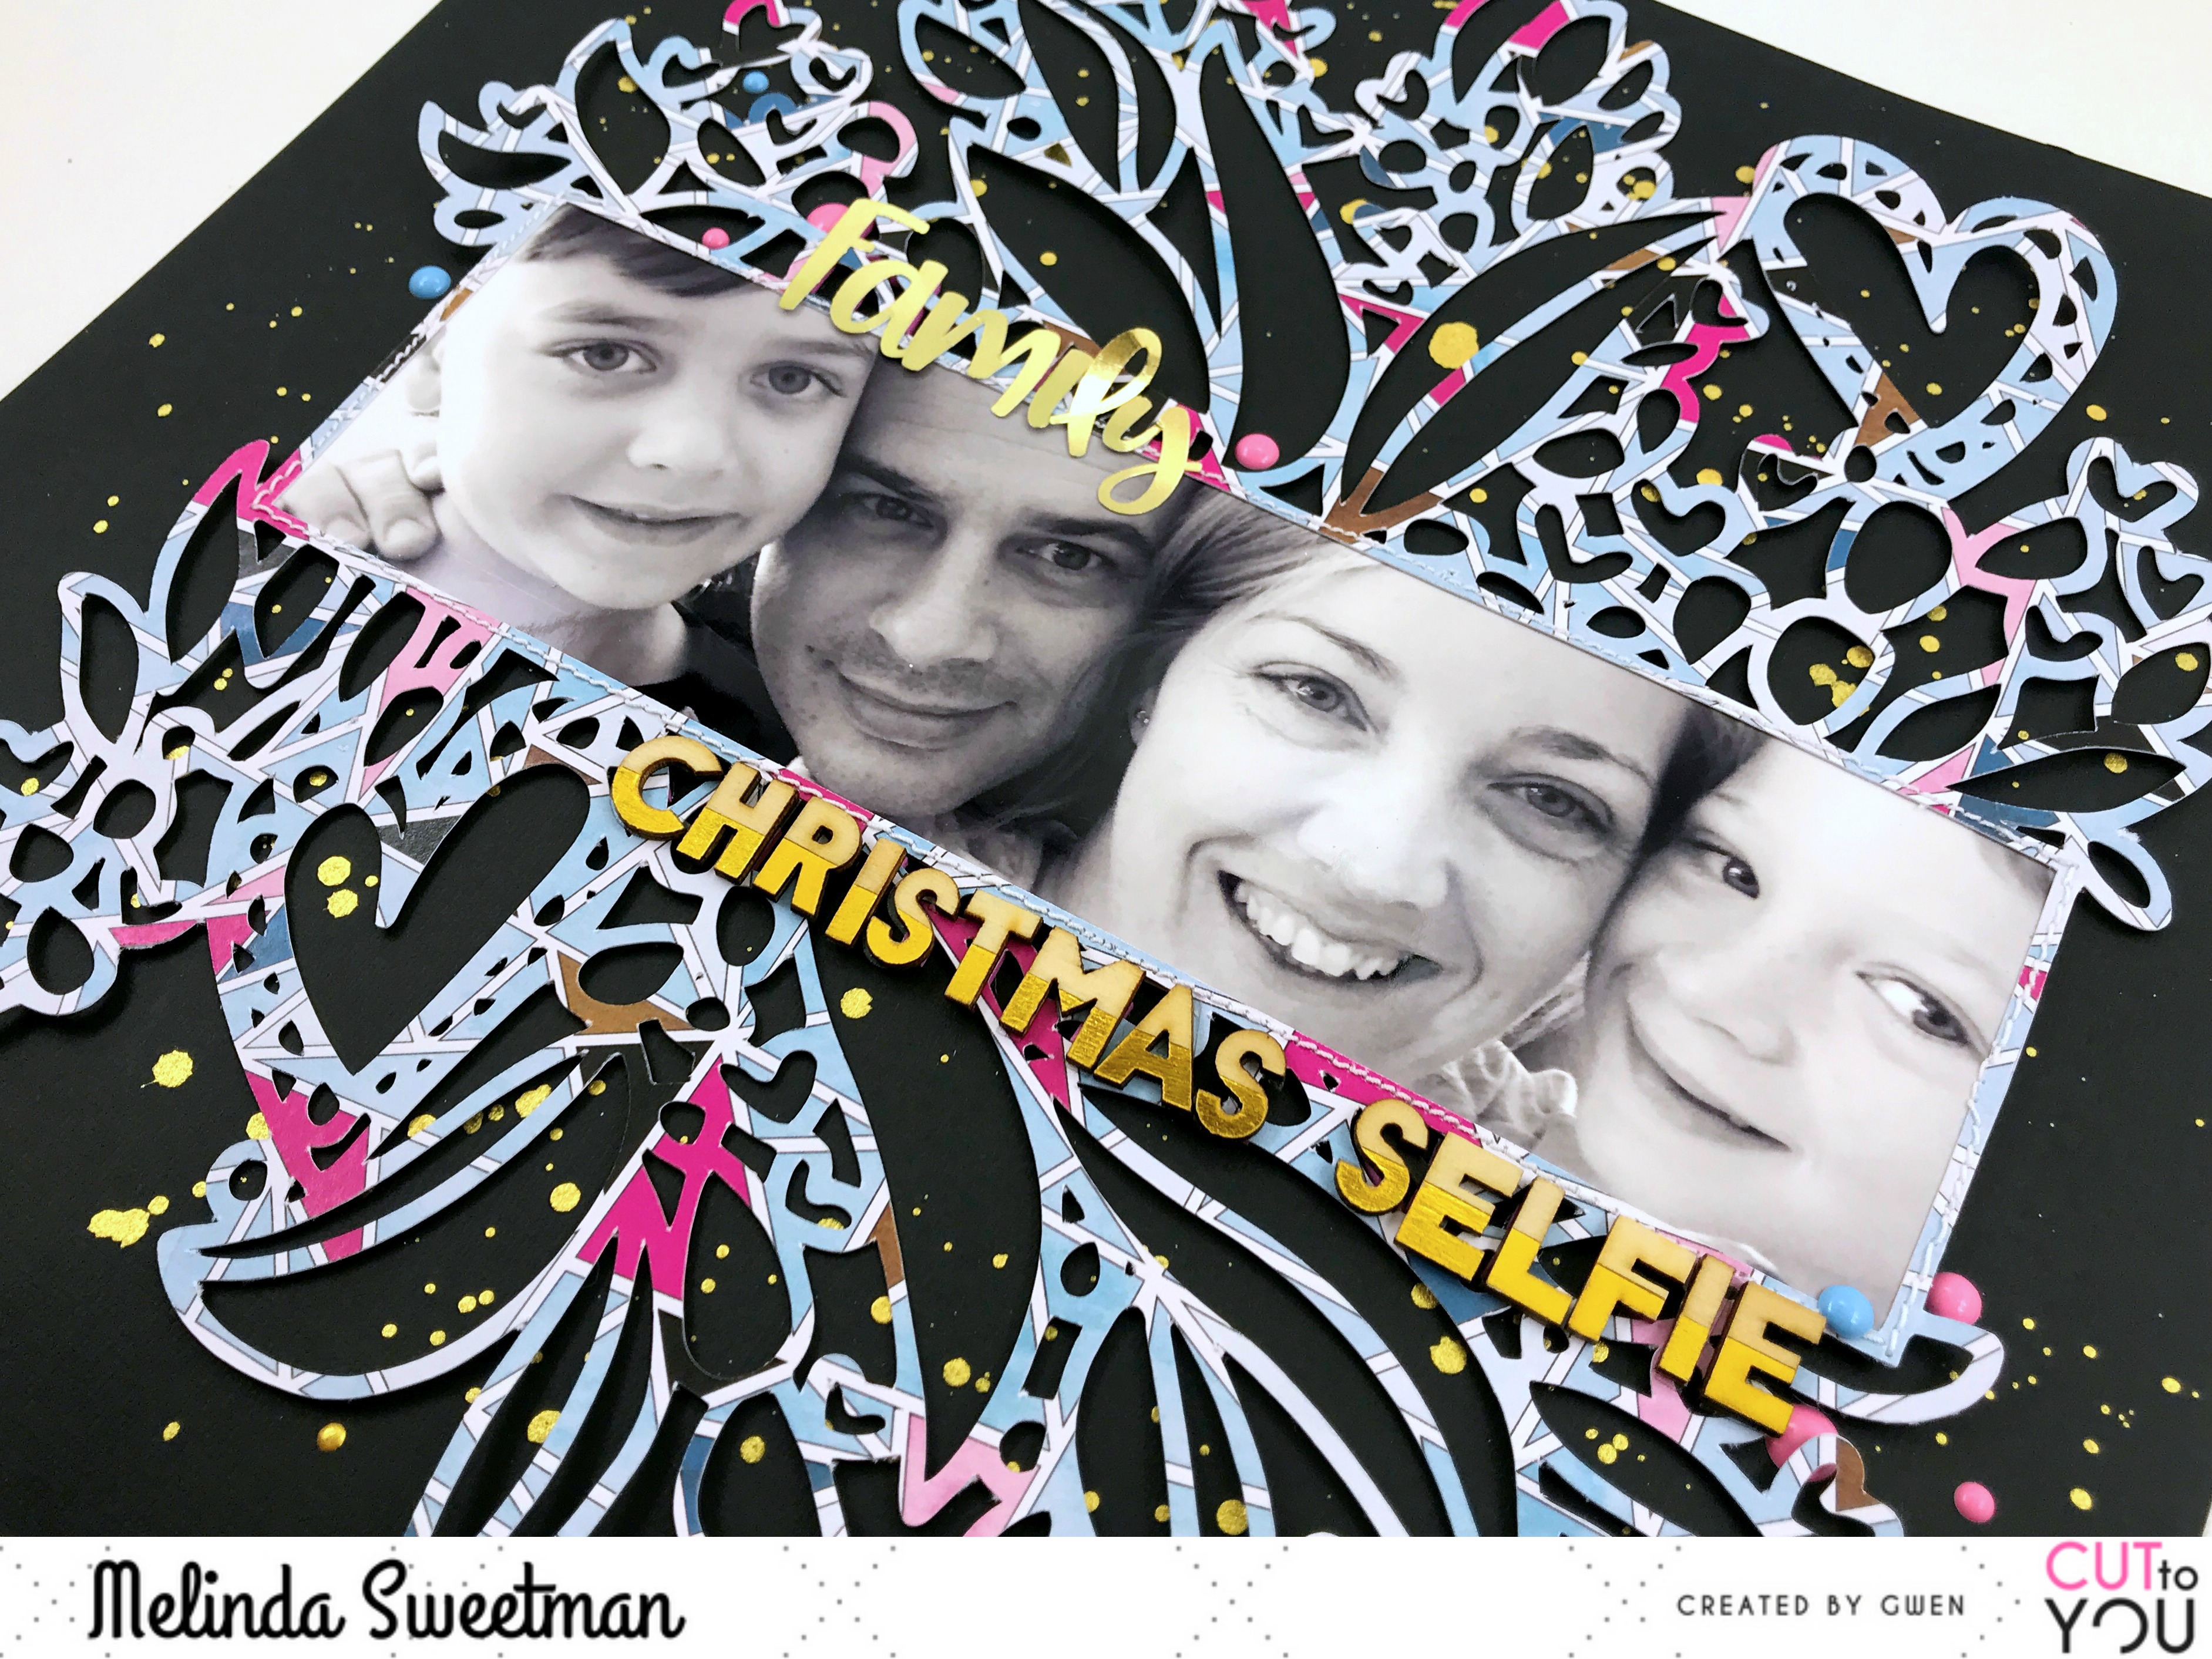
I have used an "older" cut from November called Title Bouquet. As soon as I saw this file I knew I wanted to make it BIG and fill that middle area with a kind of panoramic picture.


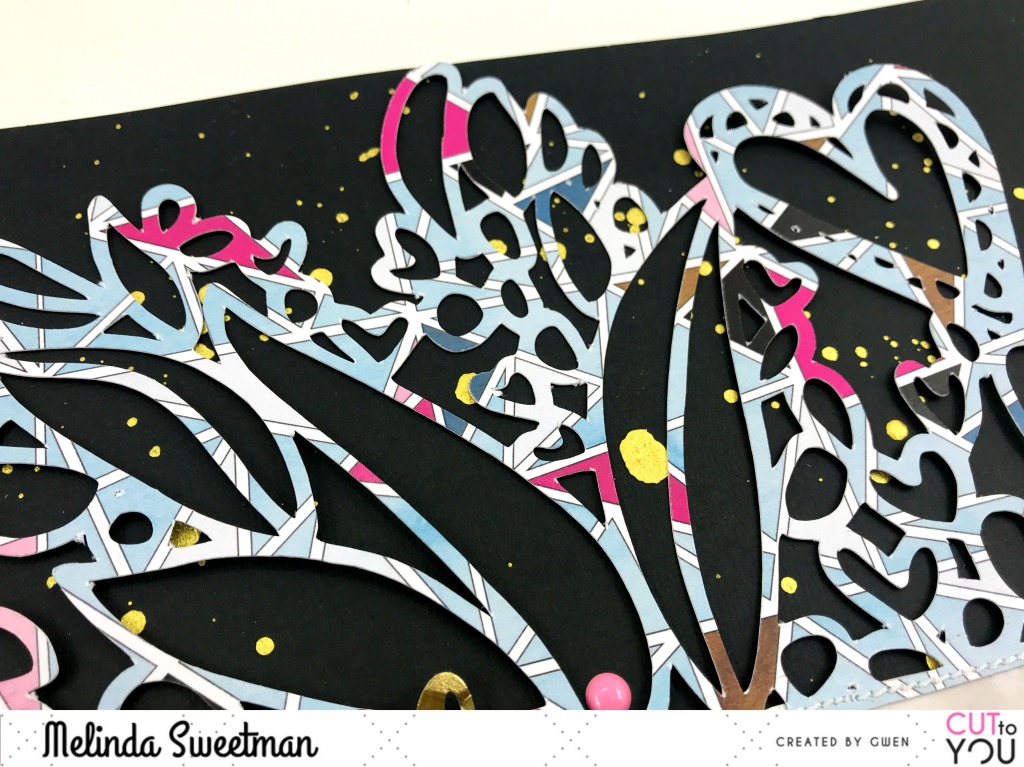
I cut this gorgeous cut file on a busy and bright pattern paper for something different and after trying it on white, grey and black I settled on the black cardstock back ground. I just love the way the cut file jumps off the page and it such a beautiful feature.


Before I did anything else with the cut file I sprinkled gold mist all over my background and popped that aside to dry. While that dried I adhered my big photo into the open rectangle and added some white machine stitching. I popped up the photo on some dimensional adhesive and then got to work on my title.


I have used dimensional adhesive behind my letters as well and then stuck that big cluster as one piece. I have only used adhesive where the dimensional adhesive was applied and have not stuck down the outer leaves and details.


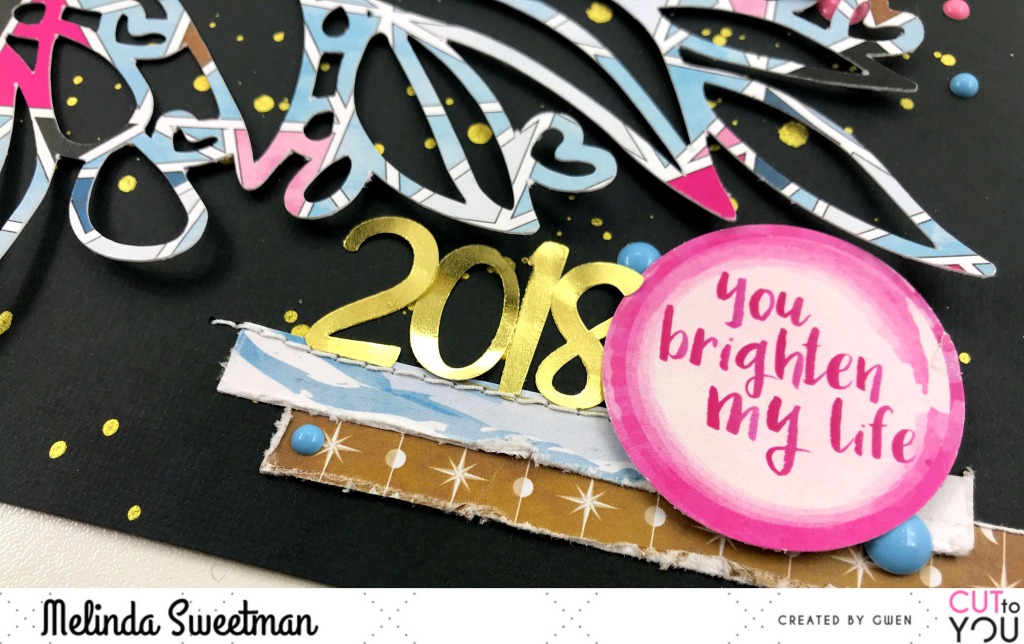
I created a smaller cluster to the bottom right of the page including the rest of my title and some scraps of paper from the same collection I cut my cut file from. I've added in some stitching to the bottom cluster as well. I finished out my page scattering some enamel dots all around the page.


I have created a process video for you today and it includes the process I followed in Silhouette Studio to get my file cut and how I "designed" my page as well before I cut anything! I'd love for you to check it out!

I hope you have enjoyed this page and I will be back again soon with yet another share!! 

Until then, happy scrapping!
Mel
xx

Saturday, 2 March 2019

STB March 2019 Challenge | My Love For You

Hey everyone!! A new month and another new challenge for Scrap The Boys!


This month we have a beautiful inspiration board to play along with and I was inspired by both the quote and the colours (one of my all time fave colour combos - navy and light pink) and decided to go big with my title.


This month our sponsor is Cocoa Vanilla Studios and though I have a substantial CVS stash I didn't have just the "right" colours to use for my background or cut file so pulled from my stash.


The cut file I used is from the Silhouette Studio Store and the file number is 111217. I have cut it on an older Dear Lizzy paper and made it fairly big. I also used the same paper to back the right hand side and the bottom of my card stock background.


I added some splatters on my background, behind where my cut file would be, using some of my Shimmerz Paints products.


A couple of layers of scrap papers from my stash behind my photo of my boys and also some tissue paper.


I pulled out my stash of CVS Midnight embellishments and layered those around the page and under/around my photo.

My final step was some enamel dots from CVS also sprinkled around where my photo and embellishments were.

Something different for me, no journalling!! I felt that the title said all that I wanted to say. I may go back in and add the details of the where we were and the why they were dressed up but I do have other photos of this same event (wedding) which I will scrap and tell those details.

A pretty simple page but I really, really love the way this came together! I feel like I can create any page with these colours and I will love it lol

I do have a process video for this and will link it up as soon as it's edited and uploaded. I am currently away on scrap retreat for the long weekend (here in WA) and won't be able to finish off my video until probably Tuesday.


I hope that you find some inspiration from myself and the other DT members over on the STB blog here and do remember to link up to the blog post!

Thanks so much for stopping by and I'll be back again with another page to share with you all!

Mel
xx 

Wednesday, 27 February 2019

CUT to YOU | Happy Together | A Scrapbook Layout

Hello my scrappy friends!! As the month of love rapidly comes to a close I have another lovey-full-of-hearts page to share with you!


This is another page for CUT to YOU and I have used the beautiful "Love Me Some Hearts" cut file which is available here on the website and here on the Etsy store. 

I have filled most of my white card stock background with and sent to cut.


I picked this gorgeous ombre blue patterned paper from CVS for my background so knew I didn't want to cover too much of it up or distract too much from it so I kept it pretty simple and just misted and painted the whole file in gold.


I have used the 3 biggest hearts for the photo's I wanted to use to tell my story. I have cut those to shape and stuck behind my cut file.


As I knew I really wanted that cut file and photos to pop the rest of the page is really fairly simple but I just love the end result! I chose a few random hearts to back using some gold printed newspaper print vellum (which I may be hoarding every single scrap of!!) from my stash to add a bit more gold and subtle pattern.


I used some CVS Love Always wood veneer for my embellishment and part of my title and some of the same collection ephemera to finish off my title and add some butterflies.


A few sparkly black enamel dots from the same CVS collection. 3 triangles of 3 around my photos and embellishments.

I added my journalling using a white pen and my final touch was some white splatters using Dylusions White Linen Ink Spray.

And that is it for me for today!
I do have a process video for you which you can watch just by clicking the play button below


Make sure you head over to the CUT to YOU shop to check out all of the beautiful February releases and make sure you head back really soon for the soon to come March releases - oh la la <3<3<3

I hope you have enjoyed and I will be back again with another layout share very soon! Thanks for stopping by!

Happy scrapping
Mel
x

Thursday, 21 February 2019

CUT to YOU | This is My Right Now | A Scrapbook Layout

Hello my scrappy friends and welcome to my blog today, it's lovely to have you stop by! Today's share is my latest share for Gwen's CUT to YOU store and this time I am using another Travellers Notebook file but I have cut it BIG!! This one is the "This Is My Right Now" file.


And here is my finished page


I have cut this on a red/orange patterned paper to match the red/orange on the background paper I have chosen and backed the open letters with some plain vellum. The cut file has also been mounted onto some craft foam for some extra dimension and for me to be able to layer my embellishments both on top of and below the file.


I have used a bunch of Elle's Studio labels - both cut apart and sticker forms - to form the base of my 3 main clusters. One is to the top left of the title, one to the top of the photo and one to the bottom of the photo.


I have intentionally placed the cut file and photo where they are to allow a little more whimsy with tilting the photo as this photo is just (another!) photo of my boys being silly together and a bit of a funny story!


I did a tiny bit of mixed media in the form of black splatters using some Black Velvet Heidi Swapp Colour Shine where my 3 embellishment clusters were going.


Having this giant title really made this page come together relatively quickly as I didn't want to cover it up to much. I've also pulled in a few stickers from the Vicki Boutin #stickerbook to bring all those colours to all of my embellishment clusters.


I have a process video up on my YT channel today for this page for you too so do head over and check it out if video's are your jam!


As always, I have linked everything in my blog post and you can find all the links also on my video! Oh, and make sure you head over to the new FB Page Cut To You and hit that like button! Thanks so much for choosing to spend some of your time with me here and/or on my YT channel, it really is appreciated!!

Until next time, happy scrapping!!

Melinda
x

Friday, 21 December 2018

CUT to YOU | Merry Christmas | A Scrapbook Layout

Hey everyone and happy 4 days before Christmas!! The big question, are YOU ready?! For a change, I think I am!! I can't wait for Christmas morning with my boys, the joy and wonder on their faces is priceless!!

This is my last post pre-Christmas (I think lol) so I'd like to quickly take this opportunity to wish each and every one of you a very Merry Christmas!! I hope that wherever you find yourself and however you celebrate you have a "good enough" day filled with more happiness and love than you wish for!

Now, onto my share for today, which is another Christmas 2017 page and I've used the beautiful Merry Christmas Script cut file from the CUT to YOU store.


I have, of course, used the digital cut file which meant I could make the cut whatever size I wanted and I, in fact, part designed my layout in the Silhouette software so I could get my cut file just the right size! You can pick up the Custom Cut file here.


Isn't that photo of my boys just so cute?! This was taken last Christmas Eve, just before bed, after they said goodbye to Pixie (our Elf on a Shelf) and left milk and cookies for Santa. And carrots for the reindeer of course ;)

I have kept this page pretty simple. That big title, painted with black gesso and backed the stars with some gold glitter paper, paired with that gorgeous gold foiled paper for my background I thought looked so pretty together, I didn't want to cover up too much!


I've pulled a bunch of stuff from my Christmas box mainly focusing on colour. I have some Teresa Collins tags and word phrase stickers, some flair from Cocoa Vanilla Studio and some stickers from Heidi Swapp. You can see how I store my Christmas supplies in my process video as I pulled it out to hunt through for pieces for this page.


The only mixed media I added was tiny black splatters with some ink and a little paint brush.


I added a couple of lines of journalling and my page is done!

Looking at these photos of my boys and seeing their faces on Christmas morning takes me back to my own childhood. The wonder, excitement and pure joy in the magic of believing and I just hope that they believe as long as I did. Or still do, but, shhhh, don't tell anyone lol

I hope you have enjoyed this page and I will be back again very soon with another share, perhaps even before 2019 comes along. Which, just quietly, I have some sneaky, fun things planned coming in January, stay tuned!

Until next time, happy scrapping and have a safe, love filled Christmas!

Melinda
xx

Wednesday, 12 December 2018

CUT to YOU | Merry & Bright | A Scrapbook Layout

Wow!! It is practically the middle of December already and I cannot believe how quickly this month is flying by. Heck, 2018 has just disappeared! I hope you are managing to stay on top of the crazy this time of year, so far so good here, however school finishes tomorrow so my tune may change lol

Anyways, I am here today to share my latest creation for CUT to YOU and yep, it's a Christmas page! This month CTY is again sponsoring the Scrap The Girls challenge blog with this inspiration board and I was inspired by the black dresses with the pops of those fun Christmas colours.


Here is my page


I have used the super fun Merry & Bright digital cut file for this page and built my whole design around it and am really happy with the way it pops off the black! I did try it on a couple of patterned papers and also on white but I really do love it on the black!


I knew I wanted to use the cut file right in the centre of the page so working on that idea I pulled out my white gesso, watered that down and added splatters all over my background. I then pulled out my gold mist and did the same. I left that to air dry and continued working on the rest of my page.


I really struggled at this point to find photo's to scrap!! This was, after all, for Scrap The Girls, and the majority of my Christmas photos have at least one boy in them but after a bit of searching I found these silly Christmas Day (evening) Snapchat Elf photos of myself!


I backed the word and and also the star with some gold printed acetate (I may have stocked up on this, shhhh!!) and then left the cut file alone.


A few messy, textured layers behind my photo including some gold washi strips, some gold machine stitching all the way around the frame of the cut file and voila, my page was done!


I have a process video available for this page which you can watch below.


I did add a few extra bits and pieces after I turned off the camera including some gold holographic star stickers, a red chippy arrow and a little circle chipboard piece in black that says "hi" and then I was done!!

I hope you have enjoyed seeing this page come together and make sure you head over to the CUT to YOU store to get your hands on this awesome cutfile. Remember, you can buy it as a custom cut or as a digital cut file!

See you all very soon! Until then, happy scrapping!!

Mel
xx