Showing posts with label colour paste. Show all posts

Saturday, 2 June 2018

{Colour Blast} Hello Treasure ~ A Scrapbook Layout

Hey, hey scrappers and happy Winter!! I am here today kicking off the June challenge which sure had me testing my boundaries!! 

Here is my page that I created.


And in case you have not yet seen it the June challenge is here


And my process video can be seen below


Before I started this page I had the colour scheme in mind of black and white and yellow. So I tested a couple of different Colour Blast products for the yellow I wanted and the techniques I had in mind and settled on the ever fun Colour Shimmer Dusts!


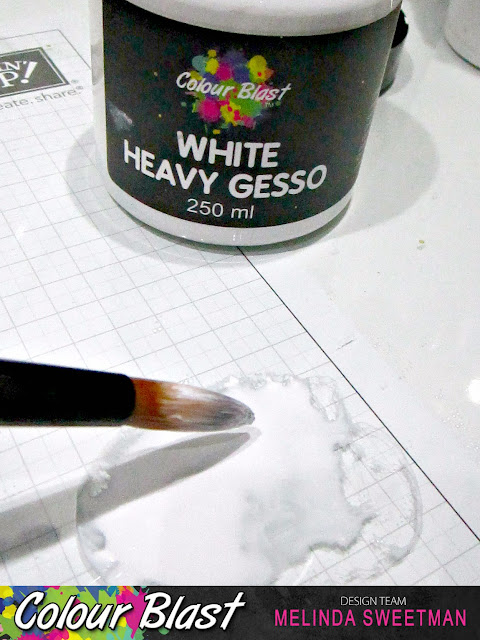
Before I got into my 4 different techniques I used a dry brush (about 1") and the White Heavy Gesso and applied a thin coat over the area on my yellow cardstock where I was going to do most of my designing.

After that was dry I activated my Colour Shimmer Dusts in Midnight and Sunflower, grabbed my extra "tools" and supplies and got to work.


I started with Sunshine Colour Paste. Swoon! I just LOVE this colour - in all of it's beautiful mediums!! I paired that with a stencil and some clear acetate hearts in  my stash (thank you Michelle Grant for your inspiration!!) and left that to dry over night.


Next, my first technique with the Colour Shimmer Dusts - stamping!! I simply used a paint brush and painted the Midnight Colour Shimmer Dust onto the stamp randomly and then mooshed my cardstock onto the stamp. 

There was still quiet a fair amount of colour on the stamp so I flipped the stamp over and randomly stamped over area where the white gesso was.


I used my heat tool to speed up the drying process, I was eager to move onto my next step! This time I used the Sunflower Colour Shimmer Dust and the ever popular (and super easy!!) smooshing technique. A little of the activated colour painted onto some old packaging, flipped over and smooshed!

Be warned with adding the wet media over the top of what I had stamped my colour did re-activate! I had paper towels handy and quickly dabbed up the wetness which left me with a really cool effect and really soft yellow colour. You can see that better in the close up photo's!


Technique 3 was splatters. Again I used a paint brush and splattered all around my page in both the Midnight and Sunflower colours. I used quiet a small brush for the midnight splatters. This I left to dry naturally as I had had another idea of what I was going to embellish with!


Finally technique 4 - painting!! I have again pulled out this awesome stamp set and settled on my title being "Hello Treasure" knowing I wanted to paint with the Shimmer Dusts. Another really simple technique and here's a little tip - if you are doing this use watercolour paper!!! If you don't the colour bleeds completely out of the lines!! Once this was dry I fussy cut this out and my other stamped word.


Time to put it all together! I've used those acetate hearts, a doily cut in half, some black and white tissue paper, some enamel shapes, a wooden button and a gorgeous yellow charm from Charms Creations. Oh, and white thread!


Me being me, I pieced everything before I stuck anything and decided just before sticking that I wanted some white splatters and my go to right now is some watered down Heavy White Gesso. 


I really love how this page came together and I love the challenge this month - it really got me thinking!!


For those of you wondering this is NOT a current photo! This photo was taken in August 2012, 5 days before our youngest was born and like so many photo's from my "I don't think I'll ever scrapbook" days has not yet been scrapped.

Here are a couple of close ups, the shimmer is really hard to get on camera but I tried!!


I hope this inspires you to play along with the June challenge - it is a super fun one and definitely a challenge!!

Until next time, happy scrapping!!


Mel
x

Saturday, 24 March 2018

{Colour Blast} My Special Boy ~ A Scrapbook Layout

Hey, hey!! Happy Saturday, Melinda here with you again today and I'm sharing some "special" photo's of my big boy that I had lots of fun scrapping!!


I can't wait to pull these out for his 18th or 21st, or heck whenever it seems funny to show some embarrassing kiddie photo's!! This page started with these photo's and title - I knew when I had these printed this HAD to be the title. I chose my alphas and then my colour scheme was picked for me - Just Blue and Bling!!

There is a process video here that you can watch and see my whole process and step-by-steps coming up!


Black cardstock base - after I realised I had NONE I stocked up and went straight for it for this page. A text stencil in the background and Just Blue Colour Paste for some texture and colour - I just LOVE the way the shimmer products POP on black!


After the Colour Paste was dry - I may have helped ;) - I grabbed my Just Blue Colour Shimmer Spray and Singin The Blues Colour Shimmer Spray and simply sprayed onto my background over my stencilling.


Because the background was not prepared with gesso it dried pretty quickly so I got to splattering - I have used a combination of the Colour Shimmer Spray's in Just Blue, Singin The Blues and, of course, Bling and also the same colours in the Colour Shimmer Pots/Cubes.


Time to build all my layers - I have used almost ALL Australian suppliers including Cocoa Vanilla Studios (You Rock collection), D-lish Scraps, Rainbow Splendor & Corbett Creations and also Flutterby Designs. Lots of blues and whites and then some extra texture with the wood veneer. The Bear may not make sense but I have always referred to my big boy as my Baby Bear and at the age he was in these photos he was OFTEN referred to as just that!


My final touches were some journalling using a white paint pen, some white thread and white splatters. My white splatters were a combination of Heavy White Gesso and water using a paintbrush and I love how it lifts the whole page!

Here are a few close ups


I just did a big batch of photo's recently and included some of these older photo's and am loving remembering the stories and scrapping them, I have so many ideas now!!

I hope I have inspired you to maybe pull out some black card stock or perhaps some older photo's and have a play!

Until next time, happy scrapping - remember, the messier it is the more fun it is lol


Melinda

Saturday, 27 January 2018

{Colour Blast} Magic & Brains ~ A Scrapbook Layout

Hello my scrappy friends and welcome to my blog today! I'm here sharing my last post for Colour Blast for January. I hope you enjoy my process!


Funny how I came to this design though because I started with a patterned paper background and decided I just didn't love it, heck I didn't even like it really so I thought I would use what I had done to create something I at least liked!!

First up - patterned paper and White Heavy Gesso. A thick-ish/random, smeary coat in the area where I was going to put my photo's. I left that over night to dry.


When I came back the next day I turned my camera on and you can see my process from here on out below and keep scrolling for my step by steps....


I decided I wanted a dark contrast so grabbed my Dusty Charcoal Colour Paste and a stencil and after I marked where my photos were going I added some paste in 2 different areas. And smeared it on the top left so added a 3rd place with the paste.


Before this dried I knew I wanted an orange/black/gold colour scheme so I grabbed my Bling Colour Embossing Powder and sprinkled a little here and there over my Colour Paste and heat set the lot! Not only does heat setting it set the embossing powder but it also makes the Paste all bubbly and gives more awesome texture!


At this point I was thinking "Hrm, I'll add a bit more colour and maybe I'll start to love it more" so I grabbed my Sunset and Saffron Colour Sprays and some packaging and got to work using the smooshing (yep, that's the techy word ;) ) technique, working a small-ish section at a time and drying in between.


While I was working on that it occurred to me that the reason the 3rd spot of paste wasn't gelling was because I hadn't added gesso first, so I told myself "I'll add some smooshing here too and that will work better". TBH with you, NOPE, just nope! Ok, time to re-think my idea!


I grabbed some circle punches and dies and got to chopping up the paper - I did feel some satisfaction here - and immediately I was liking it better!! White cardstock and clear gesso for the background and I was ready to go again!


I added some ink to both my circles and the thin mat I had applied to my photos using Archival Black ink and placed the circles and photos in a configuration, first horizontally, that I thought would work. Meh, so I tried vertically and was like "Yay!! THIS is it!!"


Remove everything from the page again, grab my black archival ink and a couple of texture stamps and stamp, stamp, stamp!!


Next, I used both my Bling Colour Shimmer Spray and Colour Shimmer Pot to apply lots of pretty gold to the background. I sprayed the mist first, I wanted a fine, light coverage then I used the Bling Colour Shimmer Cube with both the packaging technique and also a paint brush and added colour to my hearts content.


Oh, and of course splatters! I used my paint brush and Colour Shimmer Pot. And Colour Spray in Roadbase also using a brush!

I added some gold stitching with my sewing machine through some of the circles and then it was time to stick, stick, stick!


I did add some more Bling splatters after all the circles were stuck down but before the photo was stuck down.


And lots of close ups! Enjoy!


So, just because you are not loving what you started does not mean that either a) you need to ditch the whole lot or b) you have to "put up with" and keep what you don't love!! Play! I'm sure, like me you have a good stash of awesome product that can sometimes be neglected, pull it out and PLAY!!!


That's it for me for this post and January so see you again next month, I cannot wait to play along with the next challenge, it's a fun one ;)


Melinda
xx


Saturday, 30 December 2017

{Colour Blast} Special Delivery OTP Project

Hey, hey Colour Blasters! Melinda here with you today sharing a little Christmas project with you! I know that the big day has been and gone but I had lots of fun creating this and it was SOOO easy and quick that I HAD to share ;)


I purchased the box from my local K-Mart and was inspired by another box also made by K-Mart but I was unable to pick up the one I was after so I DIY'ed it!!

First up I cut a cut file on my cameo. This cut was cut diagonally across my 12x12 piece of cardstock (I chose a colour I wouldn't use!) so I could make it a wee bit longer which turned out to the be the perfect size! I also cut a bunch of snowflakes so that I had a snowflake stencil!

Next up, I laid my stencil where I wanted it, grabbed my Colour Paste in Bling and got to spreading the colour across my cut file - using it like a stencil. I took a progress shot but it has vamooshed so you can see exactly what I mean in the next step as it is essentially the exact same thing!

I left my Colour Paste to dry over night and then did my next step this  time using my Snow White Colour Paste and my snowflake stencils. Again,  I just spread the colour through the stencil and left to dry!


While it was drying I got brave and added some splatters, hoping desperately that I didn't mush any of that wet Colour Paste. I used my Colour Shimmer Cubes in Fire Engine and Bling and LOVE how that added a tiny pop of colour and a little more randomness!


Again that was left to dry overnight and I am seriously in love with the finished project! My boys don't know that I made it as our Scout Elf Pixie turned up with it on 1st December filled with Advent Calendars and a letter from Santa!!


I (ok, ok, and Pixie!!) have found a couple of other uses for it over the month of December and love that it is now something we have that I can use each year!

Pixie used it to stack all of our Christmas books in one morning.


My littlest guy used it for reading!! He sounded out each letter of the word Santa and announced "Santa" afterwards! Kinda took me by surprise but man, it was CUTE!


And on Christmas Eve Pixie turned up IN the box with our Christmas Eve PJ's and a couple of other things she brings each year on her last day with us!


I have a super short and sweet process video for this if you are interested! Just click play below!


I hope that however you celebrated it that each and every one of you had an AMAZING Christmas Day spent with those you love. Wishing all of you the very best for 2018 and I'll see you in the new year! Until then, happy scrapping!!


Melinda
xx