Showing posts with label chipboard. Show all posts

Sunday, 29 May 2016

A creative journey - Part 2

Hi hi!!

Finally I have found/made time to write up this blog post for my 2nd entry in the fun circle journal project I'm playing along with!

The journal I received last month was absolutely stunning and I found myself totally overwhelmed and TERRIFIED to start! But, a coat of gesso, a post in our FB group, some helpful advise and off I went!

The theme in this journal was Enchanted/Whimsical/Fantasy. I think I went more with whimsical than anything more enchanted/fantasy themed and am super happy with how my page came together in the end!


An idea I had wanted to try for AGES was blobbing acrylic paint on my page then smudging it around with an old gift card and one of the suggestions was exactly that so I grabbed out my acrylic paints, blobbed it on and smeared it around!


An in progress shot! I started with yellow on the left (which ends up being the top of the page) but it just wasn't working for me so I went over it with white and green and am super pleased with the colours!

The colours were VERY bold and I wanted to tone them mostly done a little so I punched a bunch of circles from some acetate and lightly stuck them randomly on the page. I used acetate so I could see the colours/patterns behind while I worked and also because I knew that it would stand up to lots of different mediums if that was the way I decided to go!

A very light coat of gesso with a paint brush (I think! It could have been my finger!) over the whole page while the circles were stuck, some black ink and some clear and roller stamps. I felt that it needed a little more texture so I grabbed another stamp from my stash that has lots of stars and randomly stamped that around the pages as well. And then a couple of open star stamps as well randomly around the page.

Before I pulled up the clear acetate pieces I grabbed a sharpie and went around each circle once. After I pulled up the acetate I went around each of the circles a couple more times in messy circles. 


I wanted to include a different texture on some parts of the page so grabbed out my awesome Faber-Castell glitter bead medium and a circle stencil.
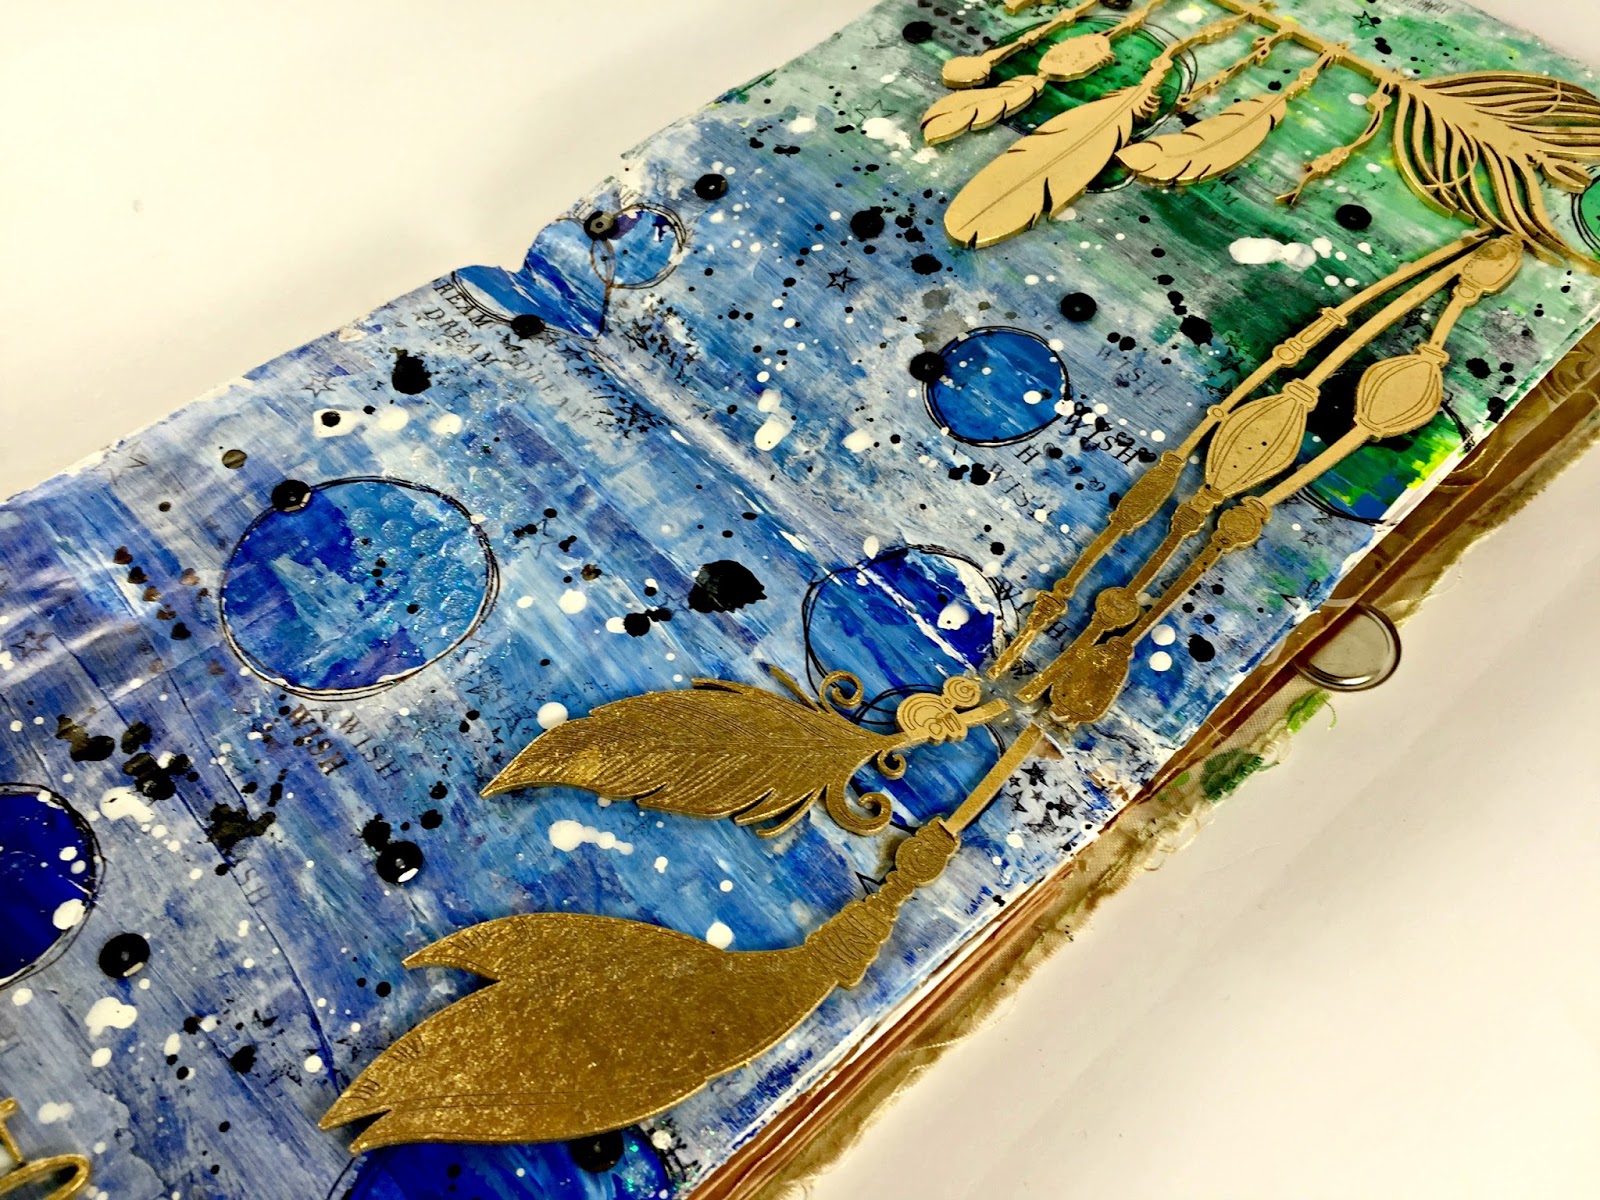


For my "sentiment" and embellishing I have pulled some of my gorgeous Dusty Attic chippy pieces, painted them gold and stuck them down :)

My final couple of steps were to mix some of my white and black acrylic paints with water and a big round brush to create some splatters. Once that was all dried I grabbed some black sequins and called it done!!

Love how it turned out and the day before I sent this on I received the next journal and oh boy, I am so looking forward to getting creative - the theme is "whatever" so yay!!

Thanks for stopping by and happy scrapping, or just plain, getting messy!!
Mel
xx

Monday, 4 January 2016

A bit of this and a bit of that....

Hello there and happy 2016!! I hope this brand new year is being good to you so far and that you all had a joyous and love filled Christmas!

I am here today sharing a couple of non-DD projects that I neglected to share pre-Christmas. I had the craziest 10 or so days ever and have fallen behind in everything but all my photo's are printed and in our DD album!

But for now I will share the frame I made for my lucky winner over on my FB page To The Stars and Back and also a 12x12 layout I made as part of my term on the Dusty Attic DT while they sponsored the challenge over at Scrap Around the World in December.

First up here is the finished coloured fairy as a refresher that I popped into a frame :)


And the finished product :)


As you can see I kept it pretty simple so that my little fairy stole the show ;) That paper in the background is actually a piece of patterned paper from a 6x6 paper stack, perfectly matched! A doily and some little resin stars :) Rosalee loved it and I believe it was going to her grand daughter so I hope she too loves it!!

And onto my 2nd share for this post - a 12x12 layout I created using a photo from our wedding vow renewal in April last year :)


I found the #happy range by Websters Pages AGES ago and KNEW that I would want to use it to scrap some of these photos so I have used that as the background layer, added in some floral pieces from one of the Maggie Holmes floral ephemera packs and then used a Dusty Attic chippy for the title, a frame, an XOXO piece and also a little row of hearts. Oh, and that gorgeous  potion bottle! The glitter is Stampin Up gold glass glitter and I LOVE how it turned out! The potion bottle was coated in white (as was the mini frame) and then I water coloured the leaves and cork.


A close up of the detail in the middle of the page - I am really so happy with how this turned out and can't wait to make some more layout's using both this range and those photos!!


And, finally, a close up of the title and the potion jar!

I hope you have liked seeing these projects and I hope to be back very soon with another post!!

Happy scrapping!
Mel
xx

Monday, 14 December 2015

December with Dusty Attic

Hello fellow Dusty Attic fans! Today is (sadly!) my last post with Dusty for the year and my term on the team! Firstly, however a massive thank you to the Jen's for the fun and challenges that I have been able to participate in throughout this year! I have loved working on the team and seriously, I have a whole new love for chipboard!! To the rest of the members on the DA team, WOW, your work is truly inspiring and I have been more than honoured to be on the same team as you all!!

So, with that said and done onto my pages for this month.

I had big plans to do cards and 12x12 LO's as well as the week I have managed to PL to share but this time of year is just crazy so today I have our week 43 to share with you all. Week 43 is late October if anyone is interested ;)

I have used the Pink Paislee Colour Wash 6"x6" paper pad for all of the papers and paired that with some Heidi Swapp ephemera from the "Dreamy" collection and of course, a bunch of Dusty Attic chipboard :)

Here is the left hand side of the 2 pages


All of the chippy (except the page pebbles) have been treated the same way - a coat of white gesso and then some spray mists mixed with water and painted on. The colours mostly blended beautifully and randomly - just what I was after!! I used a mix of a yellow and blue mist separate but also made a green using both colours together. Love how they all turned out!! The page pebbles also had the gesso and water colour but I also added a layer of the clear gloss varnish to give them a little something extra :)

And some close ups


The chippy here is from Word Pack #33.


The chippy here is from Word Pack #34.


The chippy here is Page Pebbles #10 and some Mini Stars. Those mini stars are scattered about the 2 pages for continuity.

Onto the other side


And some close ups


This piece is from Mini Captions #9


This is a Love You Arrow


More Mini Stars and also Stars #1, Mini ABC Upper and Mini Numbers.


This one is from Mini Captions #6.


Page Pebble from Page Pebbles #10.


And another page pebble from Page Pebbles #8.

So, that is it for me!! Thank you for all of your support and all of the comments that have been left over my term on the DT. No doubt, you will still see me about, I have a heap of chippy, lots of ideas and I just love the mood boards that the girls come up with every month!!


xx

Saturday, 14 November 2015

November with Dusty Attic

Yikes!! November already!! My how this year is flying past!

Melinda here with you today sharing some pages from Hunter's 2015 album, February to be exact!

I had so much fun with all the chippy pieces and paint!


I started with painting all of my chippy with Dusty In Colour Soot and then applied a coat of Clear Gloss Varnish and popped aside to dry while I got on with my background.

I have used almost entirely Australian manufactured and designed products on this layout as those papers and embellishments are from Cocoa Vanilla's Made of Awesome range. I started with an exclusive cut file from The Cut Shoppe Let's Cut Class 1 which I cut using my silhoutte and then mixed up a concoction of 4 Dusty In Colour paints to to match perfectly with the blue of that paper frame in the layers. The colours I used are Navajo White, Oceania, Faded Denim and Denim. I just plopped some colour onto a palette and mixed away until I got just the right colour! So much fun!

I then added some of the paint to some plastic packaging and some water and basically stamped/smooshed the packaging until I got the effect I was after. I love how this turned out! After that was dry I backed all the arrows that I had cut with some scraps of paper from the same range of papers.


I have used Chevrons Small - both the inside cut and the "left over" bits. And the title is from Mini Captions #6.


Here is one part of the "left overs" from Chevrons Small...


And another.


I have used 3 page pebbles here too which I did paint VERY lightly so you can still see the etched details.


I have used one of the pebbles from this pack here. 


This pack here.


And this pack here. I think this is one of my all time fave's too - I have been hoarding that too!!

While I was putting this layout together I discovered just how awesome the clear gloss varnish is too!! Obviously it leaves a beautiful layer of clear gloss but while it was out and I was playing it was the 1st glue I grabbed a few times and it really is awesome for that too!! When it sticks it's stuck but you have a little moving time!!

Onto the facing page which is, of course, a PL style page :)


Again, all my chippy has been treated the same way and papers and stickers are from the same range.

Here is the title card that I had so much fun putting together - am loving getting inky and making a mess on my craft mat!!


Some more of the Chevrons Small and also the Typewriter ABC font.

And some close ups of all the titles on the photographs!


Word Pack #25


And that is it for me for today!! I hope you have enjoyed seeing my pages for this month and see you next month!!


Mel


Wednesday, 14 October 2015

October with Dusty Attic

Hello there Dusty fans!! Melinda here with you today sharing our week 37 in our 2015 Project Life album.

I picked up my gorgeous pack from boss lady Jen a couple of weeks ago and have finally got around to using some of the beautiful new pieces!! I cannot wait to get some more out and make more pretty things!! As you probably noticed I tend to use lots of the titles in our PL album and this week/month there is no exception :)


So, the 2 pages next to each other :) Apart from all the yummy Dusty products I have used an older (by older I mean 2014!!) Pink Paislee range "Hello Sunshine" which has a few black pops in collection. I have used the 6x6 paper pad and the ephemera pack.

The pops of black totally inspired my decision to colour all of my chippy black. Which was so quick and easy using a make up sponge and the Dusty In Colour Soot (DA0925). LOVE!!

Here is the left side


And the right


And here are the close ups along with product links :)


Our title card using Mini Captions #3, Mini ABC Upper and Mini Number Set.


Another of the mini titles from Mini Captions #3.


One of the arrows from Love This....


This cute little piece I have been wanting to use for AGES and I FINALLY got it used!! From Word Disks #1.


I so love this little title from Mini Captions #7.


More alphas from the Mini ABC Upper and the "fun" is from the Word Pack #28.

I have also used the XOXO in couple of places and also the "adventure" and "awesome" titles from Word Pack #28.

So, with this spread done and dusted I am fairly certain that that concludes album #2 for 2015. But perhaps this will be week 1 in album 3!! So many, many memories and moments captured!

I am planning on some fun scrappy time this afternoon and have got the beautiful, inspiring Dusty Attic moodboard up on my computer screen to hopefully get some scrapping done. I cant win the awesome $100 voucher up for grabs so make sure you have a play and use the below board for some inspiration!


Happy scrapping and Ill see you next month!!


Wednesday, 29 July 2015

Brothers & Best Friends

Hi again!

2 12x12's in as many days!! Remarkable! Haha!

So, for this page I used a GIANT (A4, printed at home) photo and found inspiration here

Again, I used prompts from my little boxes and I pulled: 12x12 layout, Cameron collection (love, love, love this range but struggle to use it), chipboard, machine stitching, mists, ephemera pack and background stamping. 


I did "cheat" a little in that I used one of my Dusty Atic paints as s mist. Just squirted some into a bottle, added water and shook it up and voila!

Here are some close ups


So, that's it for me for today!!

Thank you for taking the time to come and check out my page!

Have a fab day!
Mel
xx