Hey everyone and thanks for stopping by my blog today!
Ok, so today's share is for the fun K+ Challenge for November and if you have not seen it yet, here it is!
I was stumped to start with and then I found this cut file in my CUT to YOU files and boom, IDEA!!
I chose to scrap an older photo of my big boy and keep it fun and bright so pulled out some of my Vicki Boutin All The Good Things collection and my Distress Oxide inks and got to work!
Today's post is short and sweet so here are a few close ups
You can see my process video for this page below
And if you have any questions, please drop them below or head over to my FB page To The Stars and Back. And make sure you head over the K+ blog for all of the amazing DT inspo and to load up your challenge for this month too!
I hope you have enjoyed and until next time, happy scrapping!
Hey, hey and happy November! Oh my goodness, yes I wrote that correctly, November!!! How?! Dear time, please slow down!
Ok, now I am breathing again today I am here to share my first DT make for the month and it is, of course, for Scrap The Boys.
Do you love the simplicity of this?! And the fact that perhaps you have a photo of one of your guys with you or another loved girl that you have permission to use this month?!? Haha! I decided months ago, when this photo was taken (in June!) that I was using this photo for this challenge and here is my page!
I have used another of the awesome cut files designed by Gwen over at CUT to YOU. In fact, it was one I used on a page I shared just last week but looks very different today! You can pick up the digi version here and the custom cut here.
I have a process video up if you're keen to see how this page came together just click on the play button below.
And a shameless plug for myself - I have set myself a goal to reach 1000 subbies by end of year so if you are not yet a subbie I would for you to head on over to my YT channel and hit that subscribe button if you like what you have seen today!
Ok, now back to the page! A photo of hubby and I all dressed up and celebrating the "end" of the fire season.
I've used my Kuetake Gansai Tambi water colours to colour the heart (and if you watch the process video you will see that my end design is NOT what I had planned to start with - see it morph lol!) and matched the colours as best I could to the gorgeous Vicki Boutin All The Good Things collection as I knew I wanted to embellish with that range.
I've used a few ephemera flowers and a couple of the paper clip thingies and I really love how this page ended up!
Here are a couple more close ups.
I hope I have inspired you to play along with the November challenge at Scrap The Boys and remember to head over the STB blog to check out the amazing work from the rest of the team and to load up your own entry!
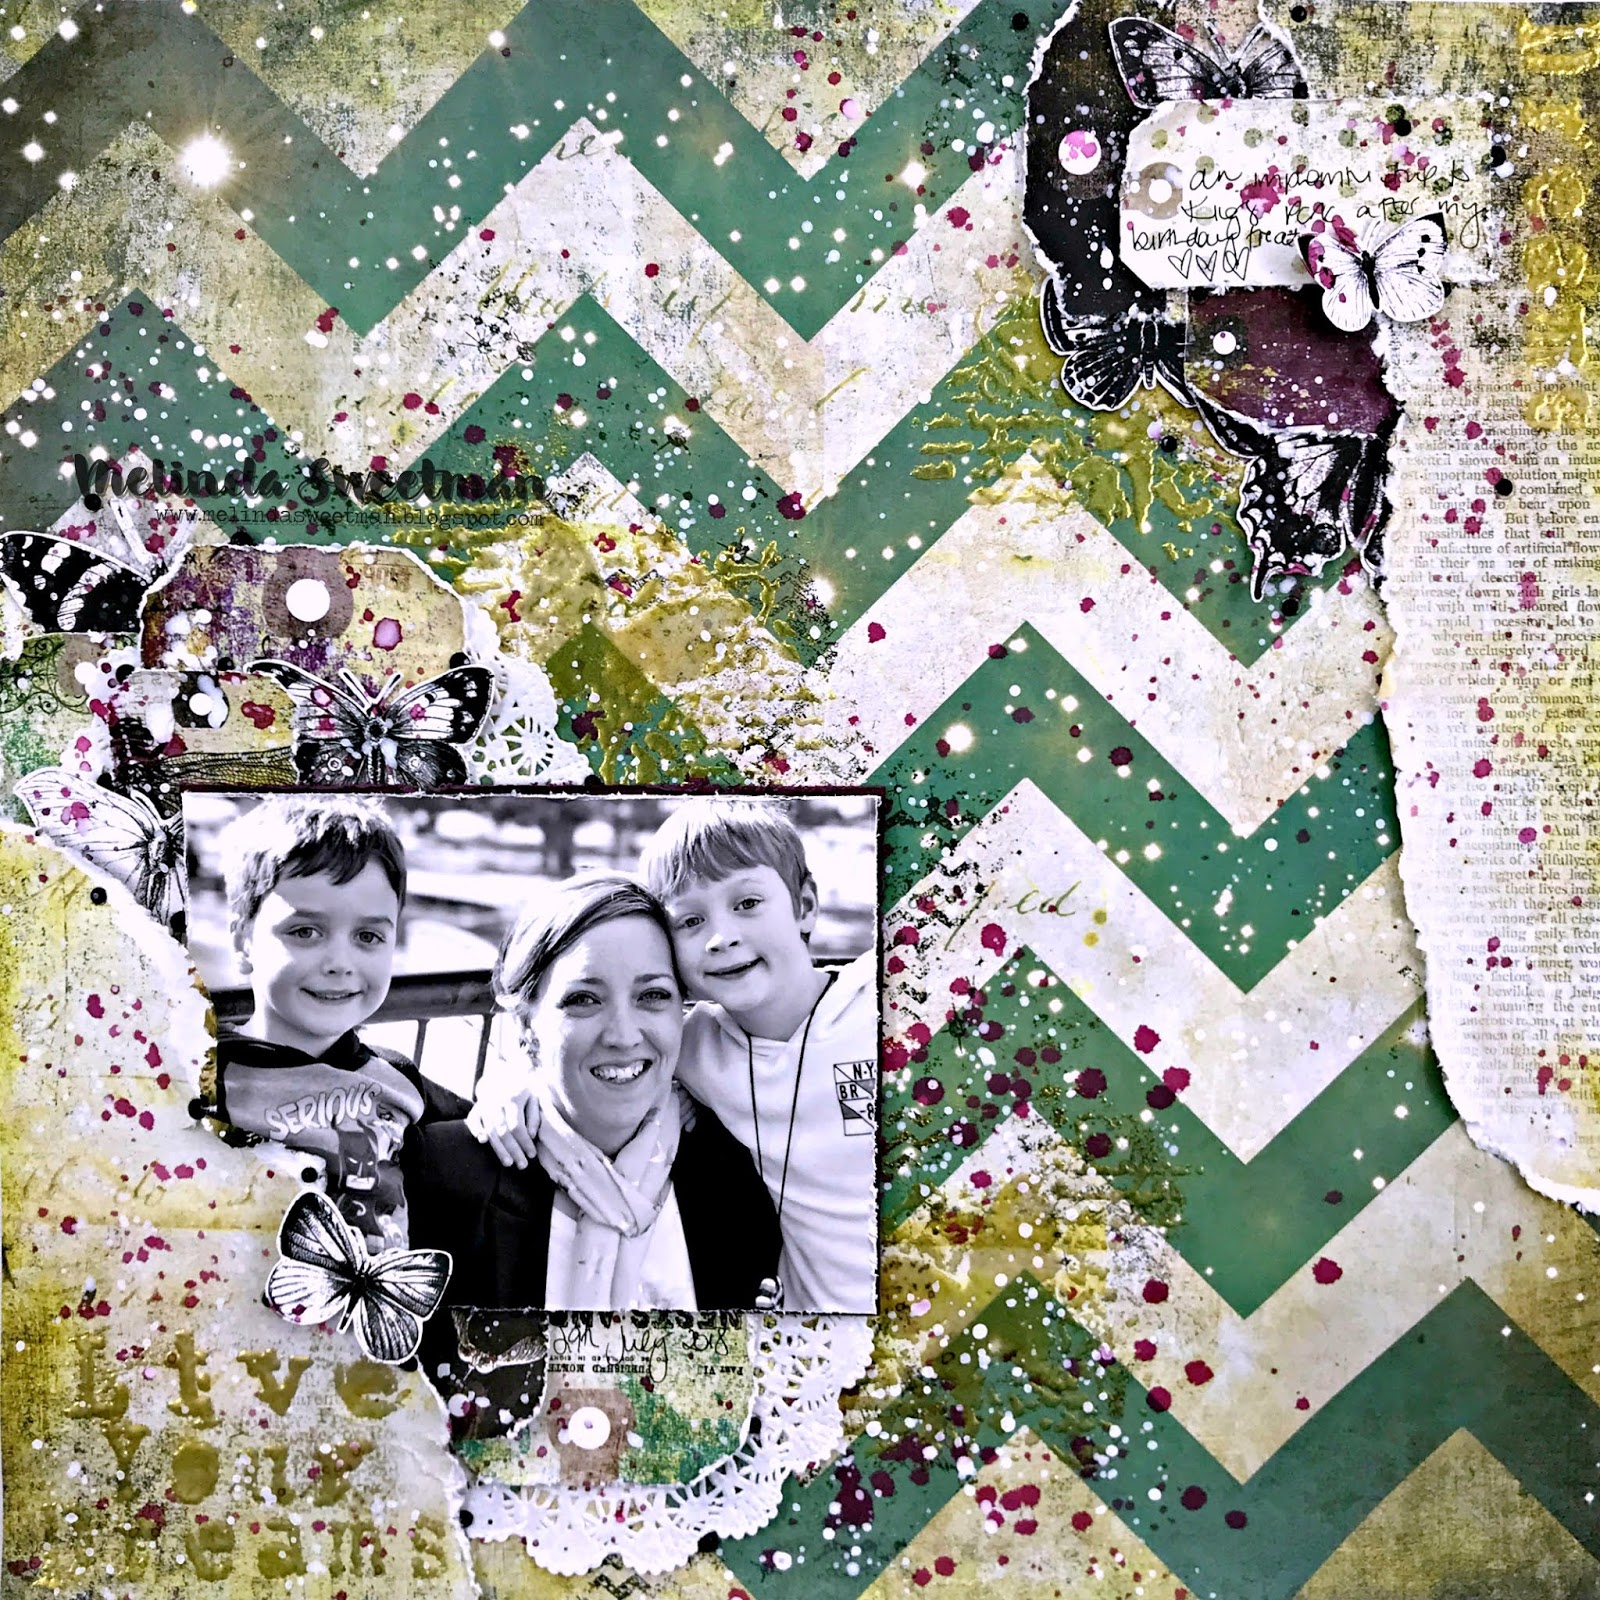
I am here today sharing a round up of the projects I made using the October 2018 Colour Blast Kit called Butterfly Stardust.
To start off with here is my unboxing video if you'd like to see everything that comes in both the Kit and the Platinum Kit.
Those of you that do sub to the kit have been advised that there were delays so you should all have started to receive your kits by now and I hope you are enjoying the inspiration provided by us DT members and of course by the beautiful products contained in the kits! Especially with the ever so creative Michelle Grant being behind the exclusive designs!
If you are not a kit subscriber and would like more info or to sign up head over here where there is the complete listing of the kits and options available.
Last week I shared my first full step-by-step with a process video scrapbook page and the link for that video is below
And this is my finished project and a couple of close ups
This week (today in fact ;) ) I am sharing my second full step-by-step with a process video art journal page and the link for that video is below
Here is my finished project and a couple of close ups
Lastly, I created a couple of extra pieces with some of the left overs. I set myself the challenge of using as much of the left overs as I could and I am so happy with the amount I managed to get onto projects!
First up a tag
And secondly a canvas
I think that between all of these projects this is maybe my fave. Maybe. I do love the scrapbook page I created though as well. Which is your fave???
I hope that you are enjoying your October kits and the projects I have shared with you. While you play with those I will be creating with the December kit ;)
I can't wait to see your creations so make sure you share in the exclusive Kit Club group but, of course, you are more than welcome to share in the Colour Blast Creative Corner FB group as well!
Today's share is again for CUT to YOU, Gwen Wruck's digital and custom cut little baby and I am playing with this beautiful Scallop Heart cut. I have used the digital version but you can also (of course!) buy the custom cut version if you don't have your own cutting machine.
This is my page and as you can see I have not actually "cut" the file at all!
First I used my Pen (come pencil!!) holder and had my silhouette trace the shape with the pencil. Right, smack bang in the middle of my white card stock background paper. After that finished I went around the lines with my pokey tool and poked little holes for me to stitch through.
I have done the chain link stitch as I have wanted to try this out for ages and I just love how it worked! And, just for the record, it didn't take as long as I expected nor was it as complicated as I expected so winning!!
After my handstitching was done there was not a great deal to do to bring my page together but I first started with some Gold Heidi Swapp Color Shine sprinkled on the paper behind where I knew the photo was going.
I have gone stash diving and pulled out the beautiful Cocoa Vanilla Studio "Hello Lovely" ephemera and used a number of pieces around my photo for embellishments.
You can also see some gorgeous gold dictionary print vellum behind my photo which is all I used as a mat and then I mounted my photo corners on cardboard so it sat evenly with the stitching. I added my title with 2 different thickers - Happy Life (the tiny white foam thickers) and Hazel (the beautiful gold font), added some enamel dots (I even finished off one sheet - woohoo!!!!) and then my journalling with a lead pencil to finish my page off.
I love using cut files in a different way to cutting and sticking and have even come up with an idea for some clothing decorating for a party my hubby is going to soon - stay tuned for that one!! I have a process video for you if you are interested and I hope you enjoy!
Hi everyone and thanks so much for stopping by my blog today! Today's share is my latest make for CUT to YOU and I have used the Be Brave Be Strong cut file for my page.
You can find the digital file here and the custom cut here and for the month of October it is FREE with any purchase! Gwen created this file for a very special cause (of course October is Breast Cancer Awareness month here in Australia) but to read more about that you can find Gwen's post here with a little of her story.
CUT to YOU is once again sponsoring Scrap The Girls and this is the STG mood board for the month which I am playing along with.
And here is my page!
As you can see I have used the quote as my main inspiration but also drew on the pinks in the graphics and the idea of "the fighter" from the entire board.
I have a process video up on my YT channel if you'd like to watch, just click the play button below and enjoy!
I cut the file on black cardstock and then after I traced and did an internal offset I cut the words also on my cameo rather than sticking and cutting. This made it super quick and easy to back the cut file, without a great deal of mucking around!
Some texture in my background and some splatters.
A couple of layers behind my photo including a vellum bag for my journalling tag to slot into for a little bit more personal journalling. Just as a side note, though that part of my journalling is hidden it is not top secret, not to be read by anyone ever, it's "hidden" in plain sight and if anyone cared to take the extra step to pop their hand into my album and pull the tag out for a read I would have no problem with that. It's "hidden" in the sense that perhaps not everyone flipping through my album would like to read the more touchy feely stuff of life but there if anyone wanted to!
I added some puffy black alphas to finish off my title, some enamel dots/shapes and little journalling to the front of the page with a grey pen and my page is done!
And this ephemera piece was just perfect for this page!
Head over here to play along with the October challenge with STG and over here to check out all the beautiful cut files available in the CUT to YOU store!
I am a big fan of K+ Challenges and have been lucky enough to be a guest DT a couple of times and was so beyond thrilled when Katie asked me if I'd like to join this incredibly talented team of creatives!
Today's post is my first share as a part of the DT and this months challenge is all about friends!
Here is my page!!
I thought what better time to scrap a photo of friends being creative together than for a K+ challenge so knew straight away I wanted to use this photo!
Most of the goodies on this page are from my stash of Heidi Swapp goodies and I love that I have got some of them onto a page. Especially that background paper, swoon!! I just love it!!
Here are a few close ups
Make sure you head on over to the K+ Challenge blog to see all of the A-MAZING creations by the rest of the design team and to link up your challenge for this month too!
If you'd like to see my process video just click on the link below and enjoy!
Thanks for stopping by and enjoy getting krafty ;)
Hi everyone and welcome to my blog! Today I am sharing my take on this fun mood board for Scrap The Boys for October. Blue with a dash of pink.
Navy and light pink {heart eyes}; one of my all time absolute fave colour combos and here is my page.
I have used this cut file from CUT to YOU and added in the word "zany" using some GIANT Ali Edwards alpha stickers.
I have used 4 different mediums with the plastic packaging technique to add colour to my white cardstock. Which I had applied a coat of clear gesso to. You can see my whole process in process video, linked below!
I have cut the outline of the cut file in a navy blue Studio Calico paper that has been in my stash for ages and also cut the inside pieces using my Cameo and a Cocoa Vanilla Studio paper and I am totally loving the end result!
I embellished pretty simply by adding some pink tissue paper behind all 3 photos, using some veneer around the page and adding in some enamel shapes in white, dark and light blue.
After almost everything was stuck down I felt that my white alpha stickers were way too white so I grabbed a Distress Oxide pad and a water colour brush (one of the Vicki Boutin brushes - LOVE!!) and coloured my alphas, dabbing it off before it was completely dried. I then also added some splatters of the same colour to my background and over the top of my alphas.
Head over here to check out the rest of the DT's beautiful work this month and make sure you get your challenge uploaded to the blog post before the end of the end of the month! I can't wait to see what inspires you with our moodboard this month!