Tuesday 31 October 2017

Success - K+ October 2017 Challenge

Hey, hey my scrappy friends!! Today I am here sharing my entry for the K+ October 2017 Challenge :)

Here is a little sneaky peek


And here is the challenge - use something clear!


Oh, I had fun with this one! As soon as I saw the challenge I KNEW I wanted to do some sort of shaker pocket and here is what I came up with


I have also used some clear acetate butterflies from an A4 sheet that I fussy cut.

I found this quote/image on a FB page called Shades of Pink and fell in love with the image and the quote so, unusually for me, I wanted to scrap it! I'm pretty sure this page will end up in a frame in my scrap space because a) I love it and b) it is WAY too bumpy to go into album ;)

Here are a couple of close ups


Thank you, as always, for stopping by and see you again very soon!

Mel
xx

Saturday 21 October 2017

{Colour Blast} Beautiful ~ A Scrapbook Page

Hey, hey scrappy friends!! It's Melinda here with you today sharing not only my latest DT make but also my take on the awesome October challenge!

Here's a bit of a sneaky peek and a little secret, this page is NOTHING like what I thought I was going to make!! But I love it!


So, if you have missed it here is the October challenge....TRIANGLES! I don't know why but I just LOVE triangles so was very excited when I saw this challenge this month!


However, that is enough chatter and here are my step-by-steps

I chose a cut file and cut that on my cameo and then I chose the ephemera packs and 1 piece of patterned paper I was going to use and trimmed up my cut file - those flowers just were not going to work! 

From the patterned paper I picked the colours I wanted to use and not knowing exactly where this page was going I grabbed the Colour Shimmer Spray, the Colour Paste and the Colour Shimmer Pots in the colours I wanted to use - Blush, Punch and Deep Water. And at the last minute, Steel.


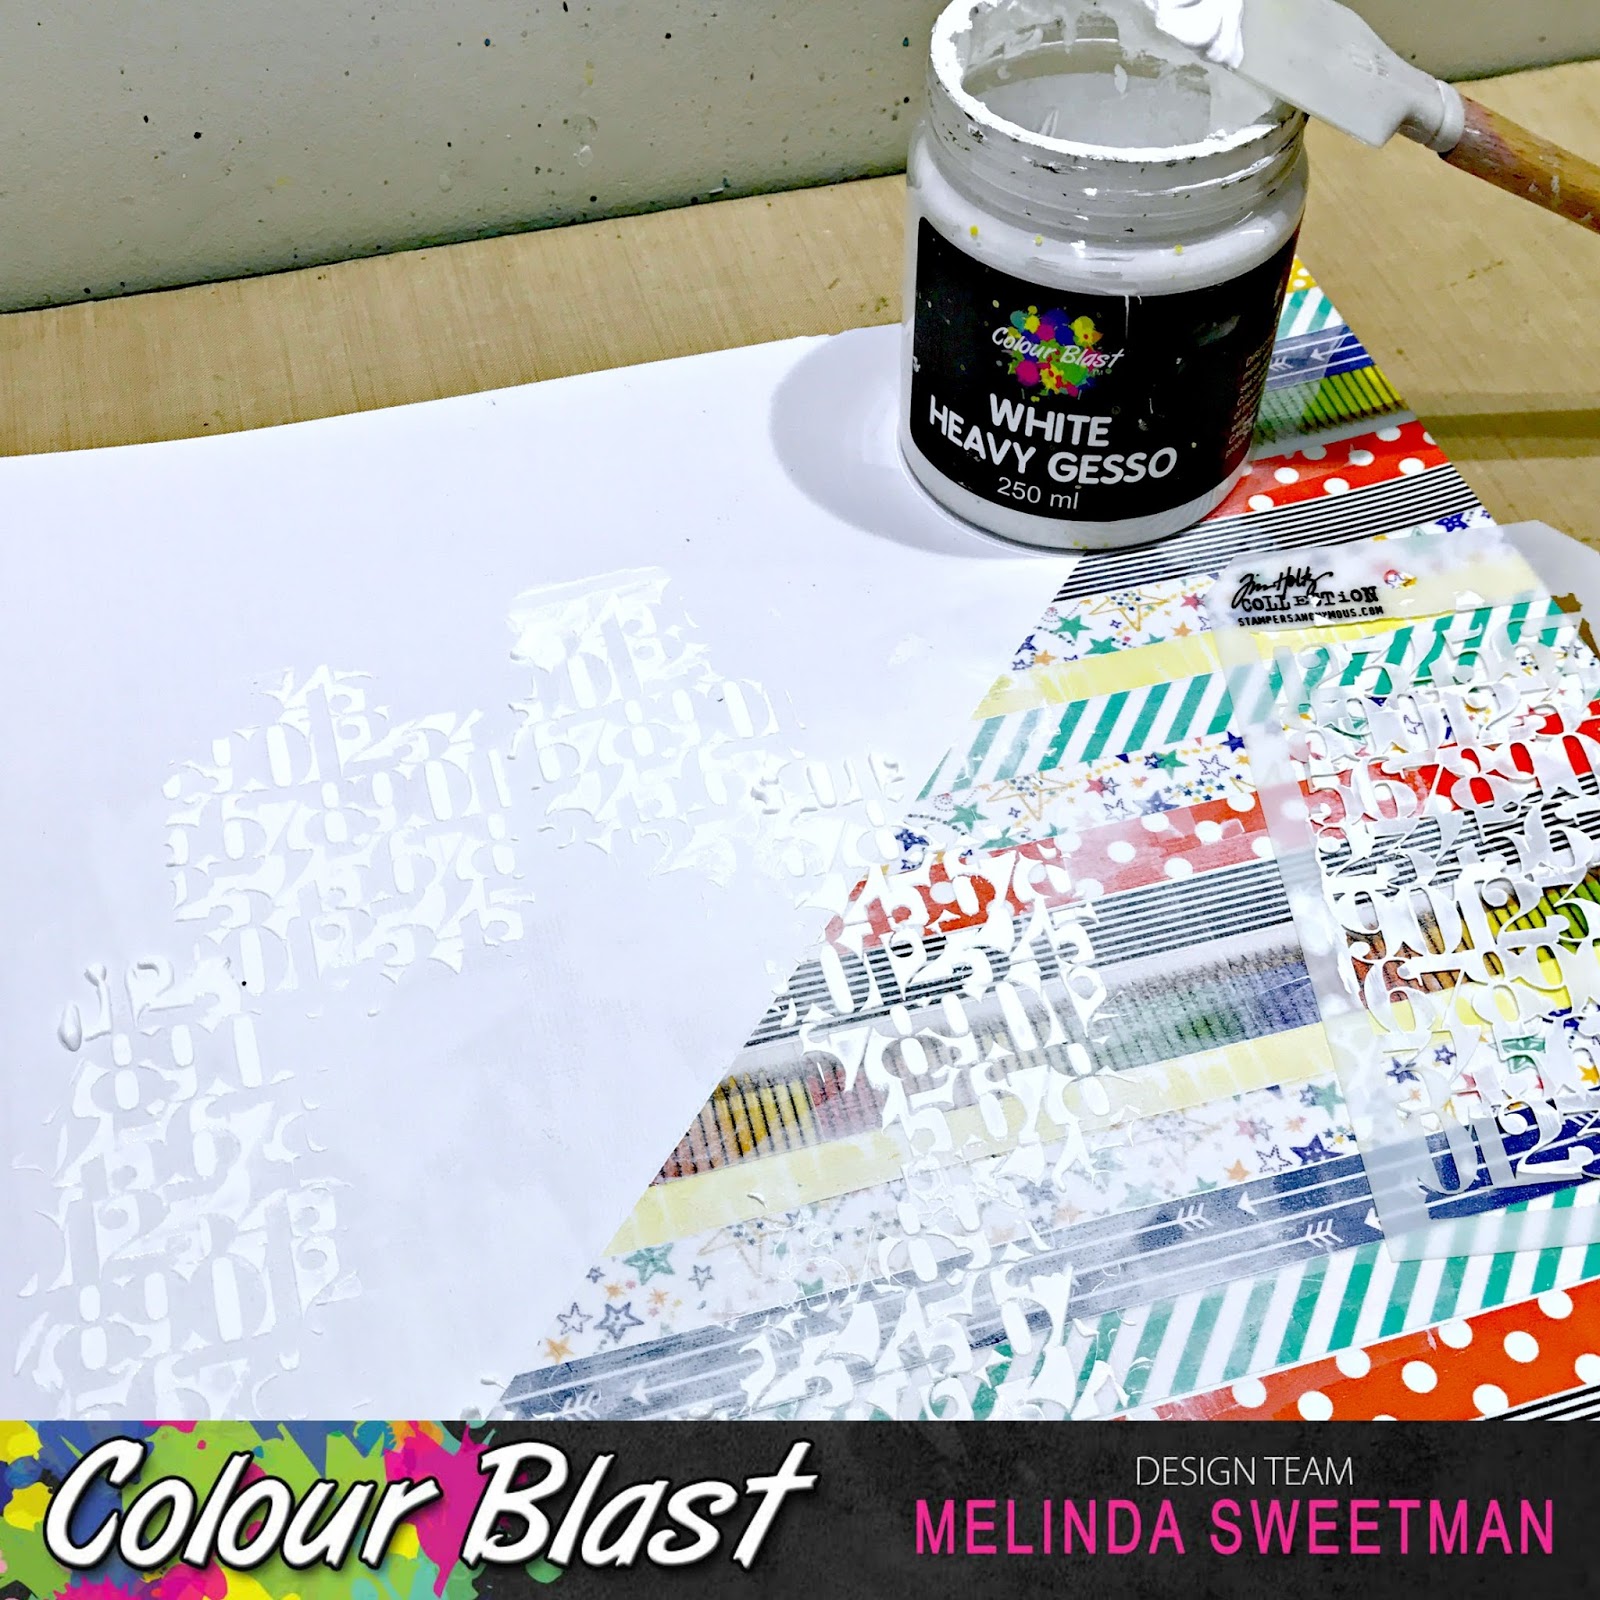
With my colours chosen and the cut file and photo ready to go I grabbed my White Heavy Gesso and used my fingers to spread a thin layer across the page where I knew I wanted my page design. I let that dry naturally which did not take long since the layer was so thin.


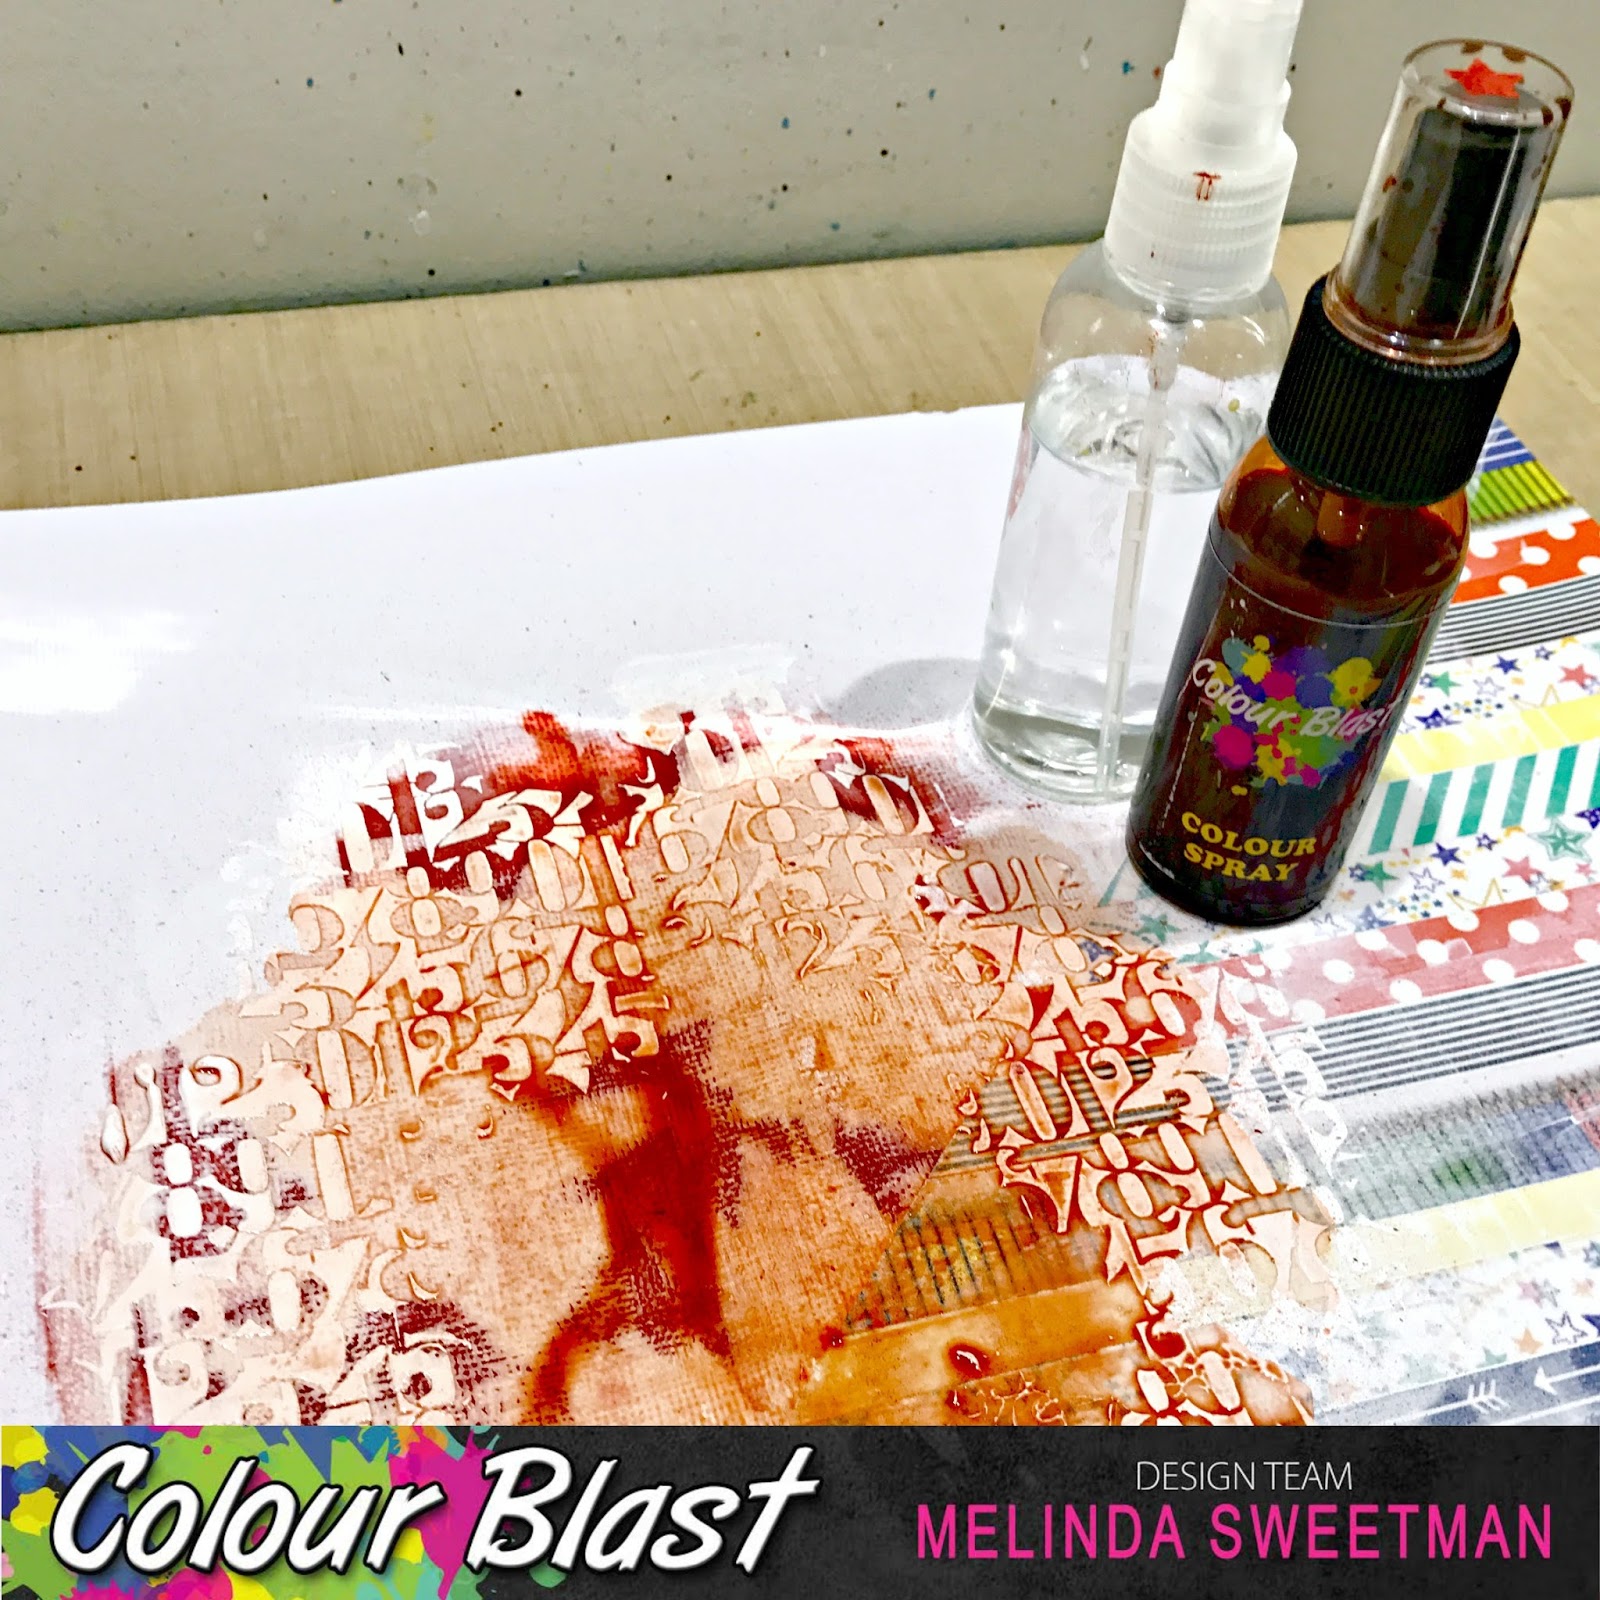
Time to add some more colour!! I started with the lightest colour - Blush - Colour Shimmer Cube, grabbed a paint brush and some packaging and added some colour randomly to my back ground. I ended up just using a wet brush and moved the colour around using that and the packaging together to get the look I was after.


I repeated the same process with Punch - again using a Colour Shimmer Cube, let that dry thoroughly and then the same process again with Deep Water - this time using my Colour Shimmer Spray (I haven't been able to get my hands on the Colour Shimmer Cube yet!!! Argh!!). I let the Deep Water dry naturally - it was dinner time - and was super happy with the dried result.


Next up some splatters - again I used the 3 matching colours in the same products and a paint brush. I added Blush and Punch splatters to the pink areas and Deep Water to the blue-y areas. At the last minute I decided to sprinkle some Steel Colour Shimmer Cube around as well just to bring that silvery colour to the page.

I surprised myself and stopped here with the colour - I really loved how it was looking and didn't want to go over the top! I added in some shadows to the cut file with a black water colour pencil. 


Some foam to mount my cut file that had been backed with the paper and my photo. Oh and some silver stitching along the triangles. A couple of very small embellishments and my page was done! 


I am super pleased with how this came together and since it is another wedding photo I haven't added a date or any journalling as I just wanted to scrap this photo!!

Here are a few close ups!


Check out the shimmer in these photo's, oh la la!!


You still have about 10 days to get your entries in for the October challenge - just enter them in this album on the FB page - and your chance to win a voucher to spend on some fun Colour Blast goodies so make some time to play!!

You can also check out my whole process on the YT channel but here is the link to watch it right now, in your browser!


Until next time, happy scrapping!!

Melinda


Monday 16 October 2017

{ScrappingClearly} Tis The Season ~ A Scrapbook Page

Hey, hey ScrappingClearly friends, Melinda here with you today with something a little different for you!!

Here is a sneaky peek


Any guesses as to what I've created?! Or been inspired by??

If you guessed this month's mood board you would be 100% correct! I was REALLY inspired by all of the Halloween-y type imagery and the colours, though I couldn't find a way to include the blue.

Here again if you haven't seen it is the mood board


And my completed project!


This is in a shadow box type product that hubby threw together with some spare MDF and because he made a stack I grabbed one super quick and got to creating! The frame was sprayed with some matt black spray paint and left to dry while I created my page!

I have used 3 patterned papers for this - My Mind's Eye - On Trend 2 - Little Things (the orange words) and 2 papers from the Pebbles - Spring Fling collection - Honey Bee (the black text) and Chalkboard Floral (my background sheet). I used a cut file from the Silhouette Store that I fell in love with the second I saw it and knew what I wanted to do with it so picked my papers and got my cameo working for me!

I knew I wanted some colour in the background and in order for my cut to POP I first applied a really quick, light layer of white gesso to fade those dots into the background some. Then I grabbed my Scribble Sticks in Tangerine and Ruby, some plastic packaging and got to smooshing some colour onto my background and also applying some splatters with the same mix of colour.


When that was all dry I added some splatters using my Colour Blast Colour Shimmer Spray in Bling knowing I was going to add more gold accents. While that dried I used my Black Soot Distress Ink to ink the edges of the "Tis The Season" words so they would pop a little more. And added some gold foil using my Mini Minc machine to some of the Minc Crate Paper Halloween ephemera pieces I wanted to use. I LOVE the pops of shiny gold and love the gold, orange and black & white mix of colours!


Once my background was completely dried all that was left was to glue everything down. Since I have used gesso on the background I did use my wet glue for everything to make sure it all stayed where I put it!


One final close up


How I love stars and how that they look any better than minc'd in gold foil?!?? Of course, there are a tonne of colours to choose from in the store if gold is not your thing!

Here is one final photo - this time the frame is stood up and I can't wait to find a home for it in the lead up to Halloween this year! My boys are super exited!


Remember, you still have almost 2 full weeks to enter our October challenges so head over to the ScrappingClearly FB group to find the albums with all of the details and the place to share!

Oh, I almost forgot! There is even a process video if you'd like to see this come together!


Until next time, thanks for stopping by and happy scrapping!


Melinda
xx

Sunday 8 October 2017

{ScrappingClearly} XOXOXOXO

Hey, hey ScrappingClearly friends! Melinda here with you today sharing my latest creation for the design team! I was inspired by the products this time, starting with the background paper that I have used and am super happy with how this page turned out!


As you can see I have scrapped another wedding photo of mine and this is a photo of my Mum and I and I really love it. It's one of those candid shots and looking back now I have no idea what we talking about or what made us smile like that but I do love this shot!!

I have used a total of 2 patterned papers for this page but love the bright, light and airy-ish look of how it all came together.

I have pulled out my 2 butterfly punches and started punching butterflies from the "Sour" 12"x12" circles to get a range of patterns and colours and that's as much as I knew at the beginning of this process.


I decided (of course!) that I need a little mixed media in the background and reached for my Distress Ink and Distress Oxide Ink pads. I have used a combination of Squeezed Lemonade (DI), Wild Honey (DO) and Worn Lipstick (DO) and the packaging technique after a quick, messy coat of gesso on the diagonal on my background.


I ended up stitching through all of the bigger butterflies in gold thread after they had all been tacked down lightly, leaving the wings free to be lifted after they dried. I LOVE the dimension this creates and yes, it will get squished somewhat when it goes into the album but I am ok with that!


I fussy cut my title from the Citrus Bliss Insta Kit square overlays and really like how that sits and is quiet subtle.

My finishing touches were some Studio Calico chipboard sticker hearts (the text ones only) and some Studio Calico sequin dots. I made sure to use just the orange-y coloured ones for this page.

I did record my process and if you wish to see that just press play below and voila!


Oh, after the camera was off I did sprinkle some gold mist along that same diagonal line, ensuring I covered up my photo! No date stamp or journalling (I know, shocking, right?!) but since it is going in my wedding album I kinda know what date it was and most wedding layouts (I've discovered at least!) are more about the photos and less about the story.

So, that's it for me for my first post for October! I hope to get the chance to play along with both the sketch and the moodboard this month - I love them both! 

Until next time, happy scrapping!


Melinda

Saturday 7 October 2017

{Colour Blast} Yr One 2016 ~ A Scrapbook Page

Hello Colour Blasters!! Melinda here with you today sharing my latest DT make.


For this page I had been inspired by lots of different people using lots of washi tape and so thought now is as good a time as any to pull out some of my own and create a background. I pulled colours from the star washi in the background and randomly applied strips across the page to make a triangle. I knew I wanted some mixed media in the background so added a quick, messy coat of Heavy White Gesso where I knew the photo was going and over the top of some of the washi.


When that was dry I added some texture, again with my gesso and a number stencil.


I left this to dry naturally as I didn't want the gesso to bubble.

Next up, COLOUR! I have grabbed my Sunset Colour Spray and a water spritzer. Also, a paper towel. I did a test sample right behind where I knew the photo was going to make sure that I was happy with the colour. I spritzed a little colour, added some water and just tipped and tilted the page until I had the coverage I was after.


I did soak up a lot of the extra water to a) help drying time but also to b) lighten the colour a little.

After that was dry thoroughly I added some splatters using both the Sunset and the Roadbase Colour Sprays.


That got popped to the side to dry and I worked on my next bits. I grabbed a couple of resist tags by Heidi Swapp and 2 more Colour Sprays - Saffron and Rainforest - and used a paint brush to apply the 2 colours to 2 different tags.


My very last step before putting all the page together was to spray some ribbon to colour it. Again I have used the Roadbase Colour Spray, spritzed the colour straight onto the ribbon and dried with my heat tool - super quick and I love the texture it gets when you wrinkle it up as it's drying.


So, that's all my messy steps, time to assemble all the bits together to finish this page off!

If you'd like to see my whole process just click play below and enjoy!!


Here are a few close ups and I hope I have inspired you to mix and match some products with some of your stash!!


Thanks so much for stopping by and happy scrapping!!


Melinda