Wednesday, 23 May 2018

{ScrappingClearly} Farewell & Thank You

Well, I would be lying if I didn't say that this post was a little hard to write however, the time has come for me to step away from ScrappingClearly. 

Before I go any further I firstly want to thank Kylie for the incredible opportunity she gave me when she offered me a spot on this Design Team back in February of 2016. You can see my intro post over on this link!

Over the course of my time here I have not only had so much fun but I have learnt a lot, been inspired by some incredibly talented designers on the team and oh boy, has my heart been filled with such joy seeing all of your kind comments and more importantly, learning I have inspired something in you to create!!

I am not sharing anything new with you today but sharing some of my faves from my time on this amazing team. I will link to each post so if you'd like to go back and read/see more you can and I will also link to any process video's that I have shared so grab a cuppa and come on a bit of a ride back in time with me! Oh, and these are not in any particular order ;)


First up, this is not only one of my fave layouts for this team it is one of my all time, absolute favourites layout of  EVER. My boys in their most "them" pose, a simple page with a love note of sorts tucked in behind the photo for them as they grow up. Blog post for this is here.


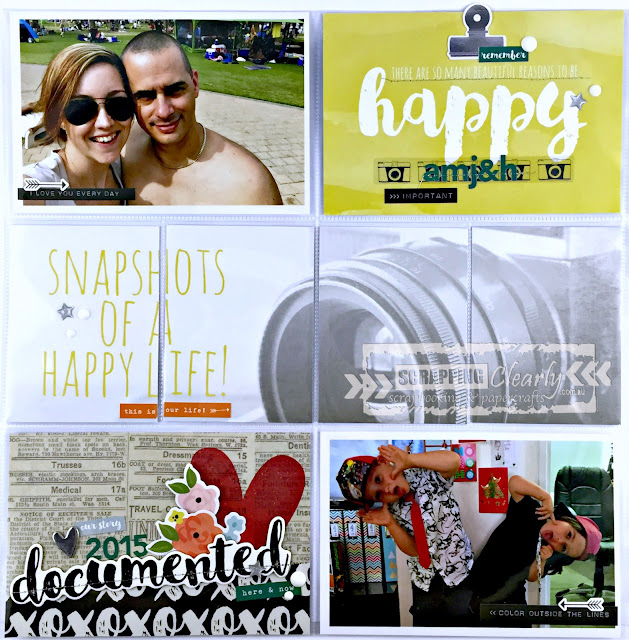
This PL page I designed with my very first DT kit from Kylie and I still love this range. This is our closing page in our 2015 PL album. Blog post is here.


I'm not sure what it is I love about this page but I do love it! I think because it is so soft and feminine and for me, I know that stretches my creativity. Blog post is here.


This one was around the time I stopped despising fussy cutting quiet as much as I use to! Those florals are just gorgeous and as soon as I saw them I heard them beg me to cut them out!! Blog post is here. Process video is here.


This chalkboard heart Heidi Swapp marquee piece. It still hangs on my door to my craft room. 
You can see the blog post for this one here.


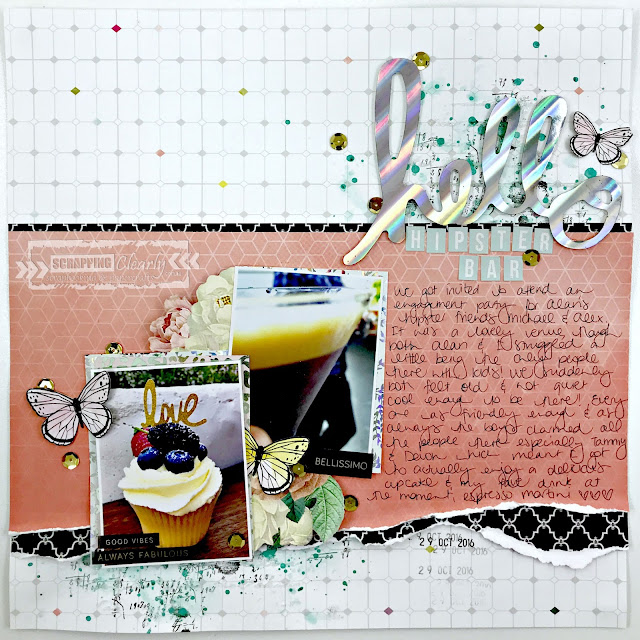
A page about me. This was created in 2016 and the photo was on my 36th birthday in July. 
Blog post can be seen here. And YT process video can be seen here.


This one was for a challenge as and I really love the simplicity and colour scheme! Blog post can be seen here and process video is here.


This page was done as I was really finding my feet with mixed media. I created this page for a fun CC that we did at ScrappingClearly and it was my challenge piece - from memory - a colour challenge and I just love this page! No blog post for this one! But there is a process video here.


An art journal page! My confidence has certainly grown in mixed media and honestly, I feel most confident when I am making a mess ;) This was also done for a CC. One of the challenges was a top 10 challenge and I chose my top 10 movies and really love how this turned out! Blog post is here. And process video is here.


Another scrapbook page and this one was done this year - in fact I made it for the February challenge and I just really love the way it came out! Blog post is here and process video is here.


And last, but not least, my minc mini album. Something WAY out of my comfort zone. Something so not "my thing" but I really love how it turned out. In fact, I love it so much that perhaps (maybe!!) I may create a few more as times goes on!! These photo's of my youngest, though I have them printed at 6x6 and in his album, I have not really done anything with so I love that they now have this special little album. Blog post can be seen here and there is also a process video here.

That is it for me!

Once again, a massive thank you to not only Kylie but to all of the other girls, both past and present, on the DT, you have made my journey so much fun and the support we have all shared has been incredible! 

Also, a big thank you to all of my supporters, your kind words mean so much and I really am grateful. Though this is goodbye to the team I will still be around in the Share & Inspire group and maybe I will even play along with some future challenges!

Melinda

Saturday, 19 May 2018

{Colour Blast} Enjoying These Awesome Moments ~ A Scrapbook Layout

Hello Colour Blasters, how are you this Saturday morning? Winter is getting ever closer and I hope you are keeping warm, if it is even cold where you are!!

I got a new stencil recently and had a play with it on another page which is totally where I got the idea for this page from! 

Here is a little looksy at what I have created


And here are my step-by-step instructions


First up I grabbed a piece of white (textured of course, it is my fave!) card stock and applied a quick, light coat of White Heavy Gesso across the entire page. Next up some stamping! I've used a couple of stamps that have not seen ink and some black Versafine ink right down the middle of page in a vertical column.


When that was dry I added some light modelling paste through my stencil (I seriously LOVE this new stencil!) and left to dry naturally.


I have been meaning to do this technique for AGES. Actually, to re-phrase, I have been meaning to do this technique and not hate what I created so I once again pulled out my Colour Shimmer Dusts in Peacock, Cobalt, Duke and Navy. I sprinkled the tiniest amount of each colour randomly across the stencilled background. You probably can't even see it in my photo but it is there - take a close look on the edge on the right hand side especially!


Add water. Yep, it's as simple as that! Add water and watch the magic happen! Tip and tilt and turn the page to get the colours to move and blend and then dry. I did use my heat tool and I did apply extra colours in a couple of places by simply adding a tiny bit more dust and activating with water. I LOVE this background!


**TIP** 
If you are anything like me and make a MESS when you do this grab a paper towel and/or a baby wipe and where you have colour you don't want you can very easily wipe/rub/dab it away. This will only work if you have applied the gesso in the first place but the excess colour where I don't want it is often why I bin my "failed" attempts!!


I knew that I had a stamp set to use for my title so decided to build my own title/journal card and use it as I would a second photo. I added my stamped title and then my journalling and had some left over space so added another stamped word which I used a little paint brush and the Peacock Colour Shimmer Dust to paint - messy style!! Oh, and splatters on the card ;)


Time to play with layers!! I layered up my photo and title card onto a piece of patterned paper (the photo is popped up), messed up the edges, added a notebook edge scrap of paper and then dove into my Cocoa Vanilla Boys Rule collection for a few stickers and a flair badge to finish of the embellishing.


I added a little more stamping over the top of the colour and paste, I felt the stamping was a little lost. You can also see I have layered some white cotton behind all of my layers, used my tiny attacher for some tiny details and threaded my tag with some black and white twine.


I am so happy with the end project having had no idea what photo I was using to start with!! I have the most fun while experimenting with products and seeing what they do so pull out something you have maybe tried and "failed" at before and get playing!!

You can very faintly see some of the gorgeous shimmer you get when you use the shimmer dusts - it's super hard to capture it flatteringly on camera!!


Oh, I also have a process video for this page just hit play below and enjoy!


Please share your latest creations over in the Colour Blast Creative Corner FB group, we do love seeing all of your creativity! Until next time, get messy and happy scrapping!!


Melinda
x

Thursday, 17 May 2018

Hey, hey scrappers! I'm here with you today sharing my latest creation for ScrappingClearly!


You can watch the process video below, just click play and enjoy! Make sure, if you haven't already you subscribe and if you like what you've seen leave me a thumbs up!!


I started this page by diving into my ScrappingClearly stash and found these awesome Heidi Swapp September Skies papers that really spoke to me. I had fussy cut that big floral piece from Beautiful Bouquet quiet some time ago and it sat and sat and sat and now it is stuck!!


I also had partial sheets of both the Mountain Trail (B side) and Light Spectrum and thought they worked really well together with the floral so there was my base!

I have added in some mixed media, of course and started with some Scribble Sticks and the packaging technique and then I grabbed my Distress Oxide Ink in Carved Pumpkin and got more of the colour I was after.


I have used a couple of strips of washi from the Teresa Collins Urban market washi pack to break up the patterns and work as my neutral.

I added in some splatters using the Scribble Sticks in Tangerine and I made a mix of Night, Umber and Black for the darker blue splatters.

A couple of paper layers behind my photo using more of the Heidi Swapp papers and also the Teresa Collins Something Wonderful "Printed Paper".


My title was built with these Heidi Swapp Black Glitter chippy alphas and these Teresa Collins Something Wonderful Word Stickers.


I finished off with one of the Heidi Swapp puffy stickers from this pack and a few word strips from my box of goodies.


Lots of journalling and my page was done! I love the bright colours of this collection and love how all those bold and bright patterns still worked together to create a page I am happy with!

Remember, documenting us and our stories, both big and small, are just as important in our albums as everyone else's story so when an idea jumps into your head, run with it ;)

I hope I have inspired you to put some new patterns together, or perhaps even to tell one of your stories! Please remember to share over in the ScrappingClearly Share & Inspire group, we love seeing your creations!

Until next time, happy scrapping!

Melinda

Wednesday, 9 May 2018

{Scrap The Boys} May 2018 Challenge ~ Our Super Star Caterpillar ~ A Scrapbook Layout

Hey, hey and happy May!! Yes, I know I am "late", what can I say?! Life has gotten busy, the boys were back to school last week, footy season has started and we now have 2 little guys playing and I HAD to take some time out for ME! 

So, this is the STB May 2018 challenge! 


Isn't it fabulous?! I mean, those colours?! And those really cool images, love it!

Here is my page


And my process video is here


I have used Distress Oxide Inks, Colour Blast Colour Paste and Embossing Powder and Dusty Attic chippy. Oh and a Charms Creation star that I perhaps have been waiting for the *perfect* layout to add it to!


You can see the official May reveal here on the STB blog - the other girls work, as always, is A-MAZING!! I hope that between myself and the rest of the team we have inspired you to play along with the challenge this month! Get your blues and greens on and have fun!


Thanks so much for stopping by, I hope you enjoy and I can't wait to see what you create using this fun moodboard!

Melinda
xx

Tuesday, 8 May 2018

{ScrappingClearly} Project Life 2018 ~ WK 2 Insert

Hello ScrappingClearly friends!! Today I am here once again sharing some more Minc inspiration!

Here is my page front


This is an insert in our 2018 Project Life album and I am super happy with how it came out. I mean, what better reason to use beautiful pink foil on all the things than when you are documenting a My Little Pony themed Birthday Party, right?!


I've used the 6x6 Minc Paper Pad paired with the pink foil for the bases of almost all of my cards for this spread but I also pulled a 3x4 card cut from the Teresa Collins "Alpha" 12x12 paper from the Urban Market collection.


For both the front and the back of the spread I have used quiet a range of different things including my foiled 6x6 papers (all in pink foil), some Cocoa Vanilla Studios "You Rock" Rubber Charms, a puffy sticker from this pack by Heidi Swapp, an ephemera piece from the Pink Fresh Studio "Boys Fort" ephemera pack, a mini Insta frame by Heidi Swapp and most of the rest of my pack of chipboard heart stickers by Studio Calico. 


Like I said, quiet a range, quiet a mix but I am really happy with the end result! Oh, and I almost forgot, I added in a few of the Pink Fresh Studio "Boys Fort" Phrase stickers. I love the little pops of black throughout the spread!


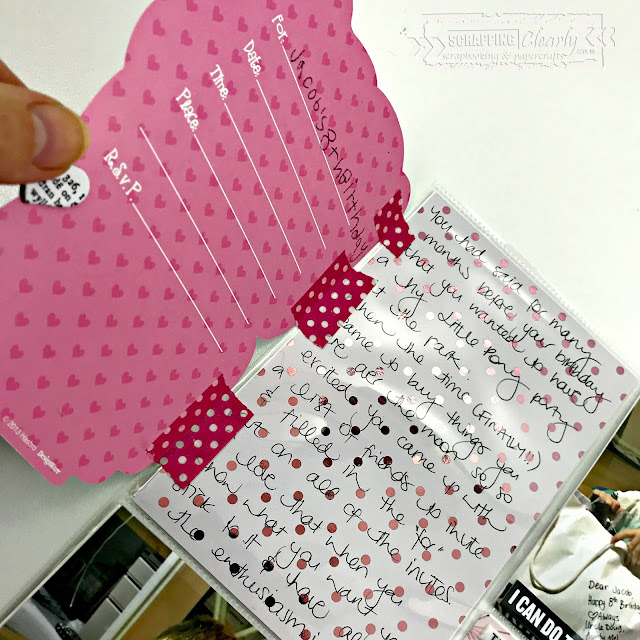
My boy had done alot of the writing on the invites himself so I had an extra (perhaps an intentional "error" ;) ) and wanted to include that also to see just what his almost 8 year old writing looked like.


I'm not loving that washi tape - it covers up the writing and is way too bold for what I wanted - I will find something else and fix it up ;)

And that, my friends is another page in our 2018 album - I think the total is now like 5 or something lol - but it is another in there!!

I do have a short process video of this coming together if you'd like to see! Just click play below and enjoy!


Until next time, happy scrapping!
Melinda
xx

Saturday, 5 May 2018

{Colour Blast} New Rainbow Boots ~ A Scrapbook Layout

Hey, hey and happy weekend!! Melinda here with you today to inspire you with some creative fun to hopefully get you creating!

Here is my page


You Tube process video is available and this one is a bit of a quick one!! When my idea came together in my head it was super quick to put together and I had a page in less time than I would normally, winning!!!


And here are my step-by-steps


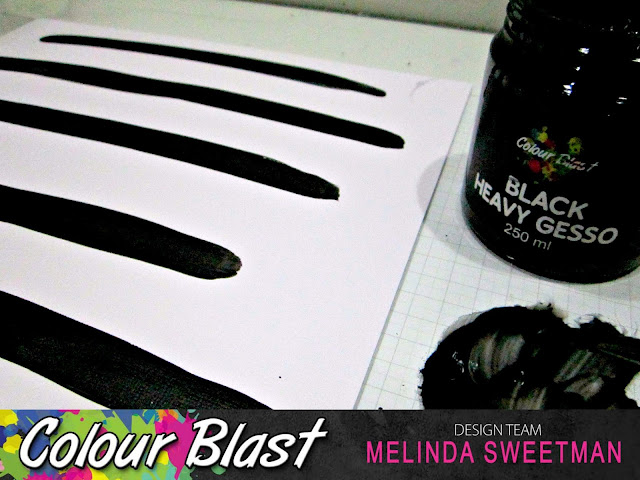
First up, textured white cardstock - my absolute fave to work with - and some Black Heavy Gesso. I put a small dollop on my work surface and added a little water - enough to make the gesso more like acrylic paint and less gesso like. I used the brush to randomly paint onto my page some black stripes making sure that I started and finished each of my lines in a different place.

After that was dry (super quick!!) I added more water to the left over gesso on my desk and added BIG splatters! I'm really sorry, no photo's or video of that process but super easy!! Load up your paintbrush with the watered down gesso, hold about head height over the page and squeeze the bristles and you will get big splatters. Love them!!


To be honest, this page has sat on my desk for a couple of weeks awaiting the inspiration to continue, so the black gesso was VERY dry when I picked it up again. I cut some whimsy-ish scallops on my cameo and then pulled out my BRAND NEW (I am so so excited to have some in my stash!!) Colour Artist Inks. And of course, rainbow colours for my first project with them!


I used some colours straight out of the bottle and I did mix a couple to get just the right colour. From left to right. Or ROYGTB (yep, I made up a new rainbow with NO purple!!) Red, Orange, Yellow - Citrus, Green, Teal-ish, Blue. And I simply painted them on each scallop with a paint brush.


After they were dry I stitched each coloured scallop over a black stripe and then added rainbow splatters in each colour.


Add the photo and a title. A little journalling and page completed! I love how this one came together and those Colour Artist Inks are so fun and vibrant! I can't wait to play again with them!! 

I have a couple of close ups to leave you with!


I hope you enjoyed this page and I'll see you again later in the month!


Melinda