
Hello my scrappy friends and welcome to my blog today! Today I have another share for CUT to YOU and for this page I have used an older cut file called Live For Today.

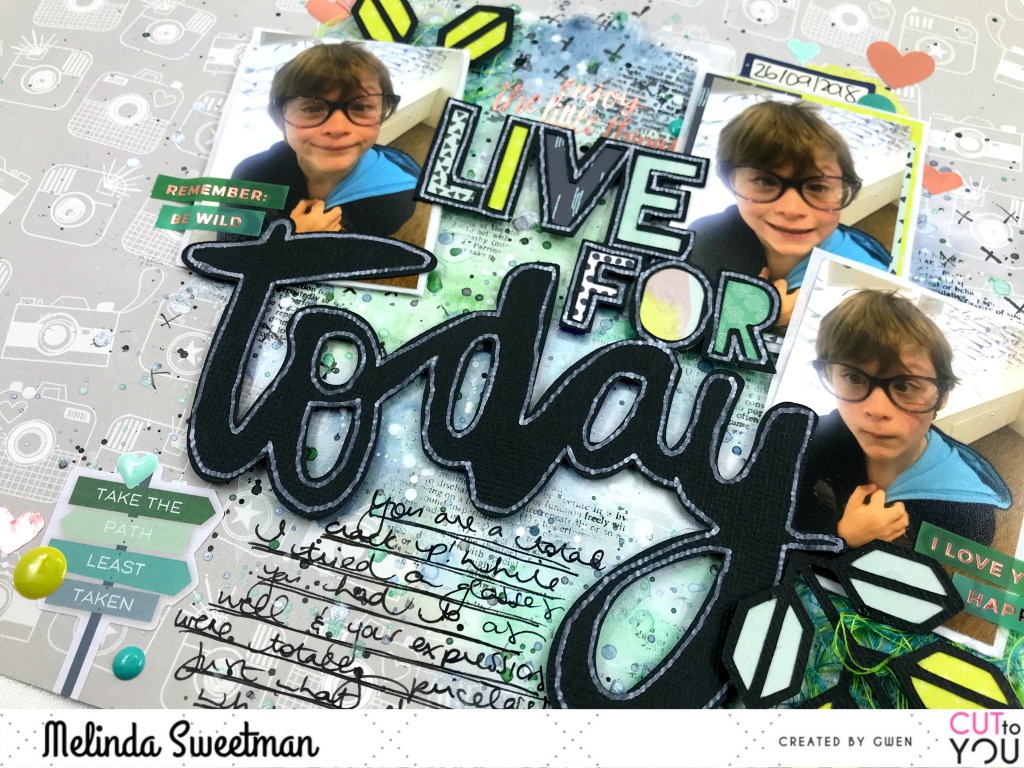
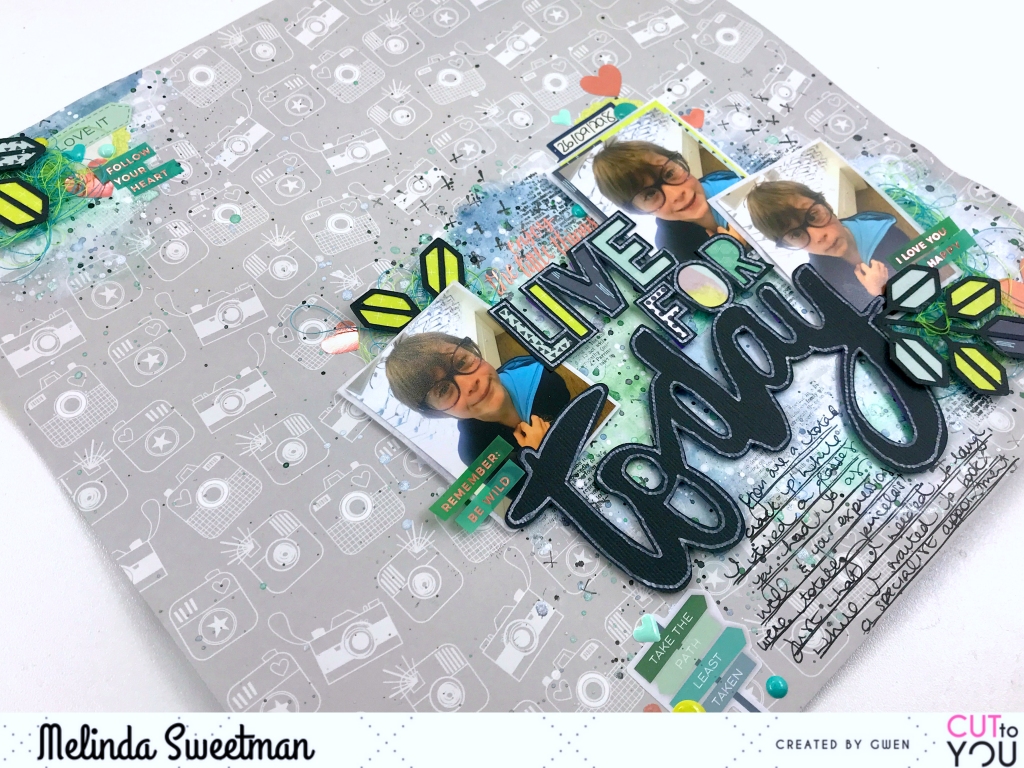
I cut this in black card a while ago and thought it was perfect for these photo's of my biggest child. First up I backed the open letters of my title using some patterned paper I had picked out to work with the colours in my photos.
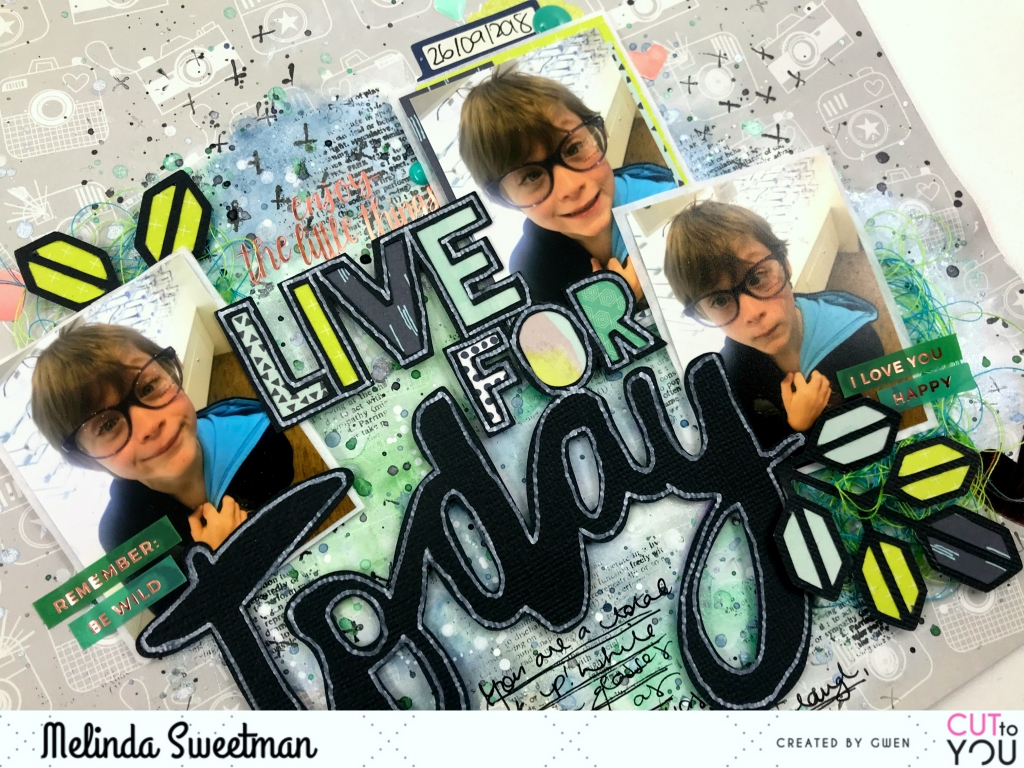
I worked out where the photos and title were going to be placed and added some white gesso to my back ground paper, smudging the edges with my finger for a softer finish. I also added a small amount to the top left of the page. I've used the packaging technique and a paint brush to add colour onto the gesso'ed back ground paper with some mists and paints from my stash. You can see how that all came together in my process video, linked below!
After adding my mixed media I added a couple of paper layers and some tissue paper behind the small photos. I stuck all the photos and title together to make it easier to maneuver around my page.
I added some more messy fun to the back ground after it was dry with some stamping in black and splatters in matching colours.
With the title and photos being one big cluster that made it easy to work out exact placement and next it was time to embellish. I grabbed a couple of spools of thread (green and blue to match my back ground) and added 3 messy clusters of tangled thread and then hunted for the longest time for something else to add.
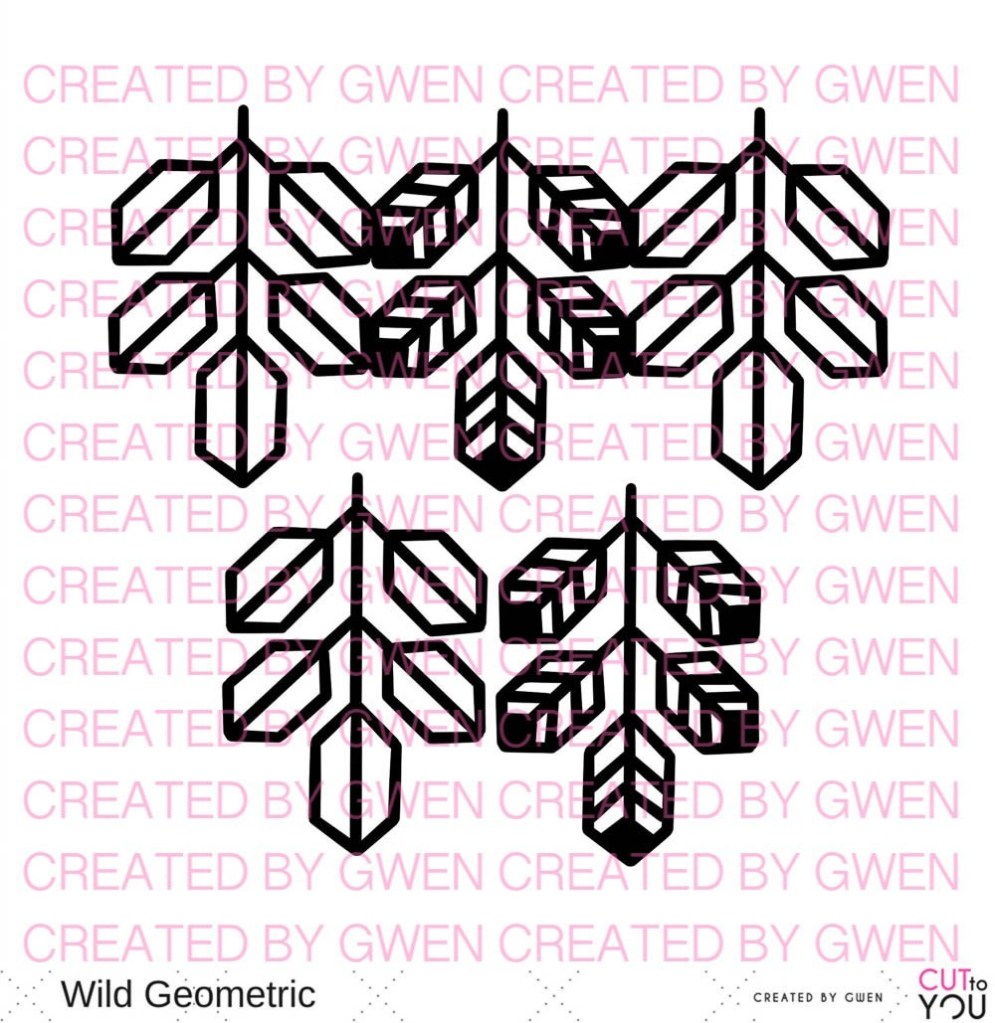
In my bag of already cut CTY cuts I found these great little geo leaves from the Wild Geometric cut file and decided they would be perfect! I backed the leaves in matching papers and then added those in my 3 main clusters over the top of my thread. Then using some wet glue I stuck the thread, title and photos and geo leaves.

I felt like my title wasn't popping enough so I grabbed a white paint pen and outlined the whole file and love the extra attention it brings to the title! Oh, and white splatters in the background ;)

A few sprinkles of stickers, word strips, enamel shapes and my journalling and my page is done!

I hope you have enjoyed my share today, I love these photo's of my little goof ball and I love the finished page!
Until next time, happy scrapping!
Melinda
x
Would you please explain how you added the pattern papers behind the open cut letters? Thanks!
ReplyDelete