Tuesday, 27 March 2018

{Stash} Masters Entry ~ Challenge 1 ~ 5x7 photo with eye contact

Hey, hey my scrappy friends!! 

So, following on from my first post with Challenge #2 here is my entry for Challenge #1. Using a 5" x 7" inch photo with eye contact.

Here is my page


My blurb that got sent in with my entry

"This photograph was specifically taken to tell these stories/record these quotes. The photograph and stories are from when he was 4 years old and I just love hearing his logic and seeing parts of this world through his eyes! This kid is a cracker and I am both excited and terrified of the young man he will grow into! I chose this range because to me it speaks of the everyday. The extraordinary, average day to day that is life. I love the graphic design and the challenge it presented to me to work with it with lots of clean lines, white space and pops of colour."

Some close up shots


And my products list

Pink Fresh Studios – Live More – 12x12 paper “Freedom”

Pink Fresh Studios – Live More – Foiled Die Cuts
Pink Fresh Studios – Live More – Studio Puff Stickers
Pink Fresh Studios – Live More – Acetate Alphas
Pink Fresh Studios – Live More – Phrase Stickers
Cocoa Vanilla Studio – You Rock – Ephemera
Teresa Collins – Basically Essential – White Alpha Stickers
Stash – flair, tags

No process video for this one. This one I went back and forth with for AGES and just couldn't make any decisions. I adore this collection, the clean, graphic lines but oh boy I struggled!! I do, once again, love how this page came together in the end and am excited to include it in Hunter's album!

Until next time, happy scrapping!

Melinda
x

Monday, 26 March 2018

{ScrappingClearly} What About Your Happy Face ~ A Scrapbook Layout

Hey and hello and happy Monday scrappy friends!!

Today I am playing along with the March challenges. Well, the March challenge, both have been rolled into one which was a bit different and fun!


Here is my take


And here is my process video


As I'm certain you noticed, I ended up flipping the page and am really happy with my end result. 

Again, I've started with one of those super cool Ella & Viv papers, "Cardinal and Gold" to be precise and built my layout on top of that. I chose that paper because it included almost all of the colours from the mood board - the only colours missing were the pink and green but I ticked both of those boxes, one with messy mixed media and the other with, of course my Minc ;)


I've used some Dylusions acrylic paint in Polished Jade with my silicone brush to apply my first messy layer on the background, sticking fairly closely to the sketch.


In line with the sketch my next layer was some watered down black gesso. I found a cool little dropper tool that had been buried in my stash but you could very easily use a big paint brush or a pipette to get the same effect by splattering from high above the page.


I added some pink as a mat under my 3 photos using some of the Heidi Swapp Minc cardstock. I've added more pink using some of the Heidi Swapp pink foil on the title - using the Minc Alpha Stickers - and the sub-title - using one of the Jumbo Words.


With the background being so bright, colourful and busy I didn't feel like I needed to add much more so I added my journalling which I typed up in strips and 2 of the Heidi Swapp Sequin Shapes - Disco Arrows and one of the Cocoa Vanilla Studios You Rock Rubber Charm pieces.

I have added 2 dates onto this page - one the date the photo's were taken and the other the date the page was made/journalling done. I think I will pop this in his current album so the journalling continues in chronological order.

Make sure you play along with our challenge this month for your chance to win a store voucher. Head over here to the FB page to upload your entry to the correct album. I can't wait to see how you interpret this month's 2 challenges in 1!!

Until next time, happy scrapping!!

Melinda


Saturday, 24 March 2018

{Colour Blast} My Special Boy ~ A Scrapbook Layout

Hey, hey!! Happy Saturday, Melinda here with you again today and I'm sharing some "special" photo's of my big boy that I had lots of fun scrapping!!


I can't wait to pull these out for his 18th or 21st, or heck whenever it seems funny to show some embarrassing kiddie photo's!! This page started with these photo's and title - I knew when I had these printed this HAD to be the title. I chose my alphas and then my colour scheme was picked for me - Just Blue and Bling!!

There is a process video here that you can watch and see my whole process and step-by-steps coming up!


Black cardstock base - after I realised I had NONE I stocked up and went straight for it for this page. A text stencil in the background and Just Blue Colour Paste for some texture and colour - I just LOVE the way the shimmer products POP on black!


After the Colour Paste was dry - I may have helped ;) - I grabbed my Just Blue Colour Shimmer Spray and Singin The Blues Colour Shimmer Spray and simply sprayed onto my background over my stencilling.


Because the background was not prepared with gesso it dried pretty quickly so I got to splattering - I have used a combination of the Colour Shimmer Spray's in Just Blue, Singin The Blues and, of course, Bling and also the same colours in the Colour Shimmer Pots/Cubes.


Time to build all my layers - I have used almost ALL Australian suppliers including Cocoa Vanilla Studios (You Rock collection), D-lish Scraps, Rainbow Splendor & Corbett Creations and also Flutterby Designs. Lots of blues and whites and then some extra texture with the wood veneer. The Bear may not make sense but I have always referred to my big boy as my Baby Bear and at the age he was in these photos he was OFTEN referred to as just that!


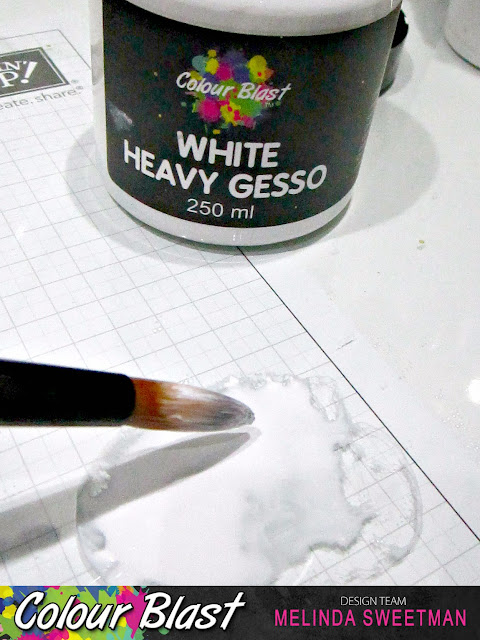
My final touches were some journalling using a white paint pen, some white thread and white splatters. My white splatters were a combination of Heavy White Gesso and water using a paintbrush and I love how it lifts the whole page!

Here are a few close ups


I just did a big batch of photo's recently and included some of these older photo's and am loving remembering the stories and scrapping them, I have so many ideas now!!

I hope I have inspired you to maybe pull out some black card stock or perhaps some older photo's and have a play!

Until next time, happy scrapping - remember, the messier it is the more fun it is lol


Melinda

Saturday, 17 March 2018

{ScrappingClearly} The Good Life ~ A Scrapbook Page

Happy St Patricks Day to you lovely ScrappingClearly fans today!!

I don't really have anything green to share with you though there is SOME green in my page today so I hope you enjoy!!


And there is a process video available over on my channel or just click play and sit back and enjoy!


I was sent a couple of these super awesome papers by Ella & Viv and WOW they are so vibrant, busy and fun. I did hesitate for a while before jumping in to use either but chose the Boombox paper for my background, I thought it worked better with my photo choice and I knew I wanted to play with some Distress Oxides!


Because that paper is so busy I used a relatively light coat of white gesso using my Prima 2" silicone brush to put a layer between my photo and the background where I could add some extra colour and kinda soften the busy-ness. Kind of.....


I've used some black Versafine ink and done some background stamping and then went in with the packaging technique and my Distress Oxides in Faded Jeans, Blueprint Sketch and Cracked Pistachio. I also pulled out Fossilized Amber which I ended up stamping with and added splatters after all the other colours were dried. I also decided to add some splatters with my Sunshine Colour Shimmer Pot because the yellow wasn't bright enough for me ;)


I used my Minc and some Gunmetal foil to create my title. I've used one one of the pieces from the Paper Phrases by Heidi Swapp - The Good Life - this photo is the perfect representation of my biggest boy totally in his element at a friends place helping to look after their horses.


I have used some plain vellum to back my photo tearing the edges and layering it a little.


I decided I didn't need too much embellishing so went with some Heidi Swapp wood veneer which I made black using the same black ink from earlier and a couple of the grey rubber charms from the You Rock collection by Cocoa Vanilla Studios.

When all my layers were stuck I wanted to lift the page so watered down a little white gesso and sprinkled away.

I added my journalling & date with my Fude Ball pen and my page was done!

Another little story told and in his album and I just love that fun back ground paper and loved the challenge I gave myself to use it!

Until next time, happy scrapping!!

Melinda


Saturday, 10 March 2018

{Colour Blast} Boys. Sheesh ~ A Scrapbook Layout

Hey hey and welcome to the blog on this Saturday morning!! 
I hope you have some fun scrappy plans for the weekend, I'm pretty sure I do 😉

Have you seen this months challenge?! It’s all about texture! To be honest, I struggled somewhat with what textures I would use and how I would incorporate them into my project. I started digging through my photos and this one of me and my baby inspired me and then I came up with my main idea - hand stitching!! Here’s a peek at my finished stitched centre piece. 


And a refresher of the challenge


Here is my process video if you’d like to see my page come together


My first step was coming up with my title which I knew I wanted to hand stitch. When I worked out what I was hand stitching I came up with the “sheesh” in my title knowing I had these leatherette alphas in my stash. More texture!


I added some colour to my title but made my own colour to match the collection I was using better. The Indigo Colour Spray was way too purple for what I was hoping for and the Caribbean was way too bright so I sprayed some Indigo Colour Spray onto my desk and mixed in some Caribbean. The quantities were about 6 (Indigo) to 1 (Caribbean). I tested on some scrap white card stock. And also thought I’d make it sparkly by adding a quick coat of Snow White Colour Shimmer Spray, perfect way to add shimmer without changing the base colour!


I used a paint brush and just painted inside the lines of the word my cameo had sketched.


When that was dry I added splatters in the same blue I created and then also added more splatters to match the collection I was using. I've used Blush, Sunshine, Envy and Stormy Weather Colour Shimmer Spray's.


After that was thoroughly dried I poked all the holes for my stitching, put on my current fave TV show and got stitching!


A few layers behind my photo including some patterned paper that had what looked like brush strokes which I fussy cut for more texture. I also added some gold star shaped punchinella as the very back layer behind my photo.


Before I stuck that down I decided I wanted some extra texture behind the photo on the white cardstock so pulled out my Black Heavy Gesso and an old store card and added in some messy lines around the 4 corners where my photo was going to tie in the black stitching.


More texture with some puffy stickers which I ended up stitching through with gold thread on my sewing machine.


I added my journalling and also a strip of paper at the top of the page and my page was done!!


Head over here to load up your take on the March Challenge in the Colour Blast Creative Corner Facebook Group and you could win a $30 voucher to spend in the Colour Blast store!!


Until next time, happy scrapping!


Melinda


Wednesday, 7 March 2018

{ScrappingClearly} Hunter's Feb 2016 ~ A Scrapbook Page & A Pocket Page

Howdy and happy Hump Day!

Hope your week has been kind to you so far, I know the beginnings of my weeks are always super busy. However, here in WA we had a public holiday and I spent the day at Adventure World with my family, so today only feels like Tuesday!

Today's share is for ScrappingClearly and I have a bit of a different project for you but first, here are the photos of my 2 pages that I created using the adorable PhotoPlay Boys Rule collection pack.


Yep, that is a 12x12 page and a pocket style page. Here is a little of the back story!

I like to have something in the boys' albums for each month to sum up what life was like for them that month. I've found the best way for me to achieve that is to include a few small stories in a pocket page that make up their every day (like in this spread of Hunter setting the dinner table).

Then I do 12x12 pages with the bigger kind of stories (like this month his first day at 3-year-old Kindy). Depending on the month I have 1 or 12 lol

I'm not a huge "this is a really cute photo, I've gotta scrap it" kind of person,
I'm more of a "this is a great story and I have this awesome photo that goes with it" kind of scrapper which works really well for me. How do you like to get your stories in your albums? Are you more of a "this is just an adorable photo" kind of scrapper? I love learning what inspires others!!

So, I made a process video for this which you can see here.


My very first step was choosing which 12x12 paper I wanted to use for my background and making sure that I included that as the title card for the pocket page spread. I tossed up between the "Seeing Stars" and the "Mr Mischief" papers from the collection pack and ultimately decided the photos popped more on the "Mr Mischief". I now had a starting point!


I started on my pocket page and picked patterned papers that I thought would work really well then cut them to size (using some of the cut-aparts but also just chopping down some of the 12x12 papers).

I love the continuity over the pocket page and the 12x12 page.


I've used the Heidi Swapp Black Glitter Chipboard Letter Stickers for my title on both pages.


I've used quite a few of the stickers from the Boys Rule collection pack sticker sheet on both pages as well, I love all those little stars that I could sprinkle across both pages!


I worked on 3 areas of embellishment on my 12x12 page layering a few bits of paper and quite a few stickers. I've also popped up a couple of the stickers to give more dimension and interest to the page.


My very final steps were adding a few stickers from Heidi Swapp's Puffy Stickers sheet, my journalling in 2 places, and some Bling splatters using my Colour Shimmer Pot by Colour Blast!


I'm super happy with how this spread came together, and even happier that I now have these photos out of the photo storage box and into Hunter's album!

Thank you, as always, for stopping by, until next time, happy scrapping!!

Melinda