Friday, 3 June 2016

Love You Always

Hi there and welcome to my blog! Today I am sharing my take on the inspiration piece for Scrappingclearly for this month!! And, isn't it just gorgeous!!


As soon as I saw this I KNEW I had to dig into my stash of wedding photo's (from 2008 I may add ;) ) as my colours were pink, black and white for our big day!! I picked one of my most fave shots from when we headed to the beach with the photographer and the bridal party.

Here is my completed layout and I have used the GORGEOUS Maggie Holmes Bloom collection to put this together!


First thing, a very little bit of mixed media using Heidi Swapp Primrose colour shine mixed with some texture paste and applied through a stencil. And, of course a few sprinkles of both the pink and gold colour shine. I let that dry and got to work on the rest of my layout.

I layered up the paper, Adore, behind my photo, used a doily from my stash and cut a piece from that beautiful printed vellum (which I gutted the middle of because it just seemed wasteful for it to be hiding behind all those other layers). I also wanted to incorporate a piece of black and white striped paper which I pulled from my stash from another Maggie collection and again, gutted the middle of that to use both on another layout and also as a layer behind my photo.

And here are some close ups


Over the course of iNSD a couple of weekends ago I purchased a few new cut files and pre-cut them on my cameo with white cardstock which I then embossed with gold glitter embossing powder from my stash. This one came from Just Nick and when I picked this photo I knew this was going to be the title paired with those gorgeous glitter thickers also from the Bloom collection which you can get here in the store.

I have used a couple of the florals from the ephemera pack, they are just so pretty! And, I'm sure like EVERYONE else that has received the beautiful Flutter paper, I also fussy cut some of those gorgeous butterflies (and just quietly, I so love the butterflies and that gorgeous wood grain a couple more pieces may have jumped into my cart without me realising!!) to spread across the page.


I also received these super, shiny, pretty sequins by Studio Calico and couldn't wait to get them onto a page!! It's a bit hard to see in my photo's but prior to sticking the butterflies down I took them to my sewing machine and did a couple of back and forward straight lines and a quick zig zag too with some gold thread.


I really love the simplicity of this little cluster. I used some of that vellum that I had gutted and attached those gorgeous pink and gold glitter letters from the ephemera pack - I just love, love, love the range of shapes and all the different pieces that come in these packs! I added another butterfly and a couple of sequins. As you can see here I also did a simple straight stitch all the way around the border of the white card stock just to pull it all together and for another small detail.

So, that's my take of that gorgeous inspiration piece for this month! Make sure you have a play along and either link up to the blog or the album in the facebook group for your chance to win an awesome prize!!

Thanks for stopping by and happy scrapping!
Melinda
xx

Sunday, 29 May 2016

A creative journey - Part 2

Hi hi!!

Finally I have found/made time to write up this blog post for my 2nd entry in the fun circle journal project I'm playing along with!

The journal I received last month was absolutely stunning and I found myself totally overwhelmed and TERRIFIED to start! But, a coat of gesso, a post in our FB group, some helpful advise and off I went!

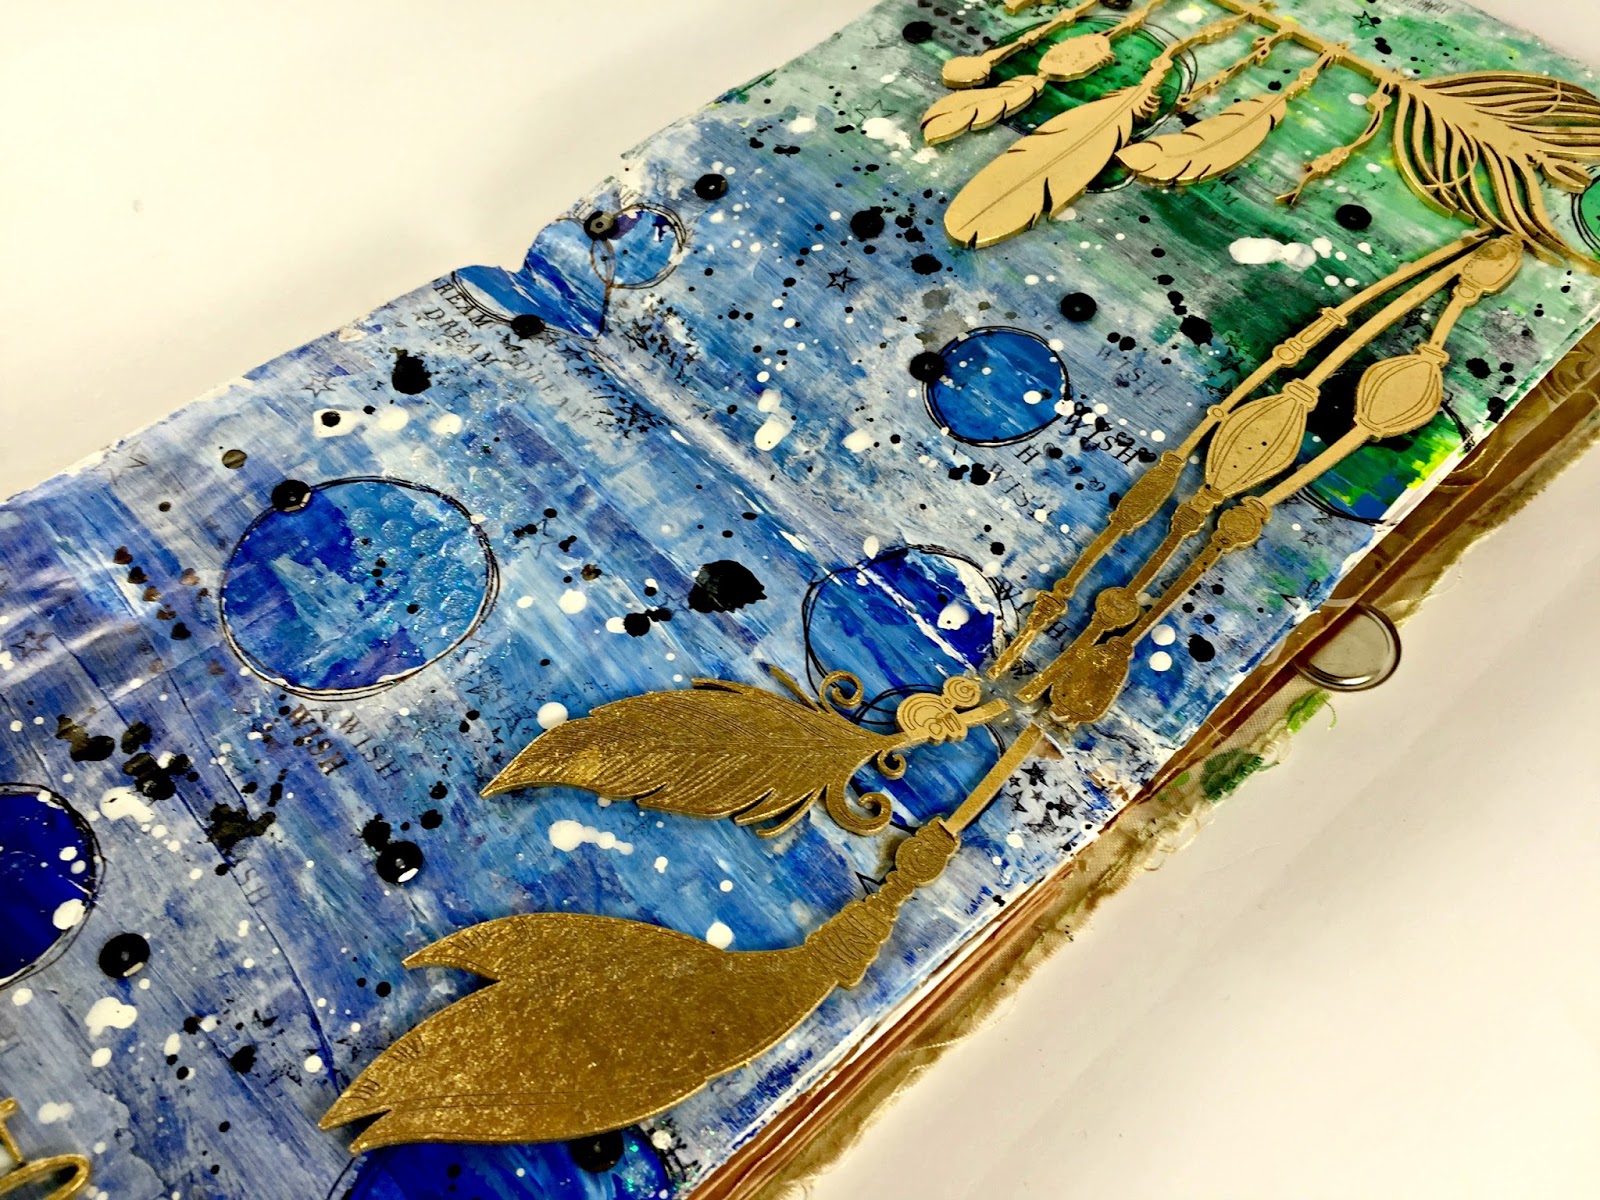
The theme in this journal was Enchanted/Whimsical/Fantasy. I think I went more with whimsical than anything more enchanted/fantasy themed and am super happy with how my page came together in the end!


An idea I had wanted to try for AGES was blobbing acrylic paint on my page then smudging it around with an old gift card and one of the suggestions was exactly that so I grabbed out my acrylic paints, blobbed it on and smeared it around!


An in progress shot! I started with yellow on the left (which ends up being the top of the page) but it just wasn't working for me so I went over it with white and green and am super pleased with the colours!

The colours were VERY bold and I wanted to tone them mostly done a little so I punched a bunch of circles from some acetate and lightly stuck them randomly on the page. I used acetate so I could see the colours/patterns behind while I worked and also because I knew that it would stand up to lots of different mediums if that was the way I decided to go!

A very light coat of gesso with a paint brush (I think! It could have been my finger!) over the whole page while the circles were stuck, some black ink and some clear and roller stamps. I felt that it needed a little more texture so I grabbed another stamp from my stash that has lots of stars and randomly stamped that around the pages as well. And then a couple of open star stamps as well randomly around the page.

Before I pulled up the clear acetate pieces I grabbed a sharpie and went around each circle once. After I pulled up the acetate I went around each of the circles a couple more times in messy circles. 


I wanted to include a different texture on some parts of the page so grabbed out my awesome Faber-Castell glitter bead medium and a circle stencil.


For my "sentiment" and embellishing I have pulled some of my gorgeous Dusty Attic chippy pieces, painted them gold and stuck them down :)

My final couple of steps were to mix some of my white and black acrylic paints with water and a big round brush to create some splatters. Once that was all dried I grabbed some black sequins and called it done!!

Love how it turned out and the day before I sent this on I received the next journal and oh boy, I am so looking forward to getting creative - the theme is "whatever" so yay!!

Thanks for stopping by and happy scrapping, or just plain, getting messy!!
Mel
xx

Monday, 23 May 2016

"The Dress" for Scrappingclearly May Sketch

Hi there and welcome! Today I am sharing another page I put together using the gorgeous Simple Stories Life In Color range this time for May's fun sketch challenge!

Here is a little refresher of the sketch and you have until the end of the month to get your page linked up!


This page is, again, different for me but I am really happy with how it turned out and all of that white space!


I started this page off with this awesome glitter bead paste from my stash - Kylie has a similar one in store here but if anyone is keen on the actual one I used (it has glitter in it!) Kylie has said she can look at stocking it!!


While that was air drying I started to pick my embellishments. Today I chose to pull out the pinks and yellows from the collection and go with those as I had already decided to go with a white card stock base! And a doily from my stash. 


I have used pieces from the sticker package, the chipboard stickers, some of the pieces from the bits and pieces pack, some of the stickers from the sticker sheet in the collection pack and also some of the clear stickers (with the silver and black). I used a few scraps (I am running very low on this range now!!) to back my photo with some of the yellow and pink behind the doily.


I'm not sure why that "TUES" sticker has photographed pink, it is actually silver (you can see it better in the previous and next photo's)!


A different angle of the same cluster so you can get a better look at that beaded gel paste! 


And a photo of the top cluster on the right :) I have layered one of the pink washi strips (which I cut into a fish tail), the beaded glitter paste and then some stickers, bits and pieces and a chipboard flower.


Finally, onto the title which I used a combination of the tile alphas from the collection pack and these thickers by Dear Lizzy, they are just gorgeous!! I finished it off with another of those clear stickers with black hearts.


So, that's it for this post! Make sure you link up your take on this fun sketch here or here on the Facebook page by the end of the month for your chance to win!

Happy scrapping!!
Mel
xx


Sunday, 15 May 2016

Love makes a house a home

Hi there today I'm sharing the acrylic album I put together for Scrappingclearly!

So, as I shared in my last 2 posts for them I was feeling intimidated by the Time Machine collection by Kaisercraft, add in my house shaped acrylic album and yikes, intimidated doesn't begin to cover it! I don't really do mini's and the pages are CLEAR!! Haha! But, when I finally found my big girl pants I dived into it and LOVE the finished album! Like, seriously, love! 

I will start by sharing the completed album then take you through page by page, grab a cuppa and I hope you enjoy!


The idea I had for my album was showing the growth of my little family from when hubby and I got married in 2008 up until the present, hence the title "Love makes a house a home."

Here is the album in all its completed glory


And a close up of the detail of the cover. 


I started this page with a stencil and texture paste from stash which I simply added some teal colourshine to. I left that to dry and when it was I started pulling pieces from my offcuts, the collectables pack and the sticker sheet. The "love" was cut using my big shot and a die from my stash and I added a coat of glossy accents just as a little extra finishing touch. 

The first page is, of course, hubby and I. About a year after we got married, about a month before we found out we were going to be a family of 3. 


For this page I just went with the stencilling from the previous page as my base, added a rub on from the kaisercraft journal spots rub ons, a couple of scraps of papers, some die cuts and stickers. I used a coat of glossy accents on the "two" tile stickers as well. 

Next is the 1st addition to our family, our 1st fur baby, Zeus. 


For the base of this page I used the Time Machine stamp set with both teal and brown permanent inks. I got impatient, I was FINALLY in the groove of making this album, so used some clear embossing powder and my heat tool to set the ink so I could keep working!! More paper layers, die cuts and stickers. I have also fussy cut a frame from this Hambly screen prints page and tucked that behind the layers. And to keep the flow I added some glossy accents again to the tile letters. 

And here are the 2 pages side by side, I really love how you can see all the bits and pieces peeking through!


The next page is our very 1st photo of the 3 of us as a family. Not the most flattering but I love this photo and all it represents to me. 


Again, I started with the front design on the page, I was really loving the see through element by now!! More paper layers, die cuts and stickers. And glossy accents on tile alphas!

The next page is the addition of our youngest child. Again, not the most flattering photo but it's the 1st of us as a family of 4 and I love it!


This time I started with that same Hambly print but this time cut to the whole house shape. I adhered all my layers to the screen print so when it came time to stick I knew where I'd be able to hide the adhesive. I did the same steps again with this page, die cuts, papers, stickers and glossy accents. 

And here are the 2 pages side by side. 


The next page is the addition of our 2nd fur baby, Olaf the Bunny. 


The screen print is of course where I started and I knew roughly where I needed to place my layers to cover the adhesive from the front. Firstly, another rub on from the Kaiser journal spots rub ons and then more die cuts, stickers, paper layers and glossy accents completed the page. 

And the last page! I started this page with this gorgeous screen print piece cut down from a 12x12 sheet. This is us currently, all 6 of us!


This page doesn't have many layers to it at all! The gold tile thickers, the 2 photos and the sentiment sticker. Oh, and the tiny tile alphas :)

And the last 2 pages next to each other. 


This takes us onto the back cover. Nice and simple!


A couple of tags, some of this acetate sheet and that pretty gold tile thicker. 

And here is the view of the entire album from the back. 


I hope I have inspired you to try something new and perhaps out of your comfort zone. You never know, you may end up with a treasured piece of work!

Head over here to see the full range of fun acrylic albums available at Scrappingclearly!!

Happy scrapping!
Mel
xx

Monday, 9 May 2016

INSD fun!

Hi there!

Super quick share today as Cocoa Vanilla Studio are having a super fun competition over on their blog and all one has to do to enter is share their favourite creation that was made for INSD!!

I am still plugging away at a few challenges but I already know that this will be very high on the list of my faves for this weekend if it isn't the top!!

Funnily enough too I have used product from the Made of Awesome range I have in my stash, which sadly, is depleting!! And just as a side note, I made this page before I saw CVS had this little competition going!

Here is my completed page and a couple of close ups!


Thanks so much for the chance Zoe! What an awesome prize! 

I hope you have liked my page and I will just quickly mention that was a labour of love!! That stitching took me a 1 1/2 hour episode of Orange is the New Black, an episode of The 100 and 1 1/2 episodes of The Vampire Diaries to complete!! But, I LOVE the finished page!

Happy scrapping!
Mel
xx

Saturday, 7 May 2016

Week 5 2016 and a challenge!

Hi there and Happy International Scrapbooking Day (weekend)!!

I just dropped in today to share the pages I put together for my challenge over at Scrappingclearly for the fun mini crop this weekend! Make sure you head over and play along as the Queen of the Crop will be awarded an awesome 12" Minc machine!! How awesome is that?!


So, the challenge I set is use multiple photos. Surprised?! Haha! I do love my PL and finally my 2015 album is done so I'm ready to kick 2016's butt!


Here are my 2 completed pages!


I used a mix of Cocoa Vanilla Studios Hello Sunshine and Hello Beautiful ranges. I also added in some fun gold glitter washi from Amy Tans newest release along with the gorgeous new roller stamp from the same collection. Oh, and some cute tear apart Studio Calico sentiments from my stash. 

Here is the left hand side, with a flip
Pocket!


And here is the right hand side. 


And of course a few close ups!


Make sure you head over to the Scrappingclearly FB group here to play along today and if you manage to complete all the challenges you may find yourself the owner of a brand new 12" Minc machine!

Good luck and happy scrapping!

Mel
Xx

Wednesday, 4 May 2016

Always find time for the things that make you happy to feel alive

Hello again!!

So, for my last post for Scrappingclearly I used the Kaisercraft Time Machine Collection Pack and while I still had that out and was working outside of my norm I decided to pull out my beloved copic markers and also my art journal! Now, to say that I love this page would certainly be an understatement! I had SO MUCH FUN pulling all this together and just loved the process!

Here is my completed spread in my journal


And now, my process!

First up I prepped the double page with a coat of gesso - I didn't really have a finished design in mind but I had already pulled out all of the round elements from the Time Machine Collectables pack so had an idea of colour scheme and the very loose idea of steampunk.

After my gesso dried I laid out all of my pieces from the collectables pack across the 2 pages and used a clear matt medium to stick them all down and also applied a coat over the top to seal them in.


I did "cheat" here and use my heat gun to get it to dry off as my plan was really beginning to come together in my head :)

I then grabbed the stamp set from the Time Machine collection and used a selection of the stamps with a brown chalk ink from my stash and also the teal Heidi Swapp ink pad - both are permanent inks and safe to apply wet mediums over the top of when dry. Again, I used my heat tool so I could move onto the next layer. Which was texture paste. I used a cogs stencil and paste from my stash and actually left that to dry for a few hours.

While that was drying I started colouring up my image - which is a digital stamp I purchased from Saturated Canary and printed to fit about 2/3 of the height of my journal page. I decided to go with sepia tones with a pop of gold (on the cogs) and that fun pop of teal. When she was all coloured I up I fussy cut her out. Needless to say, I was totally inspired by the classes I have taken over at Kit and Clowder and cannot recommend Alyce's classes highly enough!! In fact, she has a whole class on mixed media techniques using this image and it is well worth a look!


Copic colours used are as follows:
Browns/sepia tones: E50, E51, E53, E55, E57 and E59
Teal/aqua: BG11, BG13, BG49 and BG78
Gold: Y11, Y15 and E15

My next step was COLOUR on the pages! I used a super fun and easy technique and literally splashed/threw water all over the pages and then splashed/threw Heidi Swapp colour shine in Tea and Teal all over. When the inks met the water and each other they blend together and give this gorgeous water coloured/mottled effect and I really, really love how it dries. Before it dried I added a few splashed of Gold colour shine and some of that also blended together with the other colours. When that was completely dry I went back in again with the gold and applied bigger splatters.

I got the quote directly from the Time Machine stamp set. I used the tiny tile alphas from the Time Machine collection pack and also these fun gold foiled scrabble style thickers to replicate the quote on my page. I did have to use some hot glue to get the alphas through the centre of the pages to REALLY stick ;)


Once that was all dry my page was completed! This was such a fun way to use up so much of that collectables pack and it was great to make the time to pull out my copics and get messy!

Thanks so much for stopping by and see you soon!

Happy scrapping!
Mel
xx